

If you’re looking to elevate your grilled chicken meals, you’re in the right place. Grilled chicken is a classic favorite, but the right sides can truly make it shine. Think vibrant quinoa salad, creamy mashed potatoes, or golden corn on the cob. Each side brings its own unique texture and flavor to the table. Let’s explore some delicious side dishes that will turn your grilled chicken into a complete meal.
Classic Coleslaw
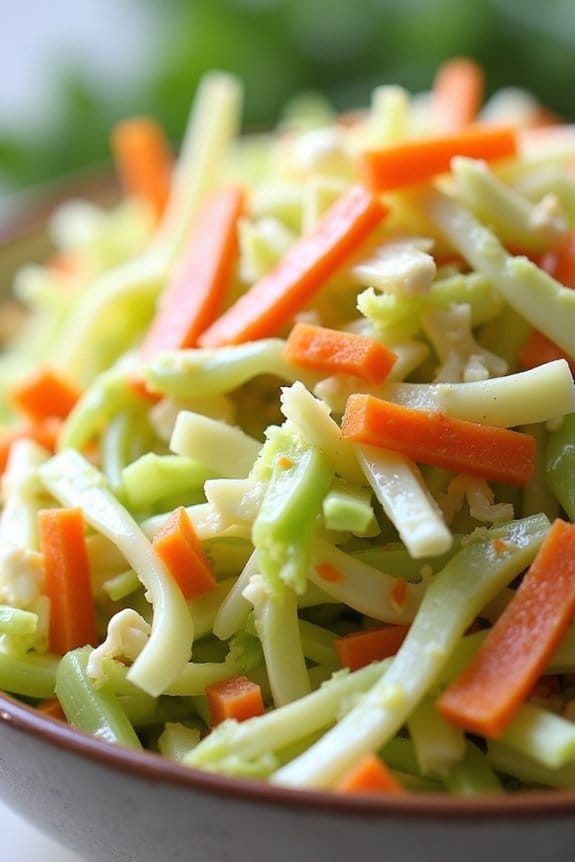
Coleslaw is a timeless side dish that pairs beautifully with grilled chicken, adding an invigorating crunch and a burst of flavor to your meal. This classic coleslaw recipe combines a delightful mixture of shredded cabbage and carrots, tossed in a creamy and tangy dressing. With its balance of sweetness and acidity, this coleslaw complements the savory flavors of grilled chicken perfectly, making it an essential addition to your barbecue spread.
Ideal for serving 4-6 people, this classic coleslaw is both easy to prepare and a crowd-pleaser. The ingredients are simple, and the preparation is quick, allowing you to focus your time on grilling the perfect chicken. Whether you’re hosting a backyard cookout or enjoying a family meal, this coleslaw will surely enhance your dining experience with its fresh and vibrant taste.
Ingredients:
- 1 small head of green cabbage (about 1 1/2 pounds), finely shredded
- 2 medium carrots, peeled and grated
- 1 cup mayonnaise
- 2 tablespoons apple cider vinegar
- 1 tablespoon Dijon mustard
- 1 tablespoon sugar
- 1/2 teaspoon celery seed
- Salt and freshly ground black pepper to taste
Cooking Instructions:
- Prepare the Vegetables: Begin by finely shredding the cabbage using a sharp knife or a mandoline slicer. Transfer the shredded cabbage to a large mixing bowl. Peel and grate the carrots and add them to the bowl with the cabbage. Toss the vegetables together to guarantee they’re evenly distributed.
- Make the Dressing: In a separate smaller bowl, combine the mayonnaise, apple cider vinegar, Dijon mustard, sugar, and celery seed. Whisk these ingredients together until they form a smooth and creamy dressing. Season the dressing with salt and freshly ground black pepper to taste.
- Combine and Toss: Pour the dressing over the shredded cabbage and carrots in the large mixing bowl. Using a pair of tongs or a large spoon, toss the vegetables and dressing together until the cabbage and carrots are completely coated.
- Chill and Serve: Cover the coleslaw with plastic wrap or transfer it to an airtight container. Refrigerate for at least 1 hour before serving to allow the flavors to meld and the cabbage to soften slightly. Serve cold alongside grilled chicken for an invigorating side dish.
Extra Tips:
For the best texture, try not to make your coleslaw too far in advance as the cabbage can become overly soft if left to sit for too long. If you prefer a lighter dressing, you can substitute half of the mayonnaise with Greek yogurt for a tangier taste.
Additionally, feel free to experiment with adding other ingredients like thinly sliced red onions or a handful of chopped fresh herbs to introduce more complexity to the flavor profile. Finally, adjust the seasoning to your taste; a dash of hot sauce or a sprinkle of cayenne pepper can add a nice kick to your coleslaw.
Grilled Corn on the Cob
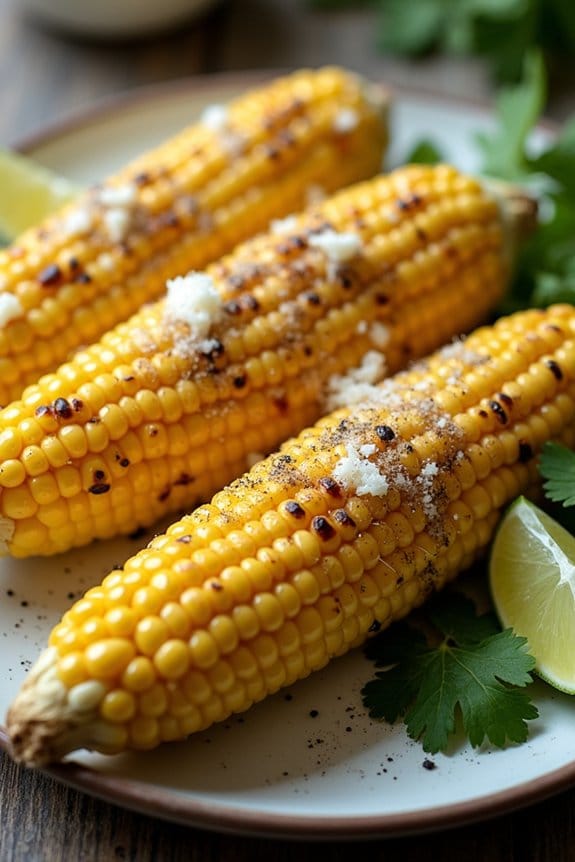
Grilled corn on the cob is a quintessential summer side dish that perfectly complements grilled chicken. The sweet, juicy kernels, when kissed by the flames, take on a smoky flavor that’s irresistible. Whether served at a backyard barbecue or a casual family dinner, this dish is simple to prepare yet always impresses.
It’s a versatile dish that can be enjoyed with just a touch of butter, salt, and pepper, or dressed up with a variety of toppings like cheese, herbs, and spices.
The key to perfect grilled corn is in the preparation and grilling technique. By soaking the corn in water before grilling, you guarantee that the husks don’t burn too quickly and the kernels remain tender and juicy. This method also helps infuse the corn with a subtle smoky flavor as it grills.
With a few simple ingredients and steps, you can create a delicious side that everyone will love.
Ingredients (Serves 4-6):
- 6 ears of corn, husks on
- 1/4 cup unsalted butter, melted
- Salt, to taste
- Black pepper, to taste
- Optional toppings: grated Parmesan cheese, chopped fresh herbs (like cilantro or parsley), lime wedges
Cooking Instructions:
- Prepare the Corn: Carefully peel back the corn husks without removing them completely. Remove the silk threads from each ear of corn. Once cleaned, fold the husks back over the corn.
- Soak the Corn: Fill a large bowl or bucket with cold water and submerge the corn for at least 30 minutes. This helps prevent the husks from burning on the grill and keeps the corn moist.
- Preheat the Grill: Preheat your grill to medium-high heat. If using a charcoal grill, guarantee the coals are evenly distributed and covered with white ash for even cooking.
- Grill the Corn: Remove the corn from the water and shake off excess water. Place the corn on the grill, directly over the heat. Cover the grill and cook for 15-20 minutes, turning every 5 minutes, until the husks are charred and the kernels are tender.
- Butter and Season: Once grilled, remove the corn from the grill and let it cool slightly. Peel back the husks and brush the corn with melted butter. Season with salt and pepper to taste.
- Serve and Enjoy: Serve the corn as is, or sprinkle with optional toppings like grated Parmesan cheese or chopped fresh herbs. A squeeze of lime juice can add a revitalizing zing.
Extra Tips:
For added flavor, try mixing the melted butter with minced garlic or smoked paprika before brushing it onto the corn.
If you prefer a slightly charred kernel, you can remove the husks during the last few minutes of grilling to allow the kernels to caramelize directly on the grill. Keep an eye on the corn during this time to prevent burning.
Additionally, you can prepare the corn ahead of time by cleaning and soaking it, making it easy to throw on the grill when your guests arrive. Enjoy this versatile dish with your favorite grilled chicken recipe for a complete and satisfying meal.
Creamy Mashed Potatoes
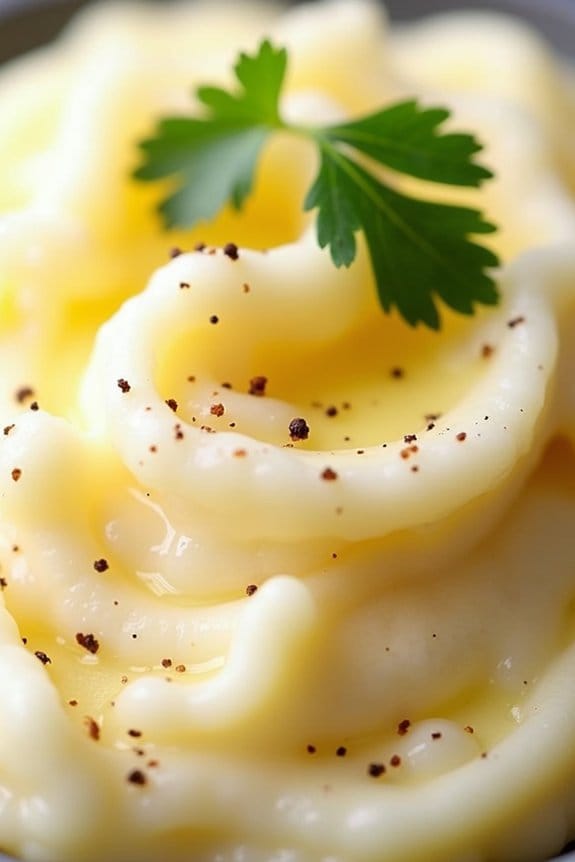
Grilled chicken pairs perfectly with creamy mashed potatoes, creating a comforting and satisfying meal. The tender and juicy chicken, with its smoky grilled flavor, complements the smooth and buttery texture of the mashed potatoes. This combination is ideal for a family dinner or any occasion where you want to impress your guests with a classic and hearty dish.
Whether grilled outdoors or on a stovetop grill pan, the chicken’s simplicity allows the creamy mashed potatoes to shine as a delightful side dish.
The creamy mashed potatoes are prepared with rich ingredients such as butter, cream, and a touch of garlic, elevating their flavor to a new level of deliciousness. This traditional side dish is loved for its smooth consistency and balanced seasoning, making it a staple on many dinner tables.
Easy to prepare, this recipe guarantees that you can focus on grilling the chicken to perfection while still delivering a luxurious accompaniment that will leave everyone asking for seconds.
Ingredients for 4-6 Servings:
- 4 tablespoons unsalted butter
- 2 pounds potatoes (Yukon Gold or Russet)
- 1 cup heavy cream
- 2 cloves garlic, minced
- Salt, to taste
- Ground black pepper, to taste
- Fresh parsley, chopped (optional, for garnish)
Cooking Instructions:
- Prepare the Potatoes: Peel and chop the potatoes into even pieces to guarantee they cook evenly. Place them in a large pot and cover with cold water. Add a pinch of salt to the water and bring to a boil. Reduce the heat to a simmer and cook for 15-20 minutes or until the potatoes are fork-tender.
- Heat the Cream and Butter: In a small saucepan, combine the heavy cream and butter. Add the minced garlic and gently heat over low heat until the butter is melted and the mixture is warmed through. Make sure the garlic infuses its flavor into the cream without browning.
- Mash the Potatoes: Once the potatoes are cooked, drain them well and return them to the pot. Use a potato masher or ricer to mash the potatoes to your desired consistency. For extra smooth potatoes, a ricer is recommended.
- Combine and Season: Gradually add the warm cream and butter mixture to the mashed potatoes, stirring gently to combine. Season with salt and ground black pepper to taste. Adjust the seasoning if necessary, keeping in mind that potatoes can absorb a fair amount of salt.
- Serve: Transfer the mashed potatoes to a serving dish. If desired, garnish with freshly chopped parsley for a pop of color and added freshness. Serve warm alongside your grilled chicken.
Extra Tips:
To achieve the creamiest mashed potatoes, make certain the potatoes are well-drained before mashing to prevent them from becoming watery. Using warm cream and butter helps the potatoes absorb moisture evenly, resulting in a smoother texture.
If you prefer a richer flavor, consider incorporating a few tablespoons of sour cream or cream cheese. Additionally, don’t overwork the potatoes as this can make them gummy; gentle mixing will keep them light and fluffy.
Quinoa and Black Bean Salad
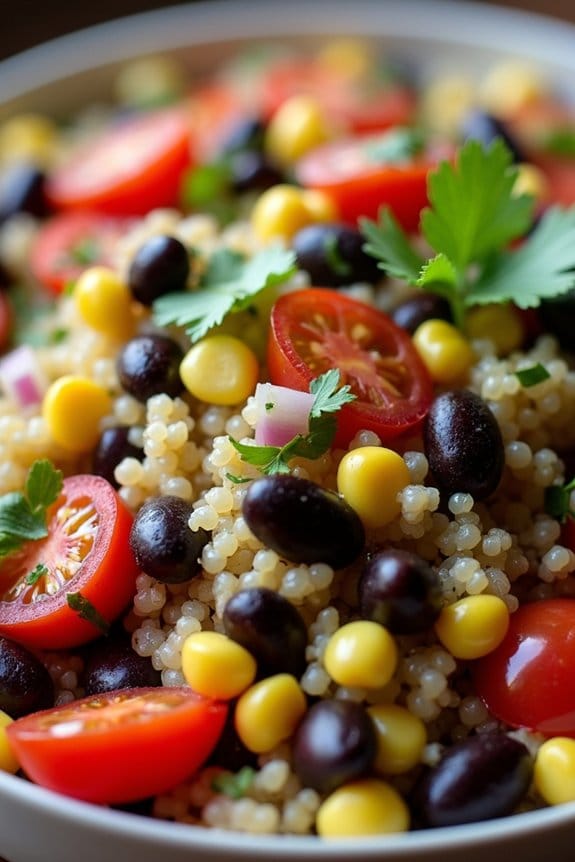
Grilled chicken is a delicious and healthy choice for any meal, and pairing it with a vibrant Quinoa and Black Bean Salad elevates the dish to a whole new level. This salad isn’t only packed with protein and fiber but also bursts with flavors, thanks to the fresh vegetables and zesty lime dressing.
Whether you’re hosting a summer barbecue or preparing a weeknight dinner, this side dish complements grilled chicken perfectly, making it a satisfying and nutritious addition to your plate.
The Quinoa and Black Bean Salad is as simple to make as it’s delightful to eat. The earthy flavors of quinoa blend seamlessly with the rich, hearty texture of black beans. Tossed with fresh vegetables like bell peppers, corn, and tomatoes, and dressed with a tangy lime vinaigrette, this salad is as colorful as it’s tasty.
Not to mention, it’s also versatile, allowing you to customize it with your favorite herbs and spices. Here’s how to make this scrumptious side dish for 4-6 people:
Ingredients:
- 1 cup quinoa
- 2 cups water
- 1 can (15 oz) black beans, drained and rinsed
- 1 cup corn kernels (fresh or frozen)
- 1 red bell pepper, diced
- 1 cup cherry tomatoes, halved
- 1 small red onion, finely chopped
- 1/4 cup fresh cilantro, chopped
- 2 tablespoons olive oil
- Juice of 2 limes
- 1 teaspoon cumin
- Salt and pepper to taste
Cooking Instructions:
- Cook the Quinoa: Rinse the quinoa under cold water to remove any bitterness. In a medium saucepan, bring 2 cups of water to a boil. Add the quinoa, reduce the heat to low, cover, and let it simmer for about 15 minutes or until the quinoa is tender and the water is absorbed. Remove from heat and let it sit covered for 5 minutes. Fluff with a fork.
- Prepare the Salad Base: While the quinoa is cooking, prepare the other salad ingredients. In a large mixing bowl, combine the drained black beans, corn, diced red bell pepper, cherry tomatoes, and chopped red onion.
- Mix the Dressing: In a small bowl, whisk together the olive oil, lime juice, cumin, salt, and pepper. Adjust seasoning to taste.
- Combine Ingredients: Once the quinoa is cooled slightly, add it to the bowl with the vegetables. Pour the dressing over the salad and toss everything together until well combined. Add the chopped cilantro and give it a final toss.
- Chill and Serve: Cover the salad and let it chill in the refrigerator for at least 30 minutes to allow the flavors to meld. Serve cold or at room temperature alongside your grilled chicken.
Extra Tips:
For the best results, use freshly cooked quinoa, but make sure it’s cooled slightly before adding it to your salad to avoid wilting the vegetables.
If you prefer a bit of heat, consider adding a diced jalapeño or a pinch of cayenne pepper to the dressing. This salad is perfect for meal prep as it keeps well in the refrigerator for up to three days, allowing the flavors to develop further.
Feel free to experiment with other fresh herbs like parsley or mint for a different flavor profile.
Caprese Salad
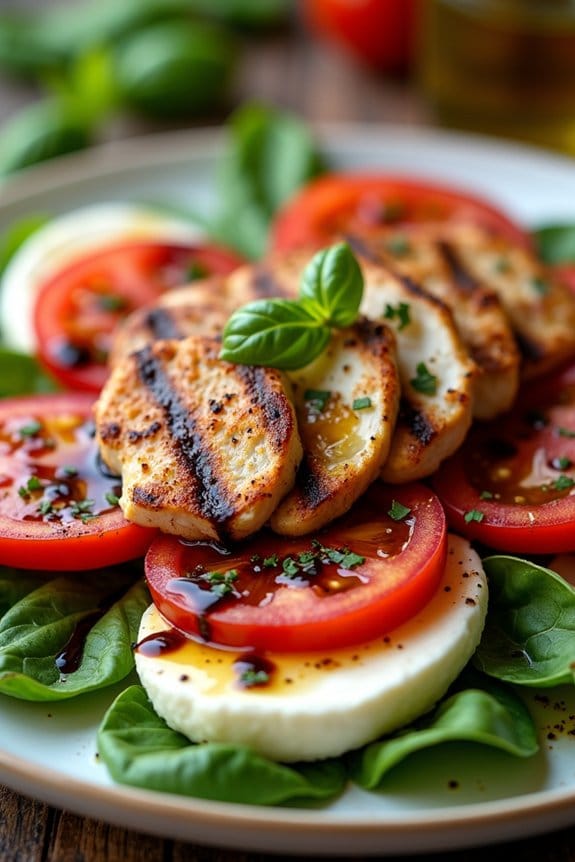
Caprese Salad is a classic Italian dish that brings together the fresh flavors of ripe tomatoes, creamy mozzarella cheese, and fragrant basil leaves, all drizzled with a touch of olive oil and balsamic glaze.
When paired with perfectly grilled chicken, it transforms into a satisfying and nutritious side dish that complements any summer meal. This recipe for Caprese Salad with Grilled Chicken is perfect for those looking to add a revitalizing and flavorful side to their grilled chicken dishes.
It’s simple to make, yet sophisticated enough to impress your guests at any barbecue or outdoor gathering. This version of the Caprese Salad enhances the traditional elements with the addition of grilled chicken, providing a delightful contrast between the freshness of the salad and the savory, smoky flavor of the chicken.
The combination of textures and flavors makes it an ideal accompaniment to grilled meats, adding a touch of elegance and variety to your meal. Whether you’re hosting a summer party or simply enjoying a family dinner, this Caprese Salad with Grilled Chicken is sure to be a crowd-pleaser.
Ingredients (Serves 4-6):
- 4 boneless, skinless chicken breasts
- Salt and pepper to taste
- 2 tablespoons olive oil
- 4 large ripe tomatoes, sliced
- 16 ounces fresh mozzarella cheese, sliced
- 1 cup fresh basil leaves
- 2 tablespoons balsamic glaze
- Extra virgin olive oil for drizzling
Cooking Instructions:
- Prepare the Chicken: Begin by seasoning the chicken breasts with salt and pepper on both sides. Drizzle olive oil over the chicken to coat them evenly.
- Grill the Chicken: Preheat your grill to medium-high heat. Place the chicken breasts on the grill and cook for about 6-7 minutes on each side, or until the internal temperature reaches 165°F (75°C). Once cooked, remove from the grill and let them rest for a few minutes before slicing.
- Assemble the Salad: While the chicken is resting, arrange the tomato and mozzarella slices on a large platter, alternating between them in a circular pattern. Tuck fresh basil leaves in between the slices.
- Slice the Chicken: After resting, slice the grilled chicken breasts into thin strips. Arrange the chicken strips on top of the tomato and mozzarella slices.
- Drizzle and Serve: Drizzle extra virgin olive oil and balsamic glaze over the entire salad. Season with a little more salt and pepper if desired. Serve immediately as a side dish to your grilled chicken meal.
Extra Tips:
For the best results, use fresh, high-quality ingredients, especially when it comes to the tomatoes and mozzarella cheese. Opt for vine-ripened tomatoes and fresh mozzarella for the most authentic flavor.
If possible, make your own balsamic glaze by reducing balsamic vinegar in a saucepan until it thickens, which can enhance the dish even further. This Caprese Salad can also be customized by adding sliced avocados or a sprinkle of pine nuts for additional texture and flavor.
Remember to let the grilled chicken rest before slicing, as this helps to keep the meat juicy and tender.
Roasted Sweet Potatoes
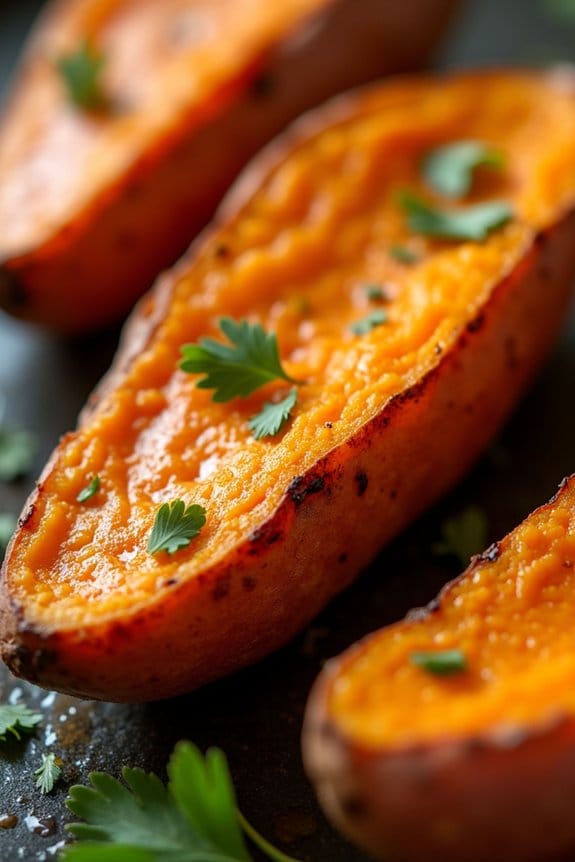
Roasted Sweet Potatoes make for a delicious and nutritious side dish that pairs perfectly with grilled chicken. Their natural sweetness and creamy texture are enhanced when roasted, resulting in a dish that’s not only visually appealing but also rich in flavor. The caramelization process brings out the natural sugars, while a blend of spices adds a savory touch that balances out the sweetness.
This dish isn’t only simple to prepare but also versatile, allowing you to modify the seasoning according to your taste preferences. Whether you’re hosting a backyard barbecue or enjoying a quiet family dinner, Roasted Sweet Potatoes are a crowd-pleaser. They complement the smoky flavors of grilled chicken beautifully, adding a pop of color and a burst of flavor to your plate.
This recipe serves 4-6 people, making it an excellent choice for gatherings or meal prepping for the week.
Ingredients (Serves 4-6):
- 4 medium sweet potatoes
- 2 tablespoons olive oil
- 1 teaspoon salt
- 1/2 teaspoon black pepper
- 1 teaspoon garlic powder
- 1 teaspoon paprika
- 1/2 teaspoon ground cinnamon
- Fresh parsley for garnish (optional)
Cooking Instructions:
- Preheat the Oven: Start by preheating your oven to 425°F (220°C). This high temperature is crucial for achieving that perfect crispy exterior on the sweet potatoes.
- Prepare the Sweet Potatoes: Wash and peel the sweet potatoes. Cut them into evenly sized cubes, about 1 inch in diameter. Uniform cutting guarantees that all pieces cook evenly.
- Season the Potatoes: Place the cubed sweet potatoes in a large bowl. Drizzle with olive oil, then sprinkle with salt, black pepper, garlic powder, paprika, and ground cinnamon. Toss the sweet potatoes until they’re evenly coated with the oil and spices.
- Arrange on Baking Sheet: Spread the seasoned sweet potatoes in a single layer on a baking sheet. Avoid overcrowding the pan to make sure they roast evenly and become crispy.
- Roast the Sweet Potatoes: Place the baking sheet in the preheated oven and roast for 25-30 minutes, flipping the potatoes halfway through. They should be tender on the inside and golden brown on the outside.
- Garnish and Serve: Once done, remove the sweet potatoes from the oven. If desired, sprinkle with fresh parsley for a touch of color and added flavor. Serve hot alongside grilled chicken.
Extra Tips:
For added flavor, consider experimenting with different spice blends or adding a touch of heat with cayenne pepper or chili powder. If you prefer your sweet potatoes to be extra crispy, broil them for an additional 2-3 minutes after roasting.
Always verify your sweet potatoes are cut uniformly to prevent uneven cooking. If you find the sweet potatoes sticking to the pan, try using parchment paper or a silicone baking mat for easy cleanup. Enjoy your deliciously roasted sweet potatoes as a perfect accompaniment to grilled chicken!
Garlic Parmesan Asparagus
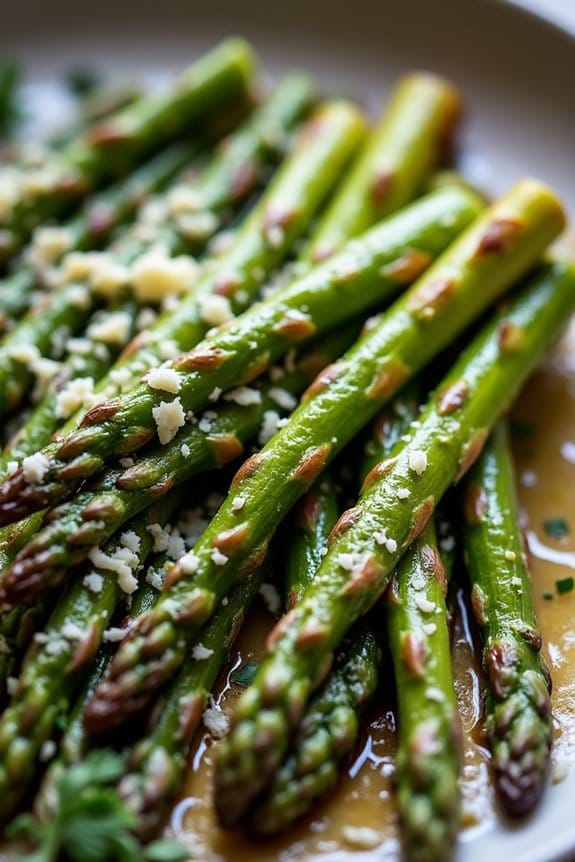
Garlic Parmesan Asparagus is a delightful side dish that pairs beautifully with grilled chicken. This dish brings out the natural flavors of fresh asparagus, enhanced by the richness of parmesan cheese and the aromatic punch of garlic. It’s a quick and easy recipe that adds a gourmet touch to your meal.
The combination of these simple ingredients creates a perfect balance of savory and fresh flavors, making it a crowd-pleaser at any gathering. Perfect for serving 4-6 people, Garlic Parmesan Asparagus isn’t only delicious but also packed with nutrients. Asparagus is a great source of fiber, folate, and vitamins A, C, and K, making this side dish not just tasty but also health-conscious.
The garlic and parmesan provide depth and complexity to the dish, while a touch of olive oil helps to roast the asparagus to perfection, guaranteeing each bite is as satisfying as the final.
Ingredients (serving size: 4-6 people):
- 2 pounds of fresh asparagus, trimmed
- 3 tablespoons of olive oil
- 4 cloves of garlic, minced
- 1 cup of grated Parmesan cheese
- Salt and pepper to taste
- 1 tablespoon of lemon juice
- Optional: chopped fresh parsley for garnish
Cooking Instructions:
- Preheat the Oven: Begin by preheating your oven to 400°F (200°C). This temperature is ideal for roasting asparagus, guaranteeing they’re cooked through yet tender with a slight crisp.
- Prepare the Asparagus: Rinse the asparagus under cold water and trim the tough ends. Pat them dry with a paper towel to remove any excess moisture. This will help the asparagus roast evenly.
- Season the Asparagus: In a large mixing bowl, combine the asparagus with olive oil, minced garlic, salt, and pepper. Toss the asparagus until they’re well coated with the seasoning.
- Arrange on Baking Sheet: Spread the asparagus in a single layer on a baking sheet. This guarantees that they cook evenly and each spear gets a nice, golden finish.
- Roast the Asparagus: Place the baking sheet in the preheated oven and roast for about 12-15 minutes, or until the asparagus are tender and slightly crispy.
- Add Parmesan: Remove the baking sheet from the oven and sprinkle the grated Parmesan cheese evenly over the asparagus. Return to the oven and roast for an additional 5 minutes, or until the cheese is melted and bubbly.
- Finish with Lemon: Once done, remove the asparagus from the oven and drizzle with lemon juice for a fresh, tangy finish. Garnish with chopped parsley if desired.
Extra Tips:
When selecting asparagus, look for firm, bright green spears with closed tips for the best flavor and texture. For even cooking, try to choose spears of similar thickness. If your asparagus is particularly thick, you might need to increase the cooking time slightly.
Be cautious with the amount of salt you add, as Parmesan cheese is naturally salty. Ultimately, feel free to experiment by adding other herbs or spices according to your taste preference!
Herbed Rice Pilaf

Herbed Rice Pilaf is a delightful and versatile side dish that pairs beautifully with grilled chicken. This aromatic rice dish is infused with a medley of fresh herbs, creating a fragrant and flavorful complement to your main course. The combination of fluffy rice, sautéed onions, and a variety of herbs guarantees that every bite is packed with taste and texture.
Whether you’re hosting a barbecue or simply enjoying a family dinner, Herbed Rice Pilaf is sure to be a hit at your table. This recipe is designed to serve 4-6 people, making it perfect for gatherings or meal prepping. The ingredients are simple, yet they come together to create a dish that’s both comforting and elegant.
With just a few steps, you’ll have an impressive side dish ready to accompany your grilled chicken and elevate your meal to a whole new level.
Ingredients for 4-6 servings:
- 1 cup basmati or long-grain rice
- 2 tablespoons olive oil
- 1 small onion, finely chopped
- 2 cloves garlic, minced
- 2 cups chicken or vegetable broth
- 1 teaspoon salt
- 1/2 teaspoon black pepper
- 1/4 cup chopped fresh parsley
- 2 tablespoons chopped fresh dill
- 2 tablespoons chopped fresh mint
- 1 tablespoon chopped fresh thyme
- 1 tablespoon chopped fresh chives
- Zest of 1 lemon
Cooking Instructions:
- Rinse the Rice: Start by rinsing the rice under cold water until the water runs clear. This helps remove excess starch, preventing the rice from becoming sticky during cooking.
- Sauté the Aromatics: In a large saucepan, heat the olive oil over medium heat. Add the chopped onion and sauté for about 3-4 minutes until it becomes translucent. Then, add the minced garlic and sauté for an additional 1 minute until fragrant.
- Toast the Rice: Add the rinsed rice to the saucepan and stir well to coat the rice grains with the oil. Toast the rice for about 2-3 minutes, stirring frequently, until the rice is lightly golden.
- Cook the Rice: Pour in the chicken or vegetable broth, and add salt and black pepper. Stir well and bring the mixture to a boil. Once boiling, reduce the heat to low, cover the saucepan with a lid, and let the rice simmer for about 15-18 minutes, or until the liquid is absorbed and the rice is tender.
- Add the Herbs: Remove the saucepan from heat and let it sit covered for 5 minutes. Uncover and fluff the rice with a fork. Gently fold in the chopped parsley, dill, mint, thyme, chives, and lemon zest, making sure they’re evenly distributed.
- Serve: Transfer the Herbed Rice Pilaf to a serving dish and garnish with additional herbs if desired. Serve warm alongside your grilled chicken.
Extra Tips:
For the best results, use fresh herbs, as they provide a vibrant flavor and aroma that dried herbs simply can’t match. If you prefer a nutty flavor, consider adding a handful of toasted slivered almonds or pine nuts to the pilaf just before serving.
Additionally, if you want to make the dish vegetarian, opt for vegetable broth instead of chicken broth. Adjust the seasoning as needed to suit your taste, and feel free to experiment with other herbs like basil or tarragon for a unique twist.
Mediterranean Couscous
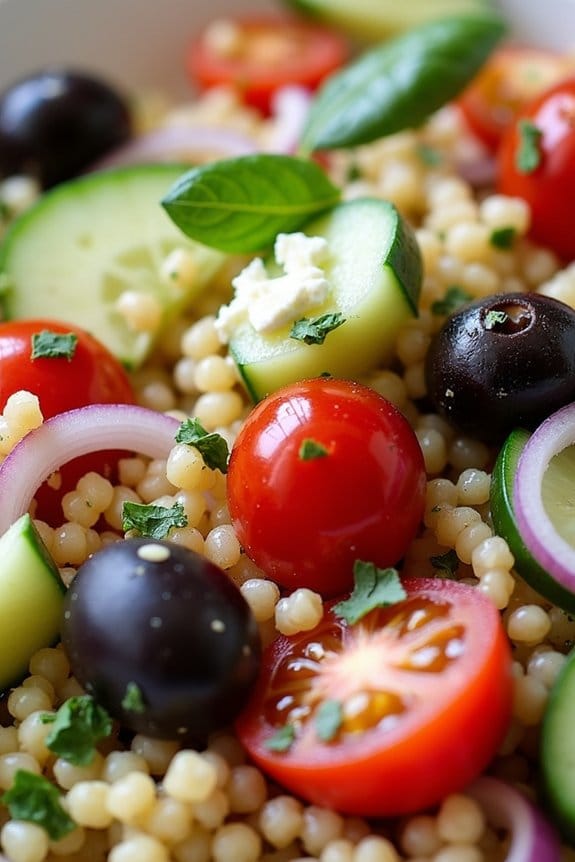
Mediterranean Couscous is a delightful and invigorating side dish that pairs perfectly with grilled chicken. This dish combines the light and fluffy texture of couscous with vibrant Mediterranean flavors, including fresh vegetables, olives, and herbs. It’s not only easy to prepare but also adds a colorful and nutritious element to your meal.
Whether you’re hosting a barbecue or simply looking for a quick and healthy side, Mediterranean Couscous is sure to impress your guests.
The beauty of this dish lies in its simplicity and versatility. You can customize it by adding your favorite vegetables or herbs, making it a staple in your repertoire. The key is to use fresh, high-quality ingredients that enhance the natural flavors of the couscous. This recipe serves 4-6 people, making it perfect for family gatherings or a casual dinner with friends.
Ingredients:
- 1 1/2 cups couscous
- 2 cups vegetable broth or water
- 1 tablespoon olive oil
- 1 cup cherry tomatoes, halved
- 1 cucumber, diced
- 1/2 cup Kalamata olives, pitted and sliced
- 1/4 cup red onion, finely chopped
- 1/4 cup fresh parsley, chopped
- 1/4 cup fresh mint, chopped
- Juice of 1 lemon
- Salt and pepper to taste
- Feta cheese (optional, for garnish)
Instructions:
- Prepare the Couscous: In a medium saucepan, bring the vegetable broth or water to a boil. Add the couscous and olive oil, then stir. Remove the saucepan from heat, cover it with a lid, and let it sit for about 5 minutes until the couscous has absorbed the liquid.
- Fluff the Couscous: After 5 minutes, uncover the saucepan and use a fork to fluff the couscous gently, breaking up any clumps. Transfer the couscous to a large mixing bowl and let it cool to room temperature.
- Prepare the Vegetables: While the couscous is cooling, prepare the vegetables. Halve the cherry tomatoes, dice the cucumber, slice the olives, and finely chop the red onion. Chop the fresh parsley and mint as well.
- Combine Ingredients: Once the couscous has cooled, add the cherry tomatoes, cucumber, olives, red onion, parsley, and mint to the bowl. Drizzle the lemon juice over the mixture, and season with salt and pepper to taste.
- Mix Well: Toss all the ingredients together until they’re well combined. Verify that the lemon juice, salt, and pepper are evenly distributed to enhance the flavors.
- Serve: Transfer the Mediterranean Couscous to a serving platter. If desired, sprinkle crumbled feta cheese over the top for an extra layer of flavor. Serve alongside grilled chicken for a complete meal.
Extra Tips:
For a more robust flavor, consider toasting the couscous in a bit of olive oil before cooking it in the broth. This will add a subtle nutty taste.
Additionally, you can experiment with other herbs like basil or dill for a different flavor profile. If you prefer a spicier dish, add a pinch of red pepper flakes.
Remember to taste and adjust the seasoning as needed before serving. This dish can be made ahead of time, making it an excellent choice for easy meal prep.
Tangy Cucumber Salad
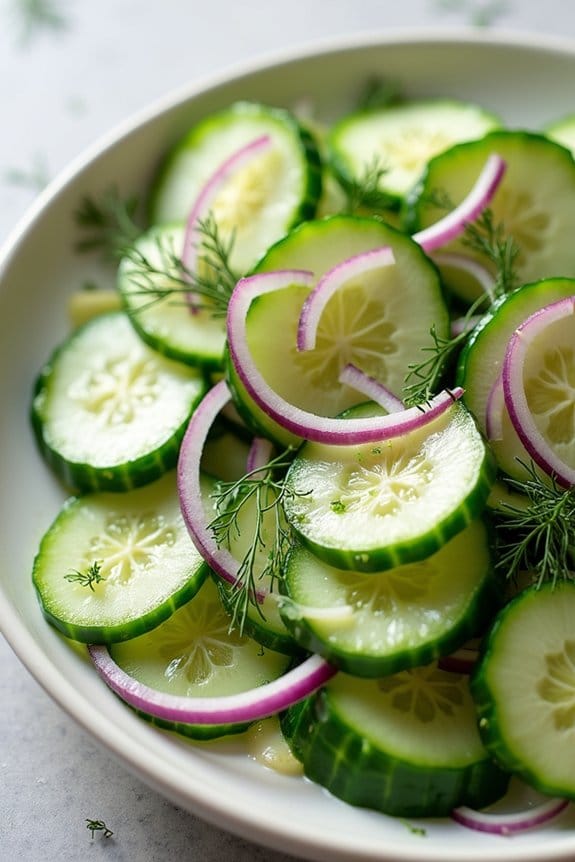
When it comes to complementing grilled chicken, a Tangy Cucumber Salad is an ideal choice. This invigorating and light side dish balances the hearty flavors of grilled chicken with its crisp texture and zesty dressing. The salad combines the coolness of cucumbers with the bold flavors of red onion and fresh dill, all brought together by a tangy dressing.
It’s perfect for a summer barbecue or any time you want a quick and easy side dish that doesn’t skimp on flavor. The simplicity of this salad allows the freshness of the ingredients to shine. Thinly sliced cucumbers provide a satisfying crunch, while the red onion adds a bit of sharpness.
A dressing made from vinegar, olive oil, and a hint of sugar gives it a tangy kick, and fresh dill adds a fragrant herbal note. This dish not only enhances the taste of grilled chicken but also provides a visual appeal with its vibrant colors.
Ingredients (Serves 4-6):
- 2 large cucumbers, thinly sliced
- 1 small red onion, thinly sliced
- 1/4 cup fresh dill, chopped
- 1/4 cup white vinegar
- 2 tablespoons olive oil
- 1 tablespoon sugar
- Salt and pepper to taste
Cooking Instructions:
- Prepare the Cucumbers: Start by washing the cucumbers thoroughly. Using a sharp knife or a mandoline slicer, slice the cucumbers thinly. Place the cucumber slices into a large mixing bowl.
- Slice the Onion: Peel and thinly slice the red onion. Add the sliced onion to the bowl with the cucumbers.
- Chop the Dill: Rinse the fresh dill under cold water and pat dry with a paper towel. Finely chop the dill and add it to the mixing bowl.
- Make the Dressing: In a small bowl, combine the white vinegar, olive oil, and sugar. Whisk until the sugar is dissolved completely. Season the dressing with salt and pepper to taste.
- Combine and Toss: Pour the dressing over the cucumber, onion, and dill mixture. Toss everything together gently until the vegetables are well-coated with the dressing.
- Chill and Serve: Cover the bowl with plastic wrap and refrigerate the salad for at least 30 minutes to allow the flavors to meld. Before serving, give the salad a quick toss to redistribute the dressing.
Extra Tips:
For the best flavor, allow the Tangy Cucumber Salad to chill for at least an hour before serving. This will enhance the tanginess and allow the cucumbers to absorb the dressing fully.
If you prefer a milder onion flavor, you can soak the sliced onions in cold water for about 10 minutes before adding them to the salad. This step will reduce their sharpness. Additionally, feel free to experiment with other types of vinegar, such as apple cider vinegar or rice vinegar, to give the salad a different twist.
Baked Macaroni and Cheese
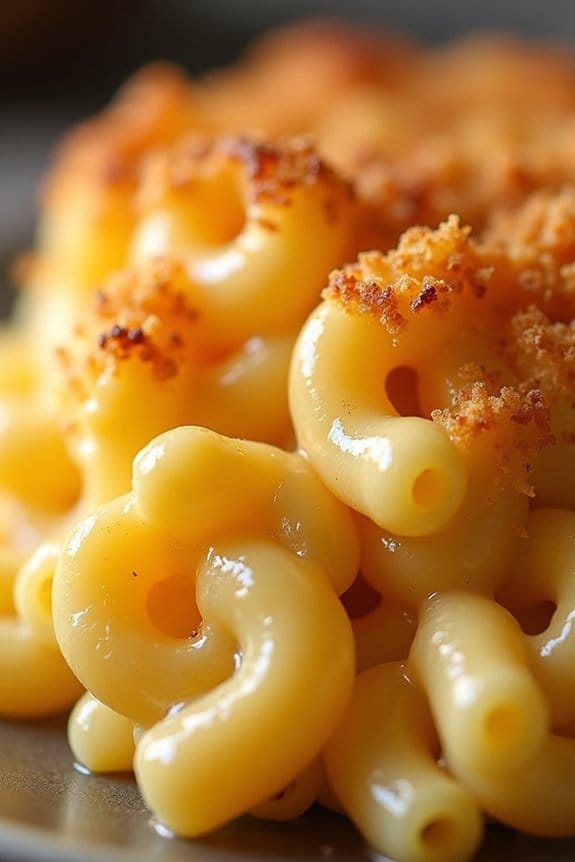
Baked Macaroni and Cheese is a classic comfort food that pairs perfectly with grilled chicken. This creamy and cheesy dish brings together the simplicity of pasta with the rich flavors of a cheese sauce, creating a delightful contrast to the smoky taste of grilled chicken. Not only is it a crowd-pleaser, but it’s also an easy and versatile dish that can be customized with a variety of cheeses and toppings to suit your taste.
Whether you’re hosting a barbecue or simply preparing a family dinner, Baked Macaroni and Cheese is a side dish that will satisfy and impress. The golden, bubbly top layer of cheese gives way to a creamy interior that complements the tender and flavorful grilled chicken. It’s an indulgence that feels like a warm hug on a plate, making it a perennial favorite at gatherings and a staple for comfort food lovers.
Ingredients (serves 4-6 people):
- 1 pound elbow macaroni
- 4 tablespoons unsalted butter
- 1/4 cup all-purpose flour
- 3 cups whole milk
- 1 teaspoon salt
- 1/2 teaspoon black pepper
- 1/4 teaspoon paprika
- 2 cups shredded sharp cheddar cheese
- 1 cup shredded mozzarella cheese
- 1/2 cup grated Parmesan cheese
- 1/2 cup breadcrumbs
- 2 tablespoons melted butter
Instructions:
- Preheat the Oven: Begin by preheating your oven to 350°F (175°C) to prepare it for baking the macaroni and cheese.
- Cook the Pasta: Boil the elbow macaroni in a large pot of salted water according to package instructions until al dente. Drain the pasta and set it aside.
- Make the Cheese Sauce: In a separate saucepan, melt the 4 tablespoons of butter over medium heat. Once melted, add the flour and whisk constantly for about 1 minute until the mixture is smooth and golden. Gradually whisk in the milk, making sure there are no lumps, and continue to cook while stirring until the sauce thickens slightly.
- Season the Sauce: Add salt, black pepper, and paprika to the sauce. Stir in the cheddar and mozzarella cheeses until they’re completely melted and the sauce is smooth and creamy.
- Combine Pasta and Sauce: Pour the cooked pasta into the cheese sauce and mix until the pasta is well coated.
- Prepare for Baking: Transfer the macaroni and cheese into a greased 9×13 inch baking dish. Sprinkle the Parmesan cheese evenly over the top.
- Add the Topping: In a small bowl, mix the breadcrumbs with the melted butter. Sprinkle this mixture evenly over the macaroni and cheese for a crunchy topping.
- Bake: Place the dish in the preheated oven and bake for 25-30 minutes, or until the top is golden brown and the sauce is bubbling.
- Cool and Serve: Allow the baked macaroni and cheese to cool for a few minutes before serving alongside your grilled chicken.
Extra Tips:
For a richer flavor, consider using a mixture of different cheeses such as Gruyère or fontina in addition to cheddar and mozzarella. If you prefer a bit of spice, adding a pinch of cayenne pepper to the cheese sauce can give it an extra kick.
To save time, you can prepare the cheese sauce a day ahead and store it in the refrigerator, then reheat it before combining with the pasta. Finally, for a crunchy twist, you can add crumbled bacon or sliced jalapeños to the breadcrumb topping before baking.
Zesty Lime and Cilantro Rice
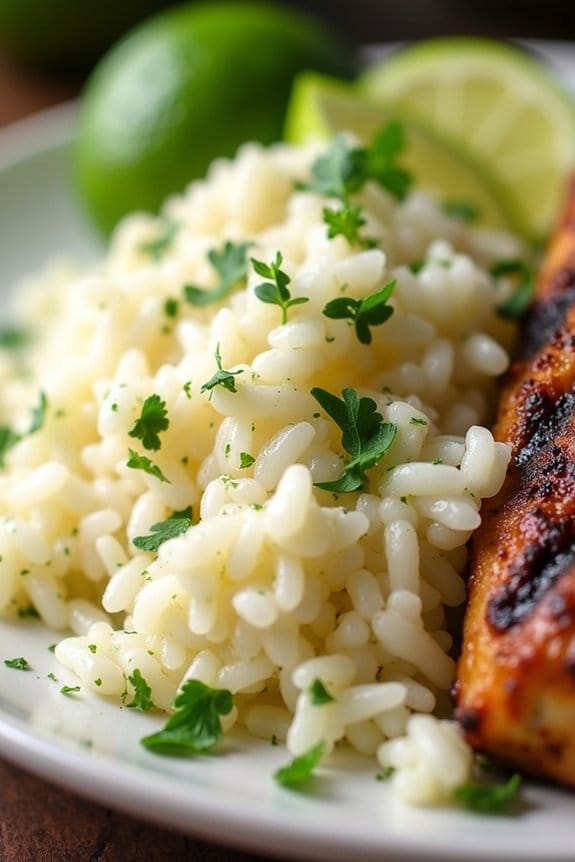
Grilled chicken is a versatile and popular main dish, and it pairs perfectly with a variety of side dishes. One standout accompaniment is Zesty Lime and Cilantro Rice. This vibrant and flavorful rice dish complements the smoky and savory taste of grilled chicken with its fresh, tangy, and aromatic notes. The zesty lime juice and bright cilantro infuse the rice with a rejuvenating taste that enhances the overall meal experience, making it a favorite for casual dinners and outdoor barbecues alike.
The key to creating a memorable Zesty Lime and Cilantro Rice lies in the balance of flavors and the quality of ingredients. Using fresh lime juice and cilantro guarantees that the dish bursts with flavor, while the aromatic additions of garlic and onion provide depth. This dish isn’t only simple to prepare but also brings a colorful and lively element to your plate, making it an ideal side for grilled chicken and a variety of other proteins.
Ingredients (serving size: 4-6 people):
- 2 cups long-grain white rice
- 4 cups chicken or vegetable broth
- 2 tablespoons olive oil
- 1 medium onion, finely chopped
- 2 cloves garlic, minced
- 2 limes, juiced and zested
- 1/2 cup fresh cilantro, chopped
- Salt to taste
- Pepper to taste
Cooking Instructions:
- Prepare the Rice Base: Rinse the rice under cold water until the water runs clear. This helps to remove excess starch, guaranteeing fluffy rice. Set the rice aside to drain.
- Sauté the Aromatics: In a large saucepan, heat the olive oil over medium heat. Add the chopped onion and cook until it becomes translucent, about 3-4 minutes. Then add the minced garlic and sauté for another 30 seconds until fragrant.
- Cook the Rice: Add the rinsed rice to the saucepan and stir well to coat the grains with the oil and aromatics. Cook for about 2 minutes, stirring occasionally, until the rice begins to lightly toast.
- Simmer: Pour in the chicken or vegetable broth, and add a pinch of salt and pepper. Bring the mixture to a boil, then reduce the heat to low, cover, and let it simmer for 18-20 minutes or until the rice is tender and has absorbed the liquid.
- Fluff and Season: Remove the saucepan from heat and let it sit, covered, for 5 minutes. Fluff the rice with a fork and stir in the lime juice, lime zest, and chopped cilantro. Adjust the seasoning with additional salt and pepper if needed.
- Serve: Transfer the rice to a serving dish. Garnish with extra cilantro and lime wedges if desired.
Extra Tips: For best results, always use fresh lime juice and cilantro. If you prefer a spicier dish, consider adding a finely chopped jalapeño or a pinch of red pepper flakes when sautéing the onions. Additionally, using a flavorful broth enhances the taste compared to water, making the rice more savory and rich. Remember to taste and adjust seasonings at the end to guarantee the flavors are balanced to your liking.
Honey Glazed Carrots
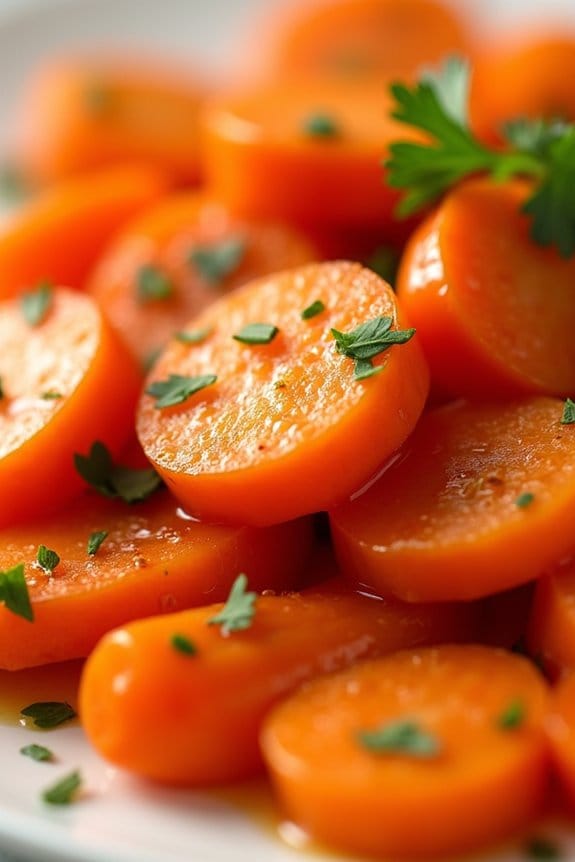
Honey Glazed Carrots are a delightful and colorful side dish that pairs beautifully with grilled chicken. The natural sweetness of the carrots is enhanced by a luscious honey glaze, creating a perfect balance of flavors. This dish isn’t only simple to prepare but also adds a vibrant splash of color to your meal.
Whether you’re hosting a dinner party or just making a family meal, these honey glazed carrots are bound to impress your guests.
The recipe for Honey Glazed Carrots is designed to serve 4-6 people, making it an ideal choice for a small gathering. With just a handful of ingredients and a few easy steps, you can elevate your meal to the next level. The subtle hint of honey and butter in the glaze brings out the best in the carrots, while the touch of herbs adds a savory note that complements the sweetness perfectly.
Ingredients:
- 2 pounds of carrots, peeled and cut into 1/4 inch slices
- 3 tablespoons of honey
- 2 tablespoons of unsalted butter
- 1 tablespoon of olive oil
- 1 teaspoon of salt
- 1/2 teaspoon of black pepper
- 1 tablespoon of fresh parsley, chopped (optional)
Instructions:
- Prepare the Carrots: Begin by peeling the carrots and slicing them into 1/4 inch thick rounds. This guarantees that they cook evenly and absorb the glaze properly.
- Cook the Carrots: In a large saucepan, bring salted water to a boil. Add the sliced carrots and cook them for about 5-7 minutes, or until they’re just tender. Drain the carrots and set them aside.
- Make the Glaze: In the same saucepan, melt the butter over medium heat. Stir in the olive oil and honey, mixing well until the ingredients are fully combined and the mixture is smooth.
- Glaze the Carrots: Add the drained carrots back into the saucepan. Toss them in the honey glaze until they’re well coated. Cook for an additional 5 minutes, stirring occasionally, until the carrots are caramelized and glossy.
- Season and Serve: Season the glazed carrots with salt and black pepper to taste. If desired, sprinkle fresh parsley over the top for a burst of color and flavor. Serve the honey glazed carrots warm alongside your grilled chicken.
Extra Tips:
When preparing Honey Glazed Carrots, consider using baby carrots for a more tender and visually appealing presentation.
If you prefer a bit of a kick, a pinch of cayenne pepper or a dash of cinnamon can add an interesting twist to the flavor profile.
Be sure not to overcook the carrots in the boiling stage; they should be tender but still slightly firm to maintain their shape and texture.
Finally, make certain to stir the carrots frequently while glazing to prevent them from sticking to the pan and to guarantee they’re evenly coated. Enjoy your delicious side dish!
Watermelon and Feta Salad
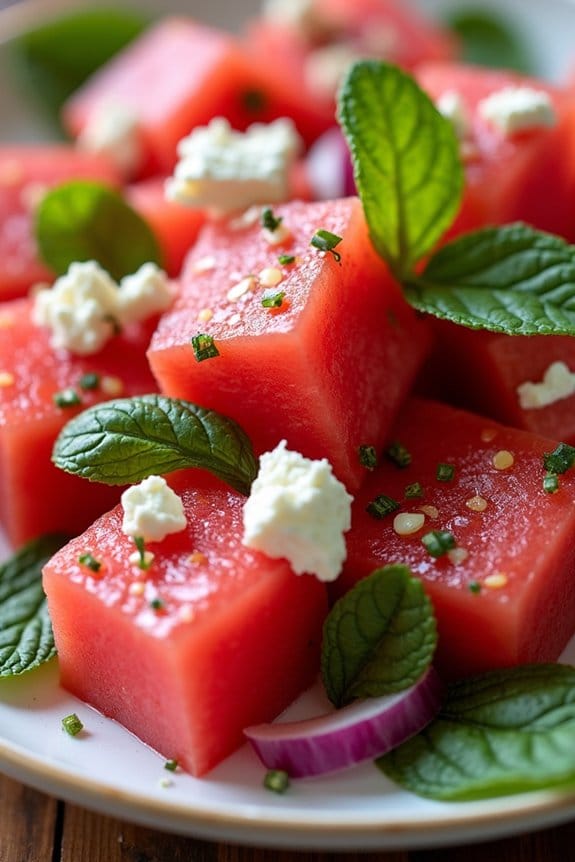
Grilled chicken is a versatile and delicious main course that pairs beautifully with a variety of side dishes. One such side that stands out for its invigorating flavors and vibrant presentation is the Watermelon and Feta Salad. This dish combines the juicy sweetness of ripe watermelon with the creamy saltiness of feta cheese, creating a harmonious balance that complements the savory notes of grilled chicken perfectly.
The addition of fresh mint and a tangy lime dressing ties all the flavors together, making it an ideal accompaniment for a summer barbecue or casual dinner party.
The Watermelon and Feta Salad isn’t only a feast for the taste buds but also a visual treat with its mix of bold colors and textures. The crisp, hydrating watermelon cubes provide a satisfying crunch, while the crumbled feta cheese adds a rich, smooth contrast.
Fresh mint leaves introduce an aromatic freshness, and the optional addition of thinly sliced red onions or cucumber can enhance both the flavor and texture of the salad. The dressing, a simple blend of lime juice, olive oil, and a hint of honey, elevates the dish with its zesty and slightly sweet notes.
This salad serves 4-6 people and is a wonderful way to enhance your grilled chicken meal.
Ingredients:
- 4 cups seedless watermelon, cubed
- 1 cup feta cheese, crumbled
- 1/4 cup fresh mint leaves, chopped
- 1/4 cup red onion, thinly sliced (optional)
- 1 cucumber, sliced (optional)
- Juice of 2 limes
- 2 tablespoons olive oil
- 1 tablespoon honey
- Salt and pepper to taste
Cooking Instructions:
- Prepare the Watermelon: Start by cutting the watermelon into bite-sized cubes. Confirm that the watermelon is seedless, or remove any seeds to maintain the texture of the salad.
- Mix the Salad Base: In a large mixing bowl, combine the watermelon cubes with the crumbled feta cheese. Gently toss to confirm the cheese is evenly distributed throughout the watermelon.
- Add Fresh Elements: If using, add the thinly sliced red onion and cucumber to the bowl. Sprinkle the chopped fresh mint over the mixture for an added layer of flavor.
- Make the Dressing: In a small bowl, whisk together the lime juice, olive oil, and honey. Season with salt and pepper to taste. The dressing should be tangy with a slight sweetness to complement the watermelon and feta.
- Combine and Serve: Pour the dressing over the watermelon and feta mixture. Gently toss the salad to coat all the ingredients evenly with the dressing. Serve immediately for the freshest taste.
Extra Tips: When preparing this salad, choose a ripe watermelon with a deep, uniform pink or red color for the best flavor. The feta cheese can be substituted with goat cheese if you prefer a different texture or flavor profile.
For an extra hint of spice, consider adding a pinch of chili flakes to the dressing. This salad is best served cold, so consider chilling your ingredients before assembly, especially if the salad will be sitting out for any length of time.
Grilled Vegetable Skewers
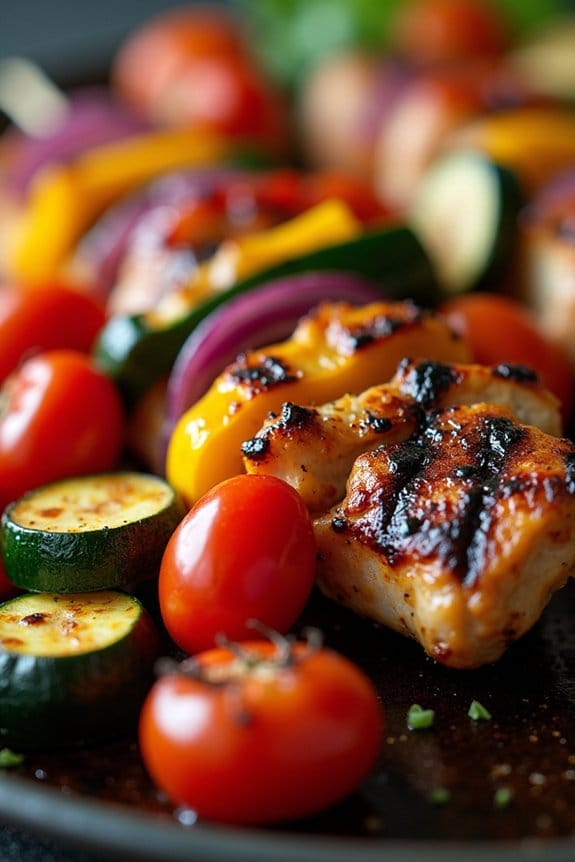
Grilled Chicken paired with Grilled Vegetable Skewers makes for a vibrant and nutritious meal that’s perfect for any outdoor gathering or family dinner. The smokiness of the grill enhances the natural flavors of the vegetables, while the tender chicken provides a satisfying protein base. This dish isn’t only visually appealing but also packed with vitamins and nutrients, making it a wholesome choice for health-conscious individuals.
The beauty of this recipe lies in its simplicity and versatility. You can choose your favorite seasonal vegetables to create colorful skewers, which can be marinated to add an extra layer of flavor. Whether you’re a seasoned griller or a beginner, these Grilled Vegetable Skewers are easy to prepare and cook, guaranteeing a delightful accompaniment to the grilled chicken. The combined textures and flavors make this dish a true crowd-pleaser.
Ingredients (Serves 4-6):
- 4 boneless, skinless chicken breasts
- 2 red bell peppers
- 2 yellow bell peppers
- 2 zucchini
- 1 red onion
- 1 cup cherry tomatoes
- 1/4 cup olive oil
- 3 tablespoons balsamic vinegar
- 2 cloves garlic, minced
- 1 teaspoon dried oregano
- Salt and pepper to taste
- Wooden or metal skewers
Cooking Instructions:
- Prepare the Marinade: In a small bowl, mix together olive oil, balsamic vinegar, minced garlic, dried oregano, salt, and pepper. Stir well to combine all ingredients.
- Marinate the Chicken: Place the chicken breasts in a large resealable plastic bag or shallow dish. Pour half of the marinade over the chicken, making sure each piece is well-coated. Seal the bag or cover the dish and refrigerate for at least 30 minutes, or up to 4 hours for maximum flavor.
- Prepare the Vegetables: While the chicken is marinating, wash and cut the vegetables into uniform chunks suitable for skewering. Aim for pieces that are roughly the same size for even cooking.
- Assemble the Skewers: If using wooden skewers, soak them in water for at least 30 minutes to prevent burning. Thread the prepared vegetables onto the skewers, alternating between different types for a colorful presentation. Brush the remaining marinade over the vegetable skewers.
- Preheat the Grill: Heat your grill to medium-high heat. Verify the grates are clean and lightly oiled to prevent sticking.
- Grill the Chicken: Remove the chicken from the marinade and place it on the hot grill. Cook for about 6-7 minutes per side, or until the internal temperature reaches 165°F (75°C).
- Grill the Vegetable Skewers: Place the vegetable skewers on the grill alongside the chicken. Grill for 10-12 minutes, turning occasionally, until the vegetables are tender and have nice grill marks.
- Serve: Once cooked, remove the chicken and skewers from the grill. Let the chicken rest for a few minutes before slicing. Serve the grilled chicken alongside the vegetable skewers.
Extra Tips:
For best results, aim to marinate the chicken for as long as possible to allow the flavors to fully penetrate. When cutting the vegetables, make sure they’re of similar size to promote even cooking. If you prefer a spicier kick, add a pinch of red pepper flakes to the marinade.
Finally, keep a close eye on the grill to prevent the vegetables from becoming too charred, and adjust the cooking time based on the thickness and type of vegetables you choose.