

Whenever I’m planning a cozy get-together, grilled cheese sliders are my go-to. Think gooey cheese nestled between crispy slices of bread, each one a bite-sized delight. With 13 different variations, ranging from classic to adventurous, there’s a flavor for everyone. Whether it’s the spicy jalapeño kick or the sweet combo of Nutella and banana, these sliders are perfect for sharing. Let’s explore these tasty options and make cherished memories with loved ones!
Classic Grilled Cheese Sliders
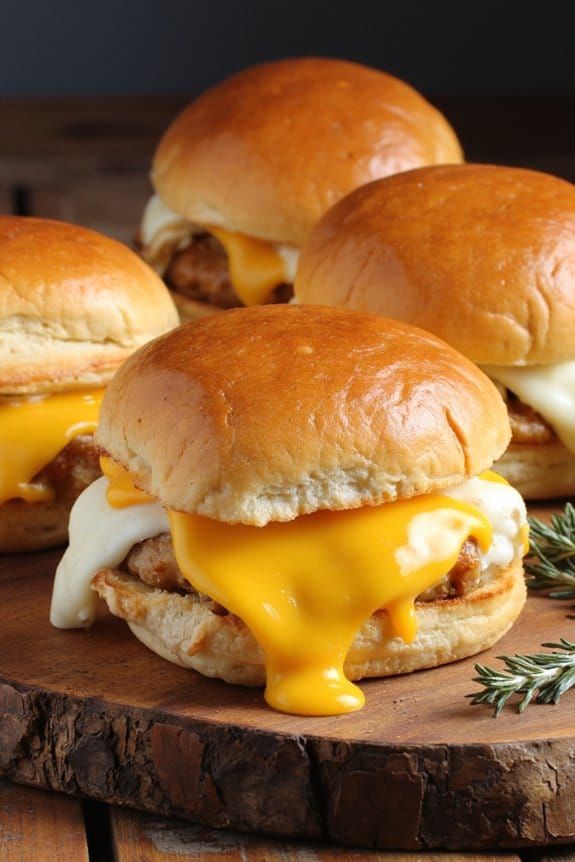
Grilled Cheese Sliders are a delightful twist on the classic grilled cheese sandwich, offering bite-sized portions perfect for sharing. These sliders are an excellent choice for parties, family gatherings, or even a fun weeknight dinner. The combination of crispy, golden-brown bread and gooey, melted cheese is sure to please both kids and adults alike.
By using a variety of cheeses, you can elevate the flavor profile and create a more sophisticated dish while maintaining the comforting taste of a traditional grilled cheese.
To make Classic Grilled Cheese Sliders, you’ll need to use small slider buns or rolls. These will be filled with a delicious mixture of cheeses and then grilled to perfection. The key to achieving the perfect balance of crispy exterior and melty interior is to use the right amount of heat and pressure. By following this recipe, you can create a batch of sliders that are both visually appealing and irresistibly tasty. This recipe serves 4-6 people.
Ingredients:
- 12 slider buns or small dinner rolls
- 2 cups shredded cheddar cheese
- 1 cup shredded mozzarella cheese
- 1/2 cup grated Parmesan cheese
- 1/2 cup unsalted butter, softened
- 1 teaspoon garlic powder
- 1 teaspoon dried oregano
- Salt and black pepper to taste
Cooking Instructions:
- Prepare the Cheese Mixture: In a large bowl, combine the shredded cheddar, mozzarella, and grated Parmesan. Mix until well blended.
- Prepare the Buns: Slice each slider bun in half horizontally. Spread a thin layer of softened butter on the cut side of each half. This will help achieve a crispy texture when grilling.
- Assemble the Sliders: Place a generous amount of the cheese mixture on the bottom half of each bun. Sprinkle a small pinch of garlic powder, oregano, salt, and black pepper over the cheese for added flavor. Place the top half of the bun over the cheese to form a complete slider.
- Preheat the Grill Pan: Heat a large grill pan or griddle over medium heat. Once hot, lightly grease the surface with a small amount of butter to prevent sticking.
- Grill the Sliders: Place the assembled sliders on the grill pan. Use a spatula or a flat weight to press down slightly on each slider. This will guarantee even cooking and melting of the cheese. Cook for about 2-3 minutes on each side, or until the bread is golden brown and the cheese is melted.
- Serve: Once cooked, remove the sliders from the pan and let them cool for a minute before serving. This will allow the cheese to set slightly and prevent it from spilling out.
Extra Tips:
For the best results, use freshly grated cheese rather than pre-packaged shredded cheese, as it melts more smoothly. If you prefer a more robust flavor, consider adding a slice of tomato or a few pieces of cooked bacon to each slider before grilling.
To make this dish even more appealing, serve the sliders with a side of tomato soup or a tangy dipping sauce like marinara or ranch. Finally, make sure to monitor the heat closely to avoid burning the bread, as each stove can vary in temperature.
Spicy Jalapeño Popper Sliders
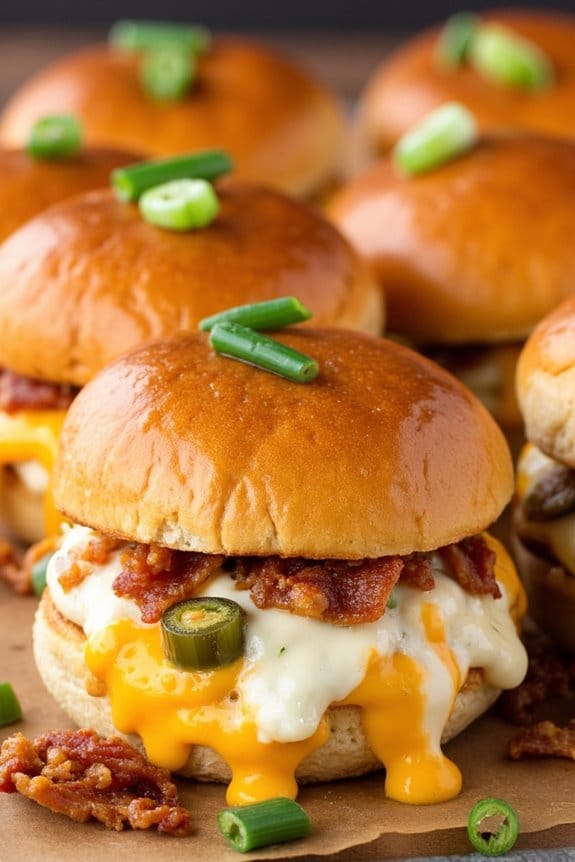
Spicy Jalapeño Popper Sliders are the perfect fusion of spicy, cheesy goodness packed into a bite-sized treat. These sliders bring together the classic flavors of jalapeño poppers with the comforting appeal of a grilled cheese sandwich.
Whether you’re hosting a party, preparing a game day snack, or simply looking for a fun and flavorful meal, these sliders are sure to be a hit. The combination of creamy cheese, spicy jalapeños, and crispy bread makes for an irresistible treat that’s both easy to make and incredibly satisfying.
The key to these sliders is balancing the heat from the jalapeños with the richness of the cheese and the crunch of the bread. To achieve this, we’ll be using a variety of cheeses such as cream cheese and cheddar, which complement the spicy kick from fresh jalapeños.
The sliders are then grilled to perfection, allowing the cheese to melt and the flavors to meld beautifully. Ready to get started? Let’s plunge into the ingredients and steps needed to create these delicious Spicy Jalapeño Popper Sliders for 4-6 people.
Ingredients:
- 12 slider buns
- 8 oz cream cheese, softened
- 1 cup shredded cheddar cheese
- 1/4 cup mayonnaise
- 3 fresh jalapeños, seeded and finely chopped
- 4 strips of bacon, cooked and crumbled
- 1/4 cup green onions, chopped
- 1 tsp garlic powder
- 1/2 tsp smoked paprika
- 2 tbsp butter, melted
Cooking Instructions:
- Prepare the Jalapeño Cheese Mixture: In a medium-sized bowl, mix together the softened cream cheese, shredded cheddar cheese, mayonnaise, chopped jalapeños, crumbled bacon, green onions, garlic powder, and smoked paprika. Stir until all ingredients are well combined and the mixture is smooth.
- Assemble the Sliders: Slice the slider buns in half horizontally. Spread a generous amount of the jalapeño cheese mixture on the bottom half of each bun. Place the top half of the bun over the mixture to form a slider.
- Prepare for Grilling: Preheat a nonstick skillet or a griddle over medium heat. Brush the tops of the sliders with melted butter to guarantee a crispy, golden-brown finish.
- Grill the Sliders: Place the sliders on the skillet or griddle, buttered side down. Grill for about 3-4 minutes until the bottoms are golden brown. Carefully flip the sliders and continue grilling for another 3-4 minutes, ensuring the cheese is melted and the buns are crispy.
- Serve and Enjoy: Once grilled to perfection, remove the sliders from the heat. Serve them immediately while they’re hot and gooey. These sliders pair wonderfully with a side of ranch dressing or your favorite dipping sauce.
Extra Tips:
For an extra kick, consider leaving in some of the jalapeño seeds when chopping them up. If you prefer a milder version, you can substitute the jalapeños with milder peppers like poblanos.
To add a bit more crunch, consider adding a layer of crushed tortilla chips inside the sliders before grilling. Finally, keep an eye on the sliders while grilling to prevent the cheese from leaking out or the buns from burning. Enjoy experimenting with different cheese blends to find your perfect flavor combination!
Gourmet Brie and Apple Sliders
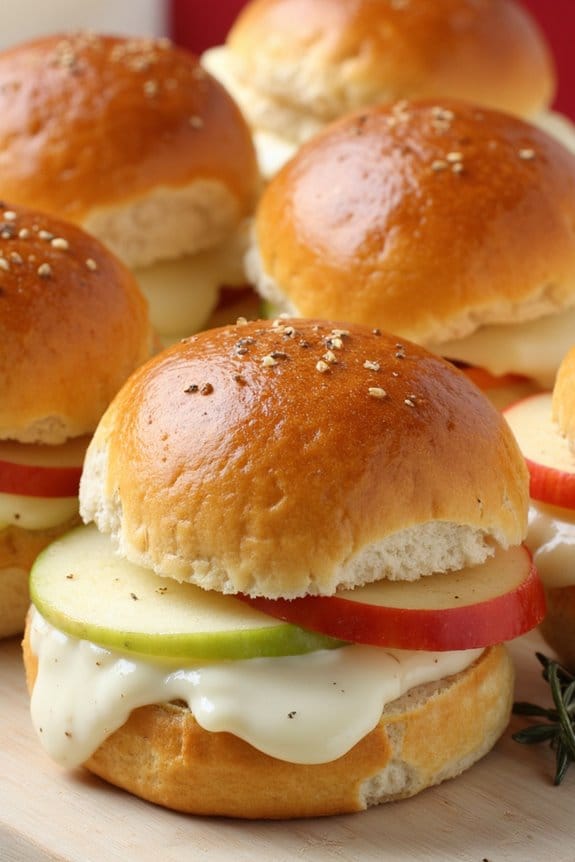
Gourmet Brie and Apple Sliders are a delightful twist on the classic grilled cheese sandwich, offering a sophisticated yet simple flavor profile that will impress your guests. These sliders combine the creamy richness of brie cheese with the sweet and tart notes of apples, all encased in perfectly toasted mini buns. The contrast between the gooey melted cheese and the crisp apple slices creates a harmonious balance that makes these sliders an irresistible appetizer or snack.
Perfect for a casual gathering or a more formal occasion, these sliders are bound to be a hit. The key to making these Gourmet Brie and Apple Sliders stand out lies in selecting high-quality ingredients. Opt for a ripe, creamy brie that will melt smoothly, and choose apples that are firm and slightly tart, such as Granny Smith or Honeycrisp.
The mini slider buns should be fresh and soft, yet sturdy enough to hold the filling without becoming soggy. With the right ingredients and a few simple steps, you’ll be able to create a dish that’s both elegant and comforting, delighting the taste buds of everyone who tries them.
Ingredients (serving size: 4-6 people):
- 12 mini slider buns
- 8 oz brie cheese, sliced
- 2 large apples, cored and thinly sliced
- 2 tablespoons unsalted butter
- 1 tablespoon honey
- 1 tablespoon Dijon mustard
- Salt and pepper to taste
Cooking Instructions:
- Prepare the Buns: Preheat your oven to 350°F (175°C). Place the mini slider buns on a baking sheet and lightly toast them in the oven for about 5 minutes. This will help keep the buns from getting too soggy when the cheese melts.
- Slice the Apples and Brie: While the buns are toasting, core and thinly slice the apples. Confirm the slices are even to promote uniform cooking. Slice the brie cheese into manageable pieces that will fit neatly inside the slider buns.
- Prepare the Spread: In a small bowl, mix together the honey and Dijon mustard. This will serve as a sweet and tangy spread for the sliders.
- Assemble the Sliders: Remove the buns from the oven and spread a thin layer of the honey mustard mixture on the inside of each bun. Place a slice of brie on the bottom half of each bun, followed by a few apple slices. Season with a pinch of salt and pepper.
- Grill the Sliders: Heat a large skillet or griddle over medium heat. Add the butter and allow it to melt and coat the pan evenly. Place the assembled sliders in the skillet, cover with a lid, and cook for about 3-4 minutes on each side, or until the brie is melted and the buns are golden brown and crispy.
- Serve: Once cooked, remove the sliders from the skillet and serve immediately while the cheese is still warm and gooey.
Extra Tips:
For an added layer of flavor, consider adding a sprinkle of fresh thyme or rosemary to the sliders before grilling. If you prefer a bit of crunch, a handful of arugula or spinach can be added to each slider just before serving.
Additionally, to prevent the apples from browning, you can soak the slices in a mixture of water and lemon juice for a few minutes before assembling the sliders. This dish pairs beautifully with a crisp white wine or apple cider for a complete and satisfying meal.
Caprese Mozzarella and Basil Sliders
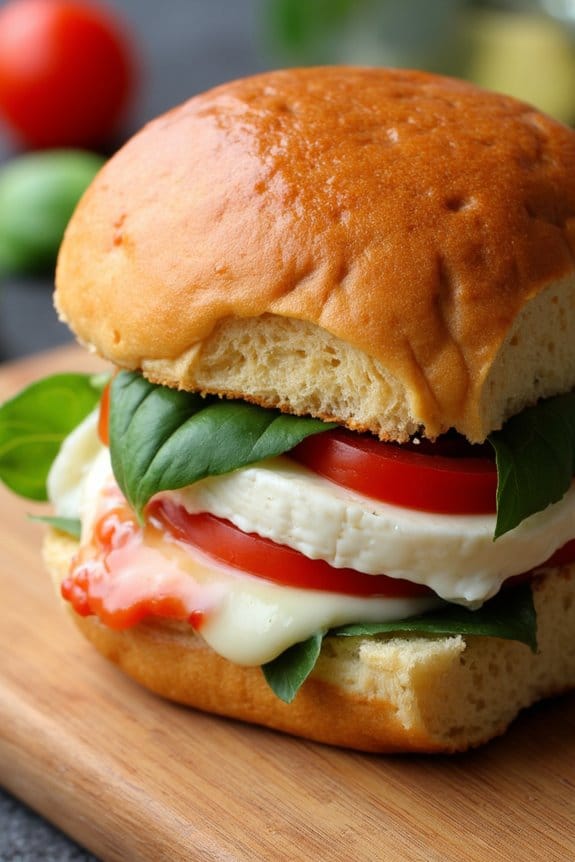
Grilled Cheese Sliders are a delightful twist on the classic grilled cheese sandwich, perfect for parties, snacks, or a comforting meal. One of the most popular variations is the Caprese Mozzarella and Basil Slider, which combines the fresh and vibrant flavors of a traditional Caprese salad with the irresistible taste of melted cheese and crispy bread.
These sliders aren’t only easy to prepare but also offer a burst of flavor with each bite, making them a crowd favorite. The Caprese Mozzarella and Basil Sliders are made by layering fresh mozzarella, juicy tomatoes, and aromatic basil leaves between slices of soft slider buns.
The sliders are then grilled to perfection, allowing the cheese to melt and the bread to achieve a lovely golden-brown crisp. This dish can be enjoyed as a standalone snack or served alongside a fresh salad or a warm bowl of soup for a more complete meal. Perfect for serving 4-6 people, these sliders are sure to impress at any gathering.
Ingredients for Caprese Mozzarella and Basil Sliders (serving size: 4-6):
- 12 slider buns
- 12 slices of fresh mozzarella cheese
- 12 slices of ripe tomatoes
- Fresh basil leaves
- 4 tablespoons of olive oil
- Salt and pepper to taste
- Balsamic glaze (optional)
Cooking Instructions:
- Preparation: Begin by slicing the slider buns in half, and set them aside. Slice the fresh mozzarella and tomatoes into thin, even slices. Wash and dry the basil leaves.
- Assembly: On the bottom half of each slider bun, place a slice of mozzarella cheese, followed by a slice of tomato, and a couple of basil leaves. Season with a pinch of salt and pepper. Top with the other half of the bun.
- Grilling: Heat a large skillet or griddle over medium heat. Brush the outside of each slider bun with olive oil to guarantee a golden, crispy finish. Place the sliders on the skillet, pressing down gently with a spatula, and cook for about 2-3 minutes on each side or until the cheese has melted and the buns are golden brown.
- Finishing Touches: Remove the sliders from the heat and allow them to cool slightly. If desired, drizzle a small amount of balsamic glaze over the top for added flavor.
- Serving: Serve the sliders warm, accompanied by your choice of sides or as a standalone dish.
Extra Tips:
For the best results, use fresh and high-quality ingredients, especially when it comes to the mozzarella and basil. The freshness of these ingredients will notably enhance the flavor of the sliders.
If you prefer a slightly tangy taste, consider using balsamic reduction instead of glaze, but use it sparingly to avoid overpowering the other flavors. Additionally, if you want a bit of crunch, you can add a leaf of arugula or a sprinkle of pine nuts between the layers.
Enjoy the sliders immediately after grilling for the best texture and taste.
BBQ Pulled Pork and Cheddar Sliders

Grilled Cheese Sliders with BBQ Pulled Pork and Cheddar are a mouthwatering delight, perfect for any gathering or casual meal. These sliders bring together the savory flavors of tender pulled pork, smoky BBQ sauce, and sharp cheddar cheese, all sandwiched between slices of buttery, toasted bread. They’re easy to prepare and are bound to be a hit with both adults and kids alike.
This dish combines the comfort of grilled cheese with the tangy, flavorful punch of BBQ pork, creating a slider that’s both satisfying and delicious. These sliders aren’t only easy to make, but they also allow for some creativity in the kitchen. You can adjust the type of cheese or BBQ sauce to suit your taste or guests’ preferences.
Serve these Grilled Cheese Sliders with BBQ Pulled Pork and Cheddar as an appetizer, a main dish, or even as a fun addition to a potluck spread. Whether you’re cooking for family or entertaining friends, these sliders are sure to impress with their combination of textures and flavors.
Ingredients for 4-6 People:
- 12 slider buns or mini sandwich rolls
- 2 cups cooked pulled pork
- 1 cup BBQ sauce
- 12 slices sharp cheddar cheese
- 6 tablespoons unsalted butter, softened
- 1 tablespoon olive oil
- 1 clove garlic, minced
- 1 small onion, thinly sliced
- Salt and pepper to taste
Cooking Instructions:
- Prepare the Pulled Pork: In a medium saucepan, combine the cooked pulled pork and BBQ sauce. Stir well over medium heat until the mixture is heated through. Lower the heat to keep it warm while preparing the other components.
- Sauté the Onions: In a small skillet, heat olive oil over medium heat. Add the minced garlic and sauté for about 30 seconds until fragrant. Add the sliced onions and a pinch of salt and pepper. Cook until the onions are soft and caramelized, about 10 minutes. Remove from heat.
- Butter the Buns: Spread a thin layer of softened butter on the inside of each slider bun. This will help them crisp up nicely during grilling.
- Assemble the Sliders: Lay the bottom half of each slider bun on a large baking sheet or tray. Place a slice of cheddar cheese on each bun. Top the cheese with a generous spoonful of the warm pulled pork mixture. Add a spoonful of the sautéed onions on top of the pork. Finally, place another slice of cheddar cheese over the onions, and cover with the top half of the slider buns.
- Grill the Sliders: Heat a large skillet or griddle over medium heat. Place the sliders on the skillet and press down gently with a spatula to ascertain even grilling. Grill each side for about 3-4 minutes or until the bread is golden brown and the cheese is melted. You may need to do this in batches depending on the size of your skillet.
- Serve Immediately: Once the sliders are grilled to perfection, transfer them to a serving platter. Serve hot and enjoy!
Extra Tips:
To enhance the flavor, consider using a mix of cheeses such as a combination of sharp cheddar and Monterey Jack. If you like a bit of spice, add a few jalapeño slices on top of the pulled pork before grilling. For a smoky flavor, try using a smoked cheddar cheese.
When selecting your BBQ sauce, choose one that complements the pulled pork, whether you prefer sweet, spicy, or tangy. Finally, keep an eye on the sliders while grilling to avoid burning, and adjust the heat as necessary.
Greek-Style Feta and Spinach Sliders
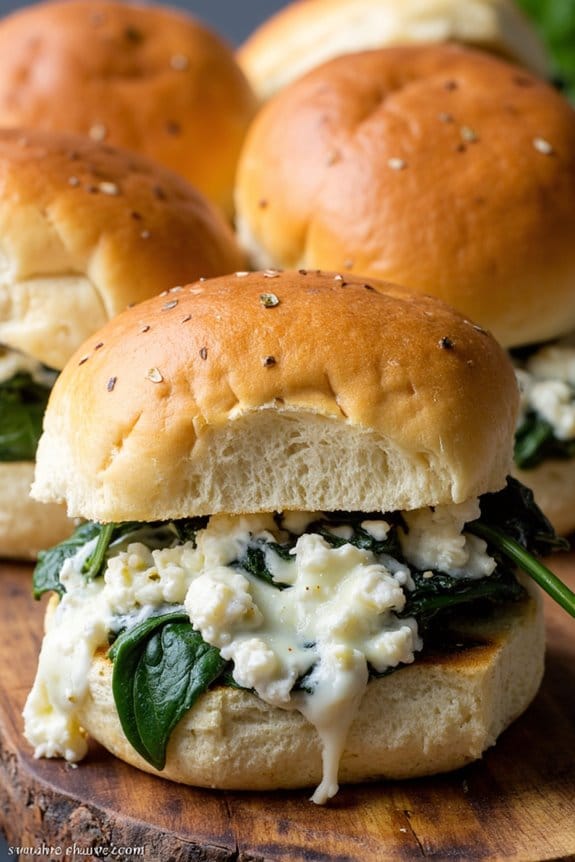
Grilled Cheese Sliders are a delicious twist on the classic grilled cheese sandwich, perfect for a fun and flavorful meal. The Greek-Style Feta and Spinach Sliders bring a Mediterranean flair to this beloved comfort food. Combining the tangy richness of feta cheese with the fresh, earthy taste of spinach, these sliders are guaranteed to delight your taste buds.
The addition of herbs and spices enhances the flavors, creating a savory treat that’s both satisfying and easy to prepare. These Greek-Style Feta and Spinach Sliders are perfect for gatherings, parties, or a quick family dinner. The recipe is designed to serve 4-6 people, making it ideal for sharing with friends and loved ones.
With just a few simple ingredients, you can transform your kitchen into a gourmet haven, delivering a unique and tasty twist on traditional grilled cheese. The sliders can be served as an appetizer, snack, or even as a main course, paired with a fresh salad or a bowl of soup.
Ingredients (serving size: 4-6 people):
- 12 slider buns
- 2 cups fresh spinach leaves
- 8 ounces feta cheese, crumbled
- 1 cup shredded mozzarella cheese
- 1 teaspoon dried oregano
- 1/2 teaspoon garlic powder
- 1/4 teaspoon black pepper
- 2 tablespoons olive oil
- 2 tablespoons butter, melted
Cooking Instructions:
- Prepare the Filling: In a large bowl, combine the crumbled feta cheese, shredded mozzarella cheese, spinach leaves, dried oregano, garlic powder, and black pepper. Mix well until all ingredients are evenly distributed.
- Prepare the Buns: Preheat your grill or a non-stick skillet over medium heat. Brush the insides of the slider buns with a bit of olive oil, making sure they’re lightly coated to help them crisp up when grilled.
- Assemble the Sliders: Spoon about 2 tablespoons of the spinach and feta mixture onto the bottom half of each slider bun. Place the top bun over the filling, pressing down gently to hold everything together.
- Grill the Sliders: Brush the tops of the assembled sliders with melted butter, then place them on the preheated grill or skillet. Cook for 3-4 minutes on each side, or until the buns are golden brown and the cheese has melted.
- Serve: Once done, remove the sliders from the grill or skillet. Allow them to cool slightly before serving. These sliders are best enjoyed warm.
Extra Tips: For even more flavor, consider adding a few slices of sun-dried tomatoes or olives to the filling mixture. To make sure the sliders are evenly cooked, press them gently with a spatula while grilling.
If you’re using a skillet, cover it with a lid while cooking to help the cheese melt more evenly. Finally, if you prefer a spicier kick, add a dash of red pepper flakes to the filling mixture.
Buffalo Chicken and Blue Cheese Sliders
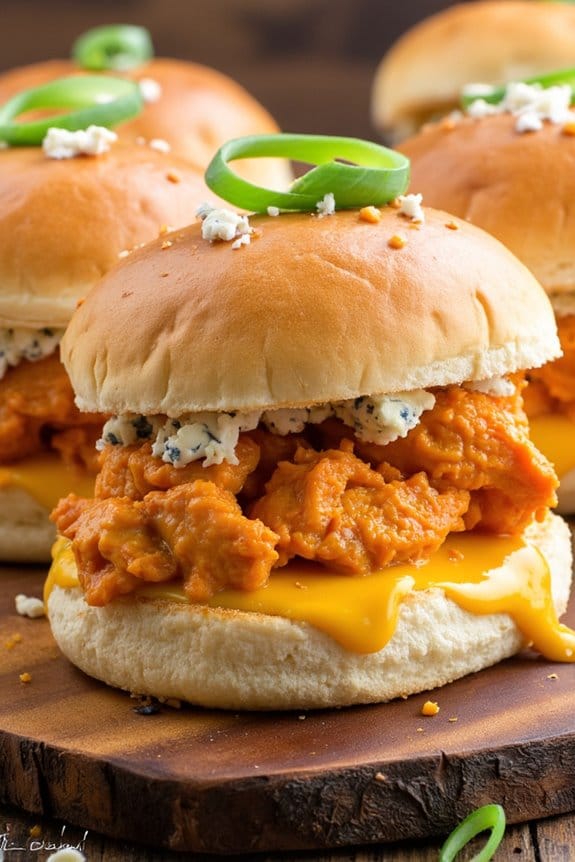
Grilled Cheese Sliders are a delightful twist on the classic grilled cheese sandwich, perfect for parties or a fun family meal. The Buffalo Chicken and Blue Cheese Sliders variation adds a spicy and tangy kick that will leave your taste buds tingling. These sliders are a harmonious blend of spicy buffalo chicken and creamy blue cheese, sandwiched between buttery, toasted slider buns.
They’re easy to make, deliciously satisfying, and certain to be a hit with both kids and adults alike. The beauty of these sliders lies in their simplicity and the bold flavors that come together in each bite. With just a few ingredients and minimal preparation time, you can whip up these sliders as a quick appetizer or a main dish.
The combination of buffalo sauce and blue cheese creates a perfect balance of heat and creaminess, while the crispy bread adds a satisfying crunch. Whether you’re hosting a game day party or simply looking for a new twist on the traditional grilled cheese, these Buffalo Chicken and Blue Cheese Sliders are certain to impress.
Ingredients (Serves 4-6):
- 1 pound cooked chicken breast, shredded
- 1/2 cup buffalo wing sauce
- 1/4 cup blue cheese crumbles
- 6 slider buns
- 3 tablespoons butter, softened
- 4 slices cheddar cheese
- 1/4 cup ranch dressing (optional)
- 1/4 cup chopped green onions
Instructions:
- Preheat the Oven: Preheat your oven to 350°F (175°C) to make sure it’s ready for toasting the sliders later.
- Prepare the Chicken: In a medium bowl, mix the shredded chicken with the buffalo wing sauce until well coated. Confirm the chicken is fully cooked before starting this step.
- Assemble the Sliders: Spread a thin layer of softened butter on the inside of each slider bun. Place a slice of cheddar cheese on the bottom half of each bun. Spoon a generous portion of the buffalo chicken mixture on top of the cheese. Sprinkle blue cheese crumbles over the chicken, and cover with the top half of the bun.
- Toast the Sliders: Arrange the assembled sliders on a baking sheet. Place them in the preheated oven and bake for about 10 minutes, or until the cheese is melted and the buns are lightly toasted.
- Add Final Touches: Remove the sliders from the oven. If desired, drizzle ranch dressing over the top of each slider and sprinkle with chopped green onions for added flavor and color.
- Serve: Serve the buffalo chicken and blue cheese sliders warm. They pair well with a side of celery sticks or a fresh salad.
Extra Tips:
When cooking the Buffalo Chicken and Blue Cheese Sliders, be sure to monitor the toasting process closely to prevent the buns from burning. You can adjust the level of spice by using more or less buffalo sauce according to your preference.
For an extra crunch, consider adding a slice of crisp bacon or a layer of crispy fried onions to each slider. If you prefer a milder cheese, swap out the blue cheese for mozzarella or Monterey Jack. Enjoy experimenting with different combinations to find your perfect slider!
Mushroom and Swiss Cheese Sliders
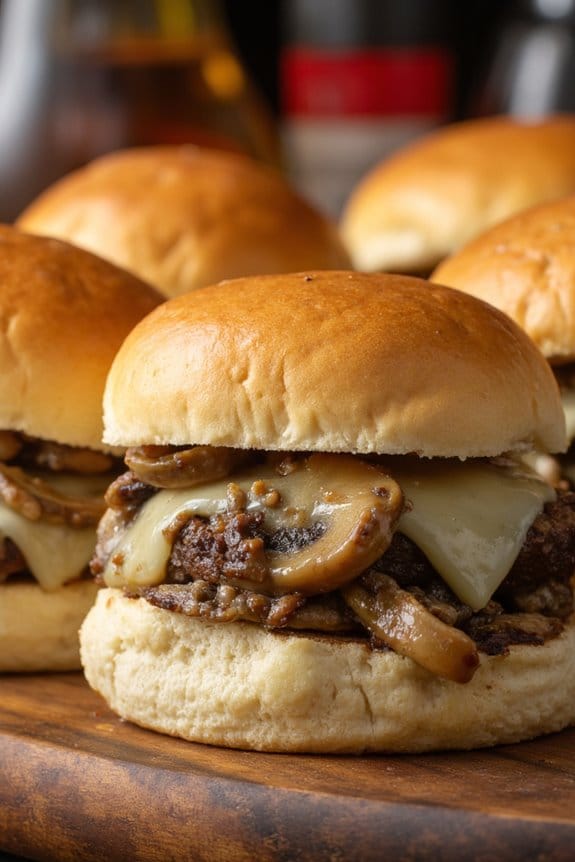
Grilled Cheese Sliders are a delightful twist on the traditional grilled cheese sandwich, perfect for gatherings or a family meal. These Mushroom and Swiss Cheese Sliders bring a gourmet touch to the classic favorite, combining the earthy flavors of sautéed mushrooms with the creamy richness of melted Swiss cheese.
The sliders are easy to prepare and are certain to be a hit with both kids and adults alike, offering a savory and satisfying bite that’s perfect for any occasion. These sliders can be served as an appetizer or the main course, making them a versatile addition to any menu.
The combination of mushrooms and Swiss cheese creates a harmonious balance of flavors that are both comforting and indulgent. Prepare to impress guests with this simple yet sophisticated dish that requires only a few ingredients and minimal preparation time.
Ingredients (Serves 4-6):
- 12 slider buns
- 8 oz sliced mushrooms
- 2 tablespoons butter
- 1 tablespoon olive oil
- 8 slices Swiss cheese
- 1 teaspoon garlic powder
- 1 tablespoon fresh thyme leaves (optional)
- Salt and pepper to taste
Cooking Instructions:
1. Prepare the Mushrooms: In a large skillet, heat the olive oil and 1 tablespoon of butter over medium heat. Add the sliced mushrooms to the skillet. Sauté for about 5-7 minutes, stirring occasionally, until the mushrooms are golden brown.
Add the garlic powder, thyme leaves, salt, and pepper, then cook for another 2 minutes. Remove the mushrooms from the skillet and set them aside.
2. Assemble the Sliders: Preheat a griddle or non-stick skillet over medium heat. Slice the slider buns in half. Spread a thin layer of butter on the outer side of each bun half.
Place a slice of Swiss cheese on the bottom half of each bun, followed by a generous portion of sautéed mushrooms. Top with another slice of Swiss cheese, then cover with the top half of the bun.
3. Grill the Sliders: Place the assembled sliders on the preheated griddle or skillet. Cook each side for about 2-3 minutes, pressing gently with a spatula, until the bread is golden brown and the cheese is fully melted.
Keep a close eye to prevent burning.
4. Serve: Once cooked, remove the sliders from the skillet, and let them cool slightly before serving. They’re best enjoyed warm, allowing the cheese to remain gooey and the flavors to meld together.
Extra Tips: To enhance the flavor, consider adding a splash of balsamic vinegar to the mushrooms while sautéing. This will add a slight sweetness and depth to the dish.
For an extra indulgent touch, use a combination of Swiss and Gruyere cheese. Also, make sure your griddle or skillet is adequately preheated before grilling the sliders to achieve that perfect crispy texture on the buns.
If serving at a party, keep the sliders warm in a low oven until ready to serve.
Pesto and Sun-Dried Tomato Sliders
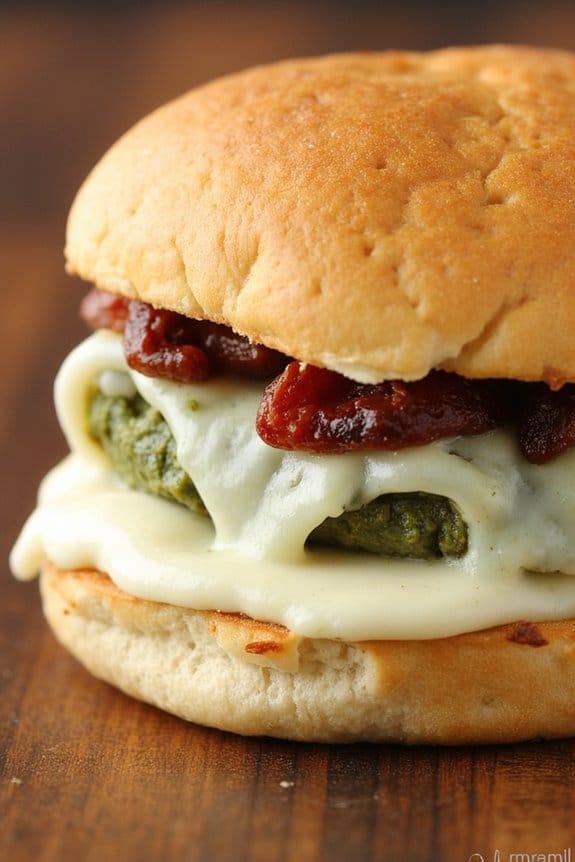
Grilled Cheese Sliders are a delightful twist on the classic grilled cheese sandwich, perfect for gatherings or as a comforting meal. The Pesto and Sun-Dried Tomato Sliders variant adds a burst of Mediterranean flavors, combining the creamy texture of melted cheese with the fresh taste of pesto and the rich, tangy notes of sun-dried tomatoes.
These sliders aren’t only delicious but also visually appealing, making them a great choice for parties or family meals. The beauty of these sliders is in their simplicity and versatility. The pesto brings a vibrant green color and a fresh, herby aroma, while the sun-dried tomatoes add a pleasant chewiness and depth of flavor.
The combination of these ingredients sandwiched between buttery, toasted slider buns creates a mouthwatering treat that can be enjoyed by both adults and children. Pair these sliders with a light salad or soup for a complete meal that’s certain to impress.
Ingredients for 4-6 servings:
- 12 slider buns
- 2 cups shredded mozzarella cheese
- 1/2 cup sun-dried tomatoes, chopped
- 1/3 cup prepared pesto
- 1/4 cup unsalted butter, softened
- Salt and pepper to taste
Cooking Instructions:
- Preheat the Oven: Start by preheating your oven to 350°F (175°C). This will guarantee that the sliders are evenly heated and the cheese melts perfectly.
- Prepare the Buns: Slice the slider buns in half horizontally. Spread a thin layer of softened butter on the cut sides of each bun. This will help give the sliders a nice, golden crust when baked.
- Assemble the Sliders: On the bottom half of each bun, spread a generous layer of pesto. Next, sprinkle an even layer of shredded mozzarella cheese over the pesto. Top the cheese with chopped sun-dried tomatoes. Season with a little salt and pepper for added flavor.
- Top and Prepare for Baking: Place the top halves of the buns over the assembled sliders. Arrange the sliders on a baking sheet lined with parchment paper or aluminum foil for easy cleanup.
- Bake the Sliders: Place the baking sheet in the preheated oven and bake for about 10-15 minutes, or until the cheese is melted and bubbly, and the tops of the buns are golden brown.
- Serve: Once baked, remove the sliders from the oven and let them cool for a minute or two. Serve warm and enjoy!
Extra Tips:
For an extra crispy texture, try toasting the buttered buns in a skillet over medium heat before assembling the sliders. This step will add an additional layer of flavor and crunch.
Additionally, feel free to experiment with different cheeses such as provolone or gouda for a unique twist. If you prefer a spicier option, consider adding a dash of red pepper flakes to the pesto.
Finally, these sliders are best enjoyed fresh out of the oven, but they can be reheated in the oven to maintain their crispness.
Bacon and Avocado Sliders
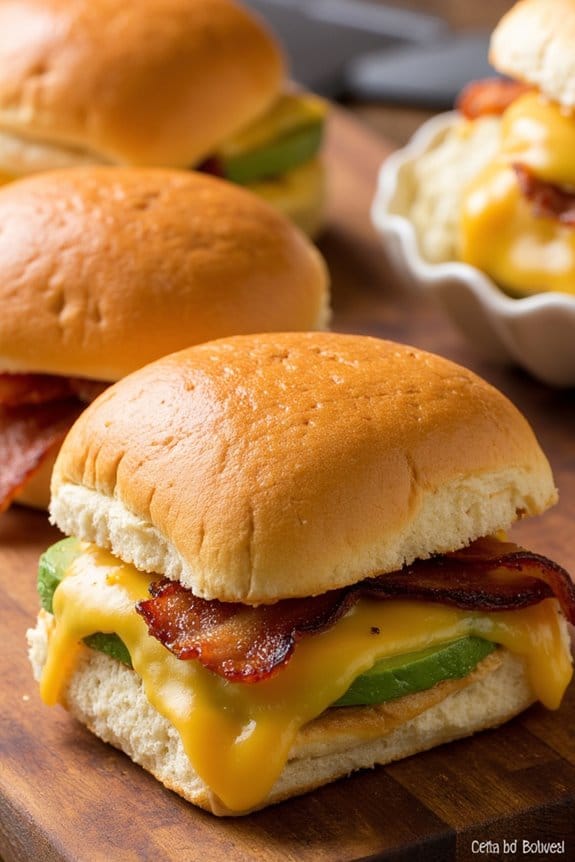
Grilled Cheese Sliders are a delightful twist on the classic sandwich, offering bite-sized portions perfect for any gathering or quick meal. The combination of crispy, buttery bread and the gooey, melted cheese is a match made in heaven.
With the addition of crispy bacon and creamy avocado, these sliders become an irresistible treat that satisfies both the young and old alike. Whether you’re hosting a weekend get-together or looking for a comforting snack, these sliders are bound to be a hit.
The Bacon and Avocado Sliders take the classic grilled cheese to new heights. The smoky, crispy bacon adds a layer of savory goodness, while the avocado provides a creamy texture that complements the melted cheese perfectly.
These sliders aren’t only delicious but also easy to prepare, making them an ideal choice for busy weeknights or casual gatherings. With just a few ingredients and a little time, you can create a dish that’s both comforting and gourmet.
Ingredients (Serves 4-6):
- 12 slider buns
- 12 slices of cheddar cheese
- 12 slices of cooked bacon
- 2 ripe avocados, sliced
- Butter, softened for spreading
- Salt and pepper to taste
Cooking Instructions:
- Prepare the Ingredients: Begin by pre-cooking the bacon until it’s crisp. While the bacon is cooking, slice the avocados and cheddar cheese, and set them aside. Preheat your grill or a large skillet over medium heat.
- Assemble the Sliders: Spread a thin layer of softened butter on the outside of each slider bun. On the inside, layer a slice of cheddar cheese, a slice of bacon, and a few slices of avocado. Add salt and pepper to taste. Top with the other half of the bun.
- Grill the Sliders: Place the assembled sliders onto the preheated grill or skillet. Cook for about 3-4 minutes on each side, or until the cheese is melted and the buns are golden brown and crispy. Be sure to press down gently with a spatula to guarantee even cooking and melting.
- Serve: Remove the sliders from the grill and allow them to cool slightly before serving. These sliders are best enjoyed warm, with the cheese still gooey and the avocado creamy.
Extra Tips: For the best results, use ripe avocados that offer a creamy texture without being overly mushy. If you’re cooking for a crowd, consider keeping the cooked sliders warm in an oven set to low heat until all are ready to serve.
Additionally, feel free to experiment with different types of cheese or add additional toppings such as sliced tomatoes or pickled jalapeños for extra flavor. Enjoy your sliders with a side of tomato soup for a classic pairing!
Philly Cheesesteak Grilled Cheese Sliders
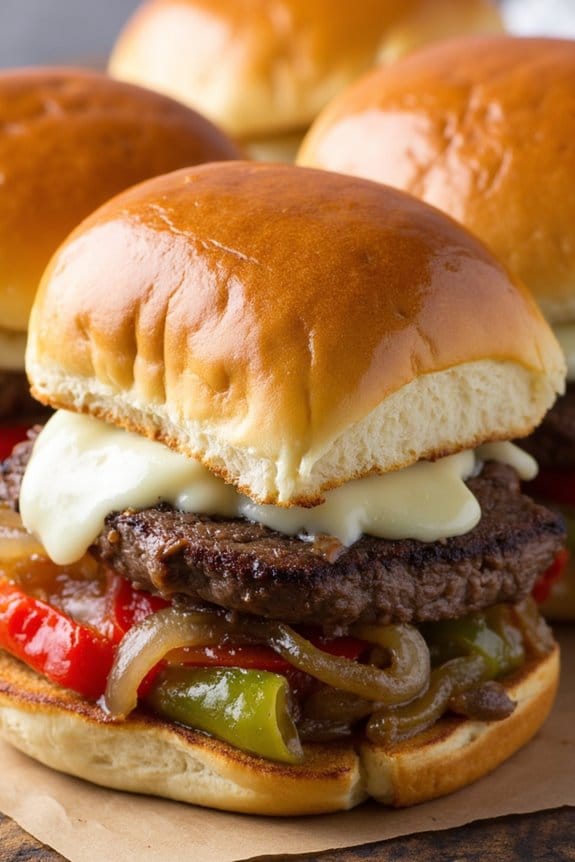
Philly Cheesesteak Grilled Cheese Sliders are a delicious twist on the classic grilled cheese sandwich, combining the savory flavors of a Philly cheesesteak with the comforting texture of melted cheese and crispy, buttery bread.
These sliders are perfect for a hearty lunch, a casual dinner, or as a crowd-pleasing appetizer for your next gathering. The combination of thinly sliced beef, sautéed onions and peppers, and gooey cheese tucked between slider buns creates a mouthwatering experience that’s bound to impress your family and friends.
This recipe is designed to serve 4-6 people, making it ideal for small parties or family meals. The key to achieving the perfect flavor profile is in the quality of the ingredients and the method of preparation. Using fresh vegetables, tender beef, and quality cheese guarantees that each bite is packed with flavor.
With a little preparation and attention to detail, you can create a dish that captures the essence of a Philly cheesesteak in a convenient slider form.
Ingredients (Serves 4-6):
- 1 pound ribeye steak, thinly sliced
- Salt and pepper to taste
- 2 tablespoons olive oil
- 1 medium onion, thinly sliced
- 1 green bell pepper, thinly sliced
- 1 red bell pepper, thinly sliced
- 12 slider buns
- 6 tablespoons unsalted butter, softened
- 12 slices provolone cheese
- 1 tablespoon Worcestershire sauce
Cooking Instructions:
- Prepare the Steak: Season the thinly sliced ribeye steak with salt and pepper. Heat 1 tablespoon of olive oil in a large skillet over medium-high heat. Add the steak slices and cook until browned and cooked through, about 3-4 minutes. Remove from skillet and set aside.
- Sauté the Vegetables: In the same skillet, add the remaining tablespoon of olive oil. Add the sliced onions and bell peppers, and cook until they’re soft and slightly caramelized, about 5-7 minutes. Stir in the Worcestershire sauce and cook for another minute. Remove from heat.
- Assemble the Sliders: Preheat the oven to 350°F (175°C). Slice the slider buns in half horizontally and place the bottom halves on a baking sheet. Spread a thin layer of softened butter on the inside of each bun. Place a slice of provolone cheese on the bottom half of each bun.
- Add Filling: Evenly distribute the cooked steak and vegetable mixture over the cheese slices. Top each with another slice of provolone cheese and place the top half of the buns over the filling.
- Bake the Sliders: Cover the sliders with aluminum foil and bake in the preheated oven for 10-12 minutes, or until the cheese has melted and the buns are slightly toasted.
- Serve: Remove from oven and allow to cool for a minute before serving. Cut into individual sliders and enjoy!
Extra Tips:
For the best flavor, verify that the ribeye steak is thinly sliced; this can be achieved by partially freezing the steak for about 30 minutes before slicing, making it easier to cut.
If you prefer a different type of cheese, feel free to substitute the provolone with Swiss or American cheese for a different taste. Additionally, these sliders can be prepared in advance; simply assemble them and refrigerate, then bake just before serving to save time during your event.
Enjoy your Philly Cheesesteak Grilled Cheese Sliders hot and fresh for the ultimate taste experience!
Vegan Avocado and Tomato Sliders

Grilled Cheese Sliders are a delightful twist on the classic comfort food, perfect for any gathering or casual meal. The Vegan Avocado and Tomato Sliders variation provides a plant-based option that doesn’t skimp on flavor or satisfaction.
These sliders are composed of creamy avocado, juicy tomatoes, and dairy-free cheese, all melted together between golden, buttery slices of mini bread. They aren’t only delicious but also easy to prepare, making them a great choice for a quick meal or a party appetizer.
The combination of avocado and tomato in these sliders complements the rich, melty cheese, creating a harmonious blend of textures and flavors. The creaminess of the avocado pairs beautifully with the slight acidity of the tomatoes, while the vegan cheese provides that quintessential gooeyness we all love in a grilled cheese.
Whether you’re hosting a vegan guest or simply looking to incorporate more plant-based meals into your diet, these Vegan Avocado and Tomato Sliders are sure to be a hit.
Ingredients for 4-6 servings:
- 12 slider buns or mini sandwich rolls
- 2 ripe avocados, sliced
- 3 large tomatoes, sliced
- 12 slices of vegan cheese
- 1/4 cup vegan butter or margarine
- 1 tablespoon olive oil
- Salt and pepper to taste
- Fresh basil leaves (optional)
Cooking Instructions:
- Prepare the Ingredients: Start by slicing the avocados and tomatoes into thin, even slices. Set them aside. If using fresh basil, rinse and pat dry the leaves.
- Preheat the Skillet: Heat a large skillet over medium heat and add the olive oil. Allow it to heat for about a minute.
- Assemble the Sliders: Open the slider buns and spread a small amount of vegan butter on the cut side of each half. Place a slice of vegan cheese on the bottom half, followed by slices of avocado and tomato. Season with salt and pepper, then add another slice of vegan cheese on top. Finish with the top half of the bun.
- Cook the Sliders: Place the assembled sliders in the preheated skillet. Cook them for 3-4 minutes on each side, pressing down gently with a spatula to guarantee even melting and browning. The buns should be golden brown and the cheese melted.
- Serve: Remove the sliders from the skillet and let them cool slightly before serving. Garnish with fresh basil leaves if desired.
Extra Tips:
For an even richer flavor, consider roasting the tomato slices in the oven with a sprinkle of salt and pepper before assembling the sliders. This will enhance their sweetness and add depth to the dish.
If you prefer a bit of a kick, add a pinch of red pepper flakes to the avocado before assembling. Additionally, for a crispier texture, consider using a panini press instead of a skillet.
Don’t rush the cooking process; allow the cheese to melt thoroughly for the best experience.
Sweet Nutella and Banana Sliders
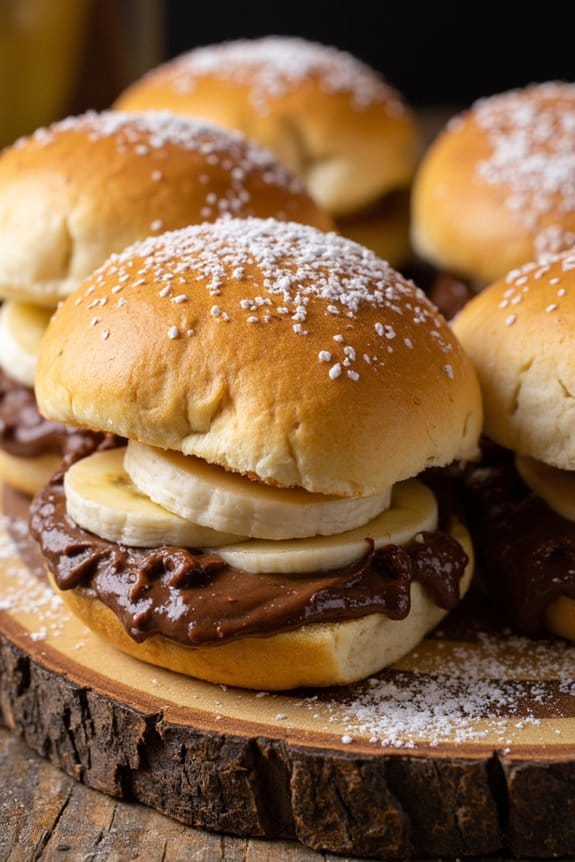
Grilled Cheese Sliders are a delightful twist on the classic grilled cheese sandwich, perfect for parties, snacks, or a sweet treat. Among the various versions of these sliders, the Sweet Nutella and Banana Sliders stand out for their irresistible combination of rich, chocolatey Nutella, and naturally sweet bananas, all sandwiched between crispy, buttery bread. This dish is easy to prepare and a sure crowd-pleaser, making it an ideal choice for gatherings or a cozy dessert option.
For this recipe, we’ll be making enough Sweet Nutella and Banana Sliders to serve 4-6 people. The preparation involves minimal ingredients and simple techniques, making it accessible even for novice cooks. The resulting sliders offer a perfect balance of sweetness and crunch that will leave everyone asking for more. With the right ingredients and a few simple steps, you’ll be on your way to creating a memorable treat that will delight both kids and adults alike.
Ingredients (Serving size: 4-6 people):
- 12 slider buns (preferably sweet or brioche)
- 1 cup of Nutella
- 3 ripe bananas, sliced
- 4 tablespoons of unsalted butter, softened
- 1 teaspoon of cinnamon (optional)
- 1 tablespoon of powdered sugar (optional, for garnish)
Cooking Instructions:
- Preparation of Ingredients:
- Begin by slicing each banana into thin, even slices. This will guarantee they fit nicely within the sliders and provide consistent flavor throughout each bite.
- Lay out the slider buns on a clean surface, and spread a generous amount of Nutella on the inside of both halves of each bun.
- Assembling the Sliders:
- Place several slices of banana onto the Nutella-covered side of the bottom slider bun. Confirm the banana slices are evenly spread to provide a uniform flavor profile in each slider.
- Sprinkle a light dusting of cinnamon over the bananas if desired, for an added layer of flavor.
- Place the top half of the slider bun over the bananas, pressing gently to secure the filling.
- Cooking the Sliders:
- Heat a large non-stick skillet or griddle over medium heat. While it heats, spread a thin layer of softened butter on the outside of each slider bun.
- Place the sliders in the skillet, ensuring they aren’t overcrowded. Cook for 2-3 minutes on each side, or until the bread is golden brown and crispy.
- Use a spatula to carefully flip the sliders halfway through cooking, ensuring both sides are evenly toasted.
- Serving:
- Once cooked, remove the sliders from the skillet and allow them to cool slightly. If desired, dust the tops with a little powdered sugar for a sweet finishing touch.
- Serve the Sweet Nutella and Banana Sliders warm, allowing guests to enjoy the gooey Nutella and warm banana filling.
Extra Tips:
When making Sweet Nutella and Banana Sliders, use ripe bananas for the best flavor and texture; overripe bananas may become too mushy during cooking. If you prefer a less sweet version, you can reduce the amount of Nutella or add a pinch of salt to the bananas.
For those who enjoy additional flavors, consider adding a few chopped nuts or a drizzle of honey inside the sliders before cooking. Finally, keep an eye on the sliders while they cook to prevent burning, adjusting the heat as necessary to guarantee an even golden brown exterior.