

As the sun sets and the grill heats up, there’s something magical about preparing dinner outdoors. Picture the delightful aroma of herb-marinated steak filling the air and the sight of citrus-glazed chicken sizzling to perfection. With balsamic vegetable skewers adding a burst of color, each recipe offers a unique flavor adventure. Whether you’re a seasoned griller or just starting out, these dishes are perfect for elevating your outdoor cooking game. Ready to explore these delicious recipes?
Grilled Herb-Marinated Steak to Savor
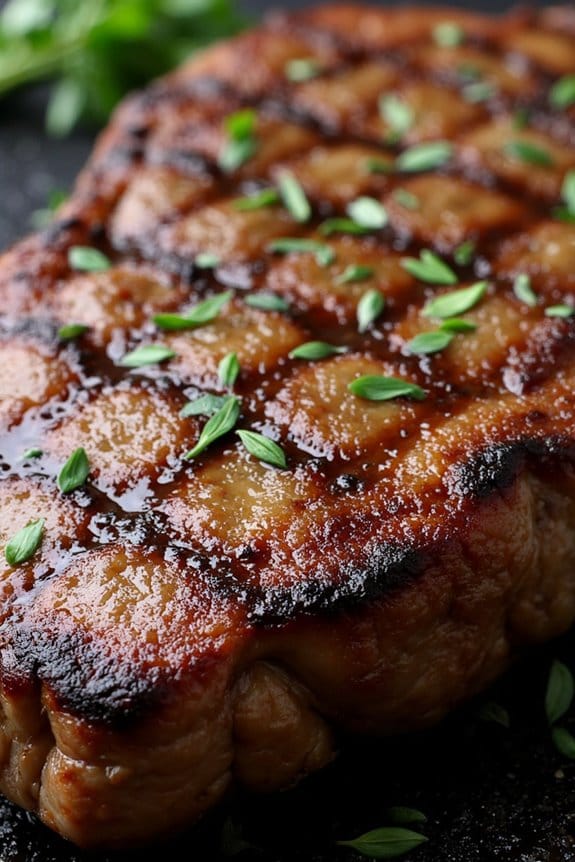
Indulge your taste buds with a Grilled Herb-Marinated Steak that promises to elevate your outdoor dining experience. This dish is perfect for steak lovers who enjoy a burst of flavor with every bite. The marinade is a blend of fresh herbs, garlic, and olive oil, infusing the steak with a delightful aroma and a rich, savory taste.
Whether you’re hosting a summer barbecue or a cozy dinner party, this recipe will surely impress your guests and leave them craving for more.
The beauty of this recipe lies in its simplicity and the quality of ingredients used. By marinating the steak for a few hours, you allow the flavors to deeply penetrate the meat, guaranteeing each bite is juicy and tender. The grilling process adds a lovely smoky char that complements the earthy herbs beautifully.
Serve this steak alongside your favorite sides for a complete meal that’s both satisfying and memorable.
Ingredients for 4-6 servings:
- 4 boneless ribeye steaks (about 1 to 1.5 inches thick)
- 1/2 cup olive oil
- 4 cloves garlic, minced
- 2 tablespoons fresh rosemary, chopped
- 2 tablespoons fresh thyme, chopped
- 2 tablespoons fresh parsley, chopped
- 1 tablespoon Dijon mustard
- 2 tablespoons balsamic vinegar
- Salt and pepper to taste
Cooking Instructions:
- Prepare the Marinade: In a medium-sized bowl, combine olive oil, minced garlic, chopped rosemary, thyme, parsley, Dijon mustard, and balsamic vinegar. Whisk the ingredients together until they form a smooth, well-blended marinade.
- Marinate the Steaks: Place the ribeye steaks in a large resealable plastic bag or a shallow dish. Pour the marinade over the steaks, guaranteeing they’re evenly coated. Seal the bag or cover the dish with plastic wrap and refrigerate for at least 2 hours, or overnight for more intense flavor.
- Preheat the Grill: About 30 minutes before grilling, take the steaks out of the refrigerator and let them come to room temperature. Preheat your grill to medium-high heat.
- Season the Steaks: Remove the steaks from the marinade and shake off any excess. Season both sides generously with salt and pepper.
- Grill the Steaks: Place the steaks on the preheated grill. Cook for about 4-5 minutes on each side for medium-rare, or adjust the time to your preferred doneness. Use a meat thermometer to guarantee the internal temperature reaches at least 135°F for medium-rare.
- Rest the Steaks: Once cooked to your liking, remove the steaks from the grill and let them rest on a cutting board for 5-10 minutes. This allows the juices to redistribute throughout the meat, guaranteeing a juicy steak.
- Serve and Enjoy: Slice the steaks against the grain and serve with your favorite sides. Enjoy the robust flavors of the herb-marinated steak.
Extra Tips:
For the best results, always choose high-quality steaks with good marbling, as this will enhance the flavor and tenderness of the dish.
When grilling, resist the urge to press down on the steaks, as this can cause the juices to escape, resulting in a drier steak. Additionally, adjusting the grilling time based on steak thickness and desired doneness is vital; using a meat thermometer can help achieve precision.
Citrus-Glazed Grilled Chicken Delight
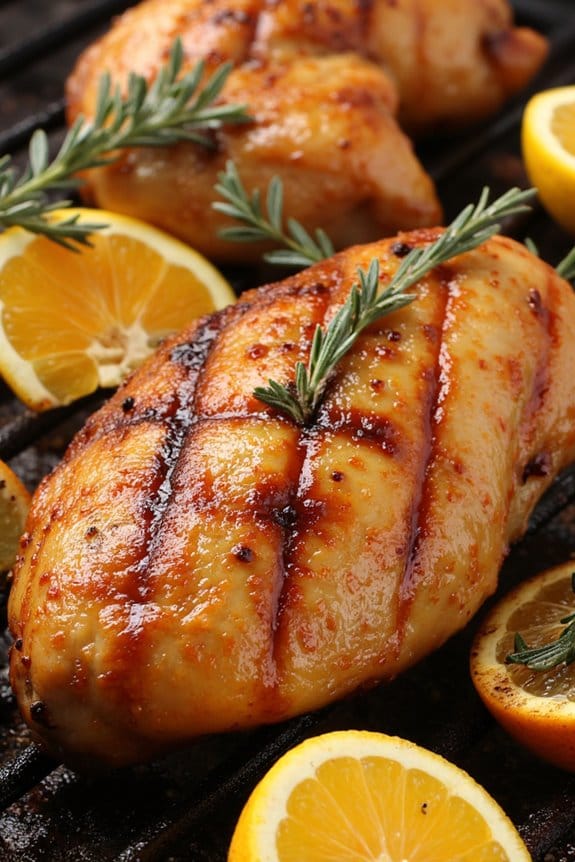
Citrus-Glazed Grilled Chicken Delight is a mouthwatering dish that perfectly combines the tangy flavors of citrus with the smoky taste of grilled chicken. Ideal for a family dinner or a small gathering, this recipe brings a revitalizing twist to the classic grilled chicken. The marinade, made from a blend of citrus juices and zest, infuses the chicken with a bright, zesty flavor that complements the charred notes from the grill.
As the chicken cooks, the glaze caramelizes, creating a deliciously sticky and flavorful coating that will have everyone coming back for seconds. This dish isn’t only delicious but also quite simple to prepare, making it perfect for both novice and experienced cooks. The key to achieving the best flavor is allowing the chicken to marinate long enough to absorb the citrus goodness.
Grilled to perfection, each bite of the Citrus-Glazed Grilled Chicken Delight is juicy and flavorful, offering a delightful taste experience. This recipe serves 4-6 people, making it ideal for a family meal or a small dinner party.
Ingredients (serving size: 4-6 people):
- 4 boneless, skinless chicken breasts
- 1/4 cup fresh orange juice
- 1/4 cup fresh lemon juice
- 2 tablespoons fresh lime juice
- Zest of 1 orange
- Zest of 1 lemon
- 2 tablespoons honey
- 3 tablespoons olive oil
- 2 cloves garlic, minced
- 1 teaspoon salt
- 1/2 teaspoon ground black pepper
- 1 tablespoon fresh thyme leaves
Cooking Instructions:
- Prepare the Marinade: In a medium bowl, combine the orange juice, lemon juice, lime juice, orange zest, lemon zest, honey, olive oil, minced garlic, salt, pepper, and fresh thyme leaves. Whisk together until well mixed.
- Marinate the Chicken: Place the chicken breasts in a large resealable plastic bag or a shallow dish. Pour the marinade over the chicken, ensuring each piece is well coated. Seal the bag or cover the dish with plastic wrap, and refrigerate for at least 2 hours, or overnight for maximum flavor.
- Preheat the Grill: About 15 minutes before you plan to cook, preheat your grill to medium-high heat. Oil the grates lightly to prevent the chicken from sticking.
- Grill the Chicken: Remove the chicken from the marinade, letting any excess drip off. Place the chicken on the preheated grill. Cook for 6-7 minutes on each side, or until the internal temperature reaches 165°F (75°C) and the chicken is no longer pink in the center.
- Glaze the Chicken: During the last few minutes of grilling, brush the chicken with the remaining marinade to enhance the glaze. Allow it to caramelize slightly, adding a rich flavor to the chicken.
- Rest and Serve: Once cooked, remove the chicken from the grill and let it rest for 5 minutes. This allows the juices to redistribute, ensuring each bite is juicy and flavorful. Serve the grilled chicken with your favorite sides, such as a fresh salad or roasted vegetables.
Extra Tips:
For the best results, make sure to marinate the chicken for at least 2 hours, which allows the citrus juices to tenderize the meat and infuse it with flavor. If you prefer a spicier kick, consider adding a pinch of red pepper flakes to the marinade.
Additionally, using a meat thermometer ensures that the chicken is cooked to the perfect temperature without overcooking. Finally, always let the chicken rest before slicing to maintain its juiciness.
Balsamic Grilled Vegetable Skewers
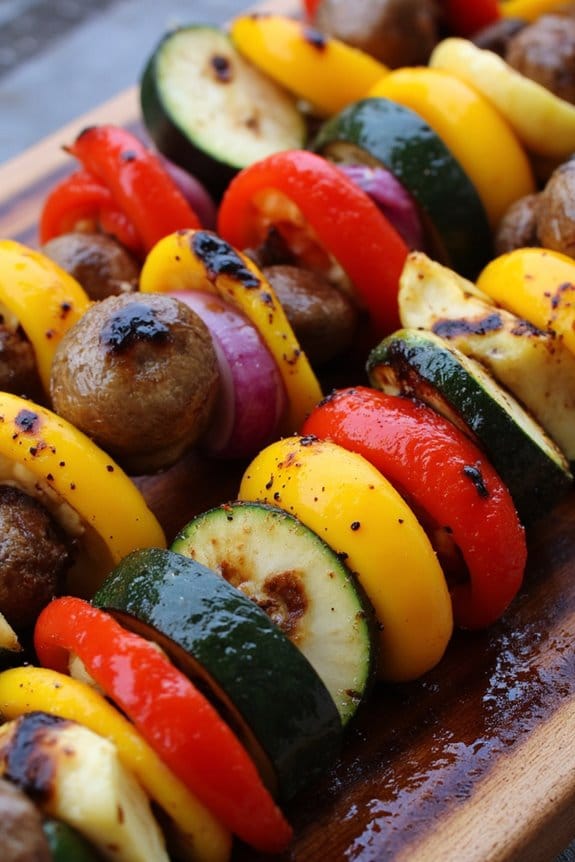
Balsamic Grilled Vegetable Skewers are a delightful way to enjoy a medley of fresh vegetables infused with the rich, tangy flavor of balsamic vinegar. Perfect for summer gatherings or as a healthy side dish, these skewers are easy to prepare and versatile enough to complement any grilled main course. The balsamic marinade enhances the natural sweetness of the vegetables, creating a savory treat that even the pickiest eaters will enjoy.
These skewers can be customized with your favorite vegetables, making them a great option for using up any produce you have on hand. The key is to select vegetables that grill well, such as bell peppers, zucchini, and mushrooms, which all absorb the flavors beautifully and develop a delicious char on the grill. This recipe serves 4-6 people, making it an excellent choice for a small gathering or family dinner.
Ingredients:
- 2 red bell peppers, cut into 1-inch pieces
- 2 yellow bell peppers, cut into 1-inch pieces
- 1 large zucchini, sliced into thick rounds
- 1 large red onion, cut into wedges
- 12-16 button mushrooms, cleaned
- 1/4 cup balsamic vinegar
- 1/4 cup olive oil
- 2 tablespoons honey
- 2 cloves garlic, minced
- Salt and pepper to taste
- 8-12 wooden skewers, soaked in water for 30 minutes
Cooking Instructions:
- Prepare the Skewers: Start by soaking the wooden skewers in water for at least 30 minutes. This step is essential to prevent them from burning on the grill.
- Make the Marinade: In a small bowl, whisk together the balsamic vinegar, olive oil, honey, minced garlic, salt, and pepper. This mixture will serve as both a marinade and a brushing sauce for the vegetables.
- Marinate the Vegetables: Place the cut vegetables in a large bowl and pour the marinade over them. Toss the vegetables until they’re evenly coated. Let them marinate for at least 15 minutes to absorb the flavors.
- Assemble the Skewers: Thread the marinated vegetables onto the soaked skewers, alternating between different types of vegetables for a colorful presentation.
- Preheat the Grill: Heat your grill to medium-high heat. Brush the grill grates with a little olive oil to prevent sticking.
- Grill the Skewers: Place the skewers on the grill and cook for about 10-15 minutes, turning occasionally and brushing with any remaining marinade. The vegetables should be tender and slightly charred.
- Serve: Once cooked, remove the skewers from the grill and let them cool slightly before serving. These skewers can be enjoyed hot off the grill or at room temperature.
Extra Tips: When selecting vegetables, make sure they’re cut uniformly to guarantee even cooking. If you prefer a stronger garlic flavor, you can add more minced garlic to the marinade. For those who enjoy a bit of heat, a pinch of red pepper flakes can be added to the marinade for an extra kick.
Additionally, if you have leftover skewers, they store well in the refrigerator and make a great addition to salads or sandwiches the next day.
Lemon Butter Grilled Salmon: A Must-Try
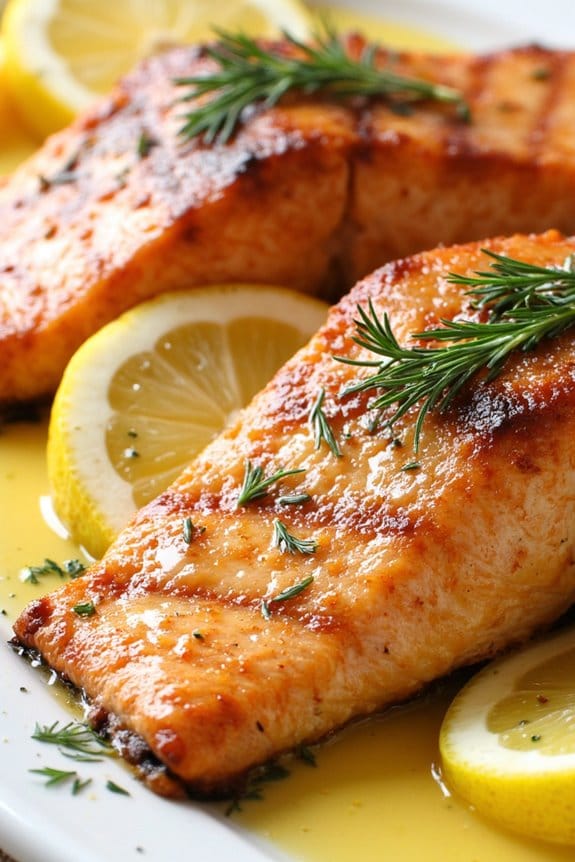
Grilling salmon with a lemon butter sauce is a simple yet elegant way to enjoy this flavorful fish. The tangy and zesty lemon complements the rich, buttery goodness that melts into the salmon as it cooks, creating a sensational taste experience. This recipe is perfect for a summer evening dinner or any occasion where you want to impress your guests with minimal effort.
The key to this dish is maintaining the delicate balance between the flavors and guaranteeing the salmon is grilled to perfection, resulting in a moist and tender meal.
This Lemon Butter Grilled Salmon recipe serves 4 to 6 people and can be prepared in under an hour, making it an excellent choice for a quick and delicious meal. With just a few ingredients, you can create a dish that looks and tastes like it came from a high-end restaurant.
Whether you’re a seasoned cook or a beginner, this recipe will guide you through the process of grilling salmon to achieve a crispy skin and juicy interior, enhanced by the delectable lemon butter sauce.
Ingredients:
- 4 to 6 salmon fillets (about 6 oz each)
- 1/4 cup unsalted butter
- 3 tablespoons fresh lemon juice
- 1 tablespoon lemon zest
- 2 cloves garlic, minced
- Salt and pepper to taste
- 1 tablespoon olive oil
- Fresh dill for garnish (optional)
- Lemon slices for garnish (optional)
Cooking Instructions:
- Prepare the Grill: Preheat your grill to medium-high heat, around 375-400°F. Make sure the grates are clean and lightly oiled to prevent the salmon from sticking.
- Make the Lemon Butter Sauce: In a small saucepan over low heat, melt the butter. Add the fresh lemon juice, lemon zest, and minced garlic. Stir until well combined, then remove from heat. Season with salt and pepper to taste.
- Prepare the Salmon: Pat the salmon fillets dry with paper towels. Drizzle olive oil over each fillet and season with salt and pepper on both sides.
- Grill the Salmon: Place the salmon fillets skin-side down on the preheated grill. Close the lid and let them cook for about 6-8 minutes. Carefully flip the fillets and cook for another 2-4 minutes until the salmon is opaque and flakes easily with a fork.
- Baste with Lemon Butter Sauce: During the last few minutes of grilling, generously brush the lemon butter sauce over the salmon fillets. Let the sauce seep into the fish for added flavor.
- Serve: Remove the salmon from the grill and transfer to a serving platter. Garnish with fresh dill and lemon slices if desired. Serve immediately with your favorite sides.
Extra Tips:
For the best results, always start with fresh, high-quality salmon. If you prefer a more intense lemon flavor, you can marinate the salmon in lemon juice for about 15 minutes before grilling.
Be cautious not to over-marinate as the acid in the lemon can begin to cook the salmon. Guarantee your grill is properly preheated to avoid sticking, and remember that cooking times may vary depending on the thickness of your salmon fillets.
Adjust the seasoning to your preference, and feel free to add other herbs like thyme or parsley for an extra layer of flavor. Enjoy your delicious Lemon Butter Grilled Salmon!
Grilled Shrimp Tacos With Lime Slaw
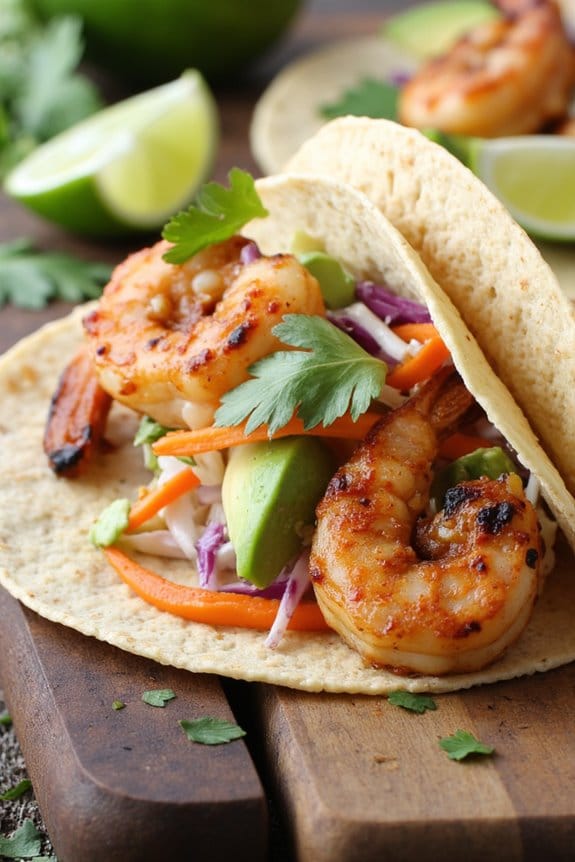
Grilled Shrimp Tacos with Lime Slaw is a vibrant and flavorful dish that’s perfect for any casual gathering or family dinner. This recipe combines the smoky, charred flavor of grilled shrimp with a zesty lime slaw, creating a delightful contrast of tastes and textures. The shrimp are marinated in a mix of spices and lime juice, which not only enhances their natural sweetness but also adds a pleasant tang.
The lime slaw, made with fresh cabbage, carrots, and a tangy lime dressing, adds crunch and a revitalizing balance to the rich, savory shrimp. Ideal for serving 4-6 people, these tacos are a fantastic option for those who love a mix of bold flavors. The warm, soft tortillas provide the perfect vessel for the juicy shrimp and crisp slaw, while optional toppings like avocado or cilantro can add an extra layer of flavor.
Whether you’re hosting a backyard BBQ or simply looking to spice up your weeknight dinners, these Grilled Shrimp Tacos with Lime Slaw are sure to impress.
Ingredients:
- 1 1/2 pounds of large shrimp, peeled and deveined
- 1 tablespoon olive oil
- 1 teaspoon chili powder
- 1 teaspoon paprika
- 1/2 teaspoon ground cumin
- 1/2 teaspoon garlic powder
- 1/4 teaspoon salt
- 1/4 teaspoon black pepper
- Juice of 2 limes, divided
- 1/4 cup mayonnaise
- 1 tablespoon honey
- 3 cups shredded green cabbage
- 1 cup shredded carrots
- 1/4 cup chopped fresh cilantro
- Corn or flour tortillas, warmed
- Optional toppings: sliced avocado, extra lime wedges, chopped cilantro
Instructions:
- Prepare the Shrimp: In a large bowl, combine olive oil, chili powder, paprika, cumin, garlic powder, salt, pepper, and the juice of 1 lime. Add the shrimp and toss until they’re evenly coated in the marinade. Let them marinate for at least 15 minutes while you prepare the slaw.
- Make the Lime Slaw: In a separate bowl, whisk together mayonnaise, honey, and the juice of the remaining lime until smooth. Add the shredded cabbage, carrots, and cilantro, tossing everything together until the vegetables are well coated in the dressing. Set aside.
- Grill the Shrimp: Preheat your grill to medium-high heat. Once hot, place the shrimp on the grill and cook for 2-3 minutes on each side, or until they turn pink and are cooked through. Remove them from the grill and let them rest for a minute.
- Assemble the Tacos: Lay out the warmed tortillas and evenly distribute the grilled shrimp among them. Top each taco with a generous portion of lime slaw. Add any optional toppings like sliced avocado or extra cilantro if desired.
- Serve and Enjoy: Serve the tacos immediately with extra lime wedges on the side for squeezing over the top.
Extra Tips:
To guarantee your shrimp are perfectly cooked, be sure not to overcook them; they should be opaque and pink when done. If using wooden skewers for grilling, make sure to soak them in water for at least 30 minutes prior to use to prevent burning.
For an added flavor boost, consider grilling the tortillas for a few seconds on each side to give them a slightly charred flavor. If you prefer a bit of heat, add a pinch of cayenne pepper to the shrimp marinade or drizzle some hot sauce over the finished tacos.
Pork Chops With Apple Chutney on the Grill
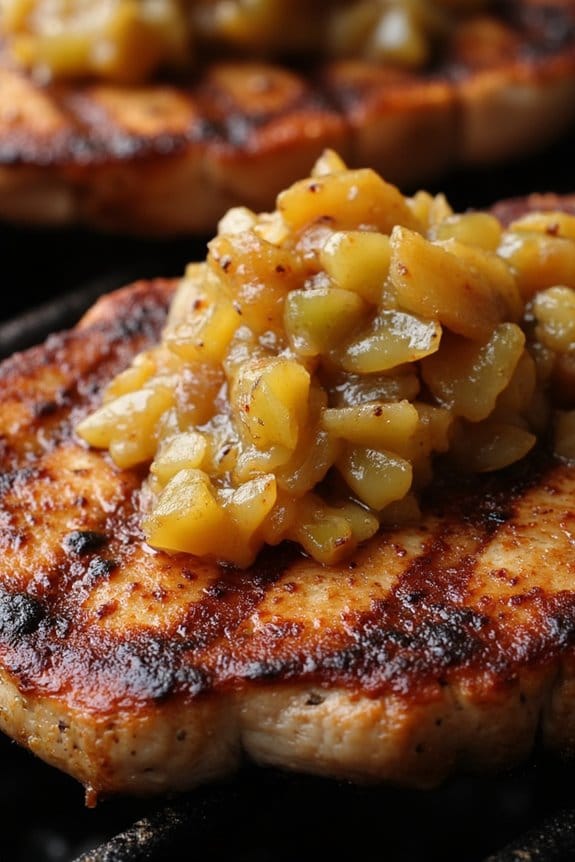
Pork Chops With Apple Chutney on the Grill is a delightful dish that combines the savory flavors of perfectly grilled pork chops with the tangy sweetness of apple chutney. This recipe is perfect for a summer evening barbecue or a cozy family dinner. The pork chops are seasoned to perfection and grilled until they’ve a beautiful charred exterior while remaining juicy and tender on the inside. The apple chutney, made with fresh apples and spices, adds a burst of flavor and a hint of sweetness that complements the rich taste of the pork.
This dish serves 4-6 people, making it ideal for a small gathering or a family meal. The combination of grilled pork and apple chutney isn’t only delicious but also aesthetically pleasing, with the vibrant colors of the chutney adding a pop of color to the dish. The preparation and cooking process is straightforward, allowing you to enjoy more time with your guests or family while the grill does most of the work.
Follow the steps below to create this mouthwatering dish that’s sure to impress everyone at the table.
Ingredients:
- 4-6 pork chops (bone-in or boneless)
- 2 tablespoons olive oil
- Salt and pepper to taste
- 2 teaspoons garlic powder
- 1 teaspoon paprika
- 1 teaspoon dried thyme
- 2 large apples, peeled and diced
- 1 small onion, finely chopped
- 1 tablespoon fresh ginger, grated
- 1/4 cup apple cider vinegar
- 1/4 cup brown sugar
- 1/2 teaspoon cinnamon
- 1/4 teaspoon ground cloves
- 1/4 teaspoon nutmeg
- 1/4 cup raisins
Cooking Instructions:
- Prepare the Pork Chops: Begin by patting the pork chops dry with paper towels. In a small bowl, mix olive oil, salt, pepper, garlic powder, paprika, and dried thyme. Rub this mixture evenly over both sides of the pork chops. Let them sit at room temperature for about 15-20 minutes to absorb the flavors.
- Preheat the Grill: While the pork chops are marinating, preheat your grill to medium-high heat. Make sure the grill grates are clean and lightly oiled to prevent sticking.
- Grill the Pork Chops: Place the pork chops on the grill and cook for about 4-5 minutes on each side, or until they reach an internal temperature of 145°F (63°C). Remove from the grill and let them rest for at least 5 minutes before serving.
- Prepare the Apple Chutney: In a medium saucepan over medium heat, combine the diced apples, chopped onion, grated ginger, apple cider vinegar, brown sugar, cinnamon, ground cloves, nutmeg, and raisins. Stir well and bring to a simmer.
- Simmer the Chutney: Reduce the heat to low and let the chutney simmer for about 20-25 minutes, stirring occasionally, until the apples are tender and the mixture has thickened to your desired consistency.
- Serve: Spoon the apple chutney over the grilled pork chops and serve immediately. Enjoy this dish with your favorite sides, such as roasted vegetables or a fresh salad.
Extra Tips:
For the best results, choose pork chops that are at least 1 inch thick to guarantee they remain juicy during grilling. If using an outdoor grill, a meat thermometer is a handy tool to confirm the pork is cooked to the right temperature.
If you prefer a bit more sweetness in your chutney, you can add an extra tablespoon of brown sugar. Additionally, allowing the chutney to cool slightly before serving can help the flavors meld together beautifully.
Enjoy your Pork Chops With Apple Chutney on the Grill with a chilled glass of white wine or a revitalizing iced tea for the perfect dining experience.
Fresh Basil and Tomato Grilled Pizza

Fresh Basil and Tomato Grilled Pizza is a delightful dish that combines the smoky flavors of grilled pizza dough with the fresh, vibrant taste of basil and ripe tomatoes. This recipe is perfect for summer evenings when you want to enjoy a light, yet satisfying meal outdoors. The key to this recipe is using fresh ingredients and allowing the natural flavors to shine through, making it an exceptional choice for a casual dinner with friends or family.
Grilling pizza might sound intimidating, but it’s actually a straightforward process that yields a deliciously crispy crust. The smoky flavor from the grill adds a unique depth to the pizza that you can’t get from an oven. Fresh basil and tomato grilled pizza isn’t only delicious but also visually appealing with its bright green basil leaves and red tomato slices. This recipe serves 4-6 people, making it a great option for gatherings or a family meal.
Ingredients (serves 4-6):
- 1 pound pizza dough
- 1/4 cup olive oil
- 2 cloves garlic, minced
- 4 large tomatoes, thinly sliced
- 2 cups fresh basil leaves
- 2 cups mozzarella cheese, shredded
- 1/2 cup parmesan cheese, grated
- Salt and pepper to taste
- Cornmeal or flour for dusting
Step-by-Step Cooking Instructions:
- Prepare the Dough: Begin by allowing your pizza dough to come to room temperature, which makes it easier to stretch. Dust a clean surface with cornmeal or flour, then roll out the dough into a thin, even circle or rectangle, about 12-14 inches in diameter.
- Preheat the Grill: Heat your grill to medium-high. If using a charcoal grill, make certain the coals are evenly distributed for consistent heat. Brush the grill grates lightly with oil to prevent sticking.
- Prepare the Toppings: In a small bowl, mix the olive oil and minced garlic. Brush this mixture over the rolled-out dough. Arrange the tomato slices evenly over the dough, leaving a small border for the crust. Sprinkle mozzarella and parmesan cheeses over the tomatoes, and season with salt and pepper.
- Grill the Pizza: Carefully transfer the pizza onto the grill. Close the lid and cook for about 5-7 minutes, or until the crust begins to crisp and the cheese is melted and bubbly. Check the bottom of the crust occasionally to avoid burning.
- Add the Basil: Once the pizza is cooked, use a pizza peel or large spatula to remove it from the grill. Immediately scatter the fresh basil leaves over the hot pizza, allowing them to wilt slightly.
- Serve and Enjoy: Let the pizza cool for a few minutes before slicing. Serve warm and enjoy the fresh, smoky flavors that make this pizza a summer favorite.
Extra Tips: For the best results, use fresh, high-quality ingredients, especially the basil and tomatoes. If you prefer a spicier kick, add a sprinkle of red pepper flakes before serving. You can also experiment with different cheeses, such as goat cheese or feta, to add a tangy flavor. If you’re using store-bought dough, let it rest outside of the refrigerator for at least 30 minutes to make it easier to work with. Finally, keep a close eye on the pizza while it’s on the grill to prevent the crust from burning.
Grilled Lamb Chops With Rosemary Flavor
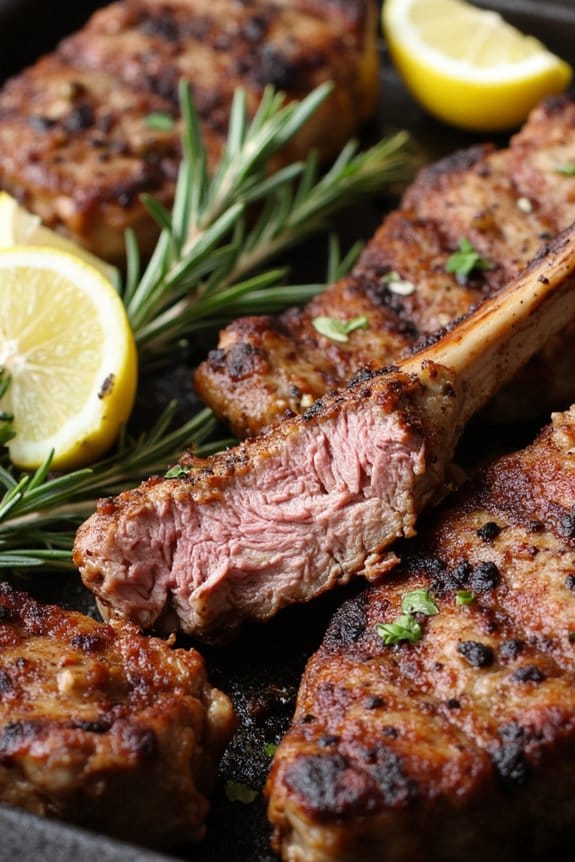
Grilled Lamb Chops With Rosemary Flavor is a delightful dish perfect for a special dinner or a weekend barbecue. The tender lamb chops are infused with the aromatic flavors of fresh rosemary, garlic, and lemon, making it a mouth-watering experience that tantalizes the taste buds.
Whether you’re a seasoned chef or a novice in the kitchen, this recipe is straightforward, allowing the natural flavors of the lamb to shine through with just a few simple ingredients.
The key to this dish is marinating the lamb chops long enough for the flavors to penetrate the meat, resulting in juicy, flavorful chops that are grilled to perfection. The rosemary and garlic provide a robust, earthy aroma, while the lemon adds a bright, zesty note that balances the richness of the lamb. This dish serves 4-6 people, making it ideal for a small gathering or family meal.
Ingredients:
- 8 lamb chops, about 1-inch thick
- 3 tablespoons olive oil
- 3 cloves garlic, minced
- 2 tablespoons fresh rosemary, chopped
- 1 teaspoon salt
- 1/2 teaspoon black pepper
- Juice of 1 lemon
- Lemon wedges, for serving (optional)
Cooking Instructions:
- Prepare the Marinade: In a small bowl, combine the olive oil, minced garlic, chopped rosemary, salt, black pepper, and lemon juice. Mix well to guarantee that all the ingredients are fully integrated.
- Marinate the Lamb Chops: Place the lamb chops in a shallow dish or a resealable plastic bag. Pour the marinade over the lamb chops, making certain they’re well coated on all sides. Cover the dish or seal the bag, and refrigerate for at least 1 hour, or overnight for more intense flavor.
- Preheat the Grill: When ready to cook, preheat your grill to medium-high heat. If using a charcoal grill, allow the coals to become ashy gray before grilling.
- Grill the Lamb Chops: Remove the lamb chops from the marinade and shake off excess. Place the chops on the grill and cook for about 4-5 minutes on each side for medium-rare, or until they reach your desired level of doneness. Use a meat thermometer to check for an internal temperature of 145°F for medium-rare.
- Rest and Serve: Once cooked to your liking, remove the lamb chops from the grill and let them rest for 5 minutes. This allows the juices to redistribute throughout the meat. Serve with lemon wedges for an extra burst of citrus flavor, if desired.
Extra Tips:
When grilling lamb chops, it’s important to preheat the grill properly to guarantee a nice sear on the outside while keeping the inside juicy and tender.
If you prefer a smokier flavor, you can add wood chips to your grill. Always let the lamb chops rest after grilling to keep them juicy and flavorful. Pair this dish with a side of grilled vegetables or a fresh salad for a complete meal that highlights the flavors of the grilled lamb.
Garlic-Infused Grilled Portobello Mushrooms
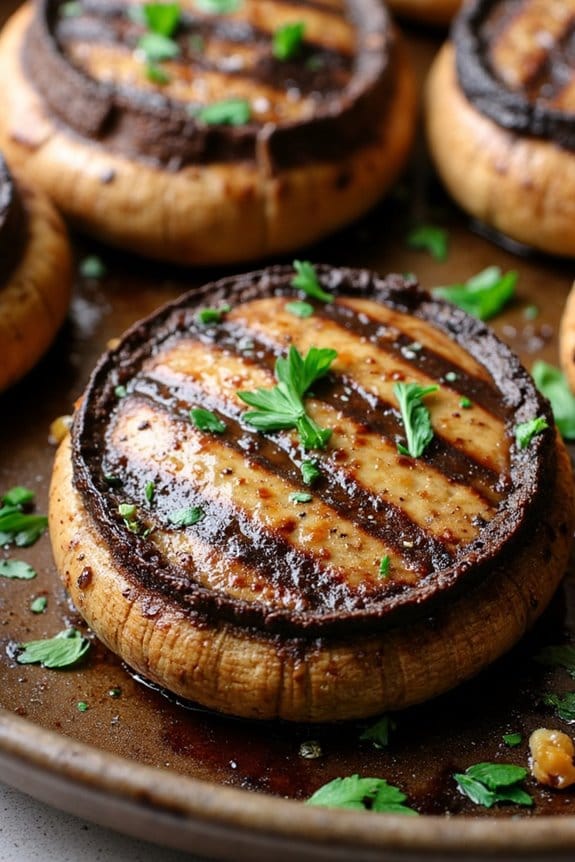
Garlic-Infused Grilled Portobello Mushrooms offer a delicious vegetarian option that’s both hearty and flavorful. These mushrooms are large, meaty, and perfect for grilling, making them a great choice for a main dish or as a side to complement any meal. The garlic infusion adds a rich, aromatic depth to the mushrooms, which enhances their natural umami flavor.
When grilled, the mushrooms develop a smoky char on the outside while staying juicy and tender on the inside, making them a delightful treat for any dinner gathering. This recipe is perfect for a serving size of 4-6 people, guaranteeing that everyone can enjoy this savory dish.
The preparation is straightforward, requiring minimal ingredients that work together to highlight the star of the dish: the portobello mushrooms. With just a few simple steps, you can create a dish that’s both impressive and satisfying, whether you’re catering to vegetarians or looking for a unique addition to your grilling repertoire.
Ingredients for 4-6 servings:
- 6 large portobello mushroom caps
- 1/4 cup olive oil
- 4 cloves garlic, minced
- 2 tablespoons balsamic vinegar
- 1 teaspoon dried thyme
- Salt and freshly ground black pepper to taste
- 2 tablespoons chopped fresh parsley (optional for garnish)
Cooking Instructions:
- Prepare the Marinade: In a small bowl, combine the olive oil, minced garlic, balsamic vinegar, dried thyme, salt, and pepper. Whisk together until well blended. This flavorful marinade will infuse the mushrooms with a rich, garlicky taste.
- Marinate the Mushrooms: Place the portobello mushroom caps in a large resealable plastic bag or a shallow dish. Pour the marinade over the mushrooms, guaranteeing each cap is evenly coated. Seal the bag or cover the dish and refrigerate for at least 30 minutes, allowing the flavors to penetrate the mushrooms.
- Preheat the Grill: While the mushrooms marinate, preheat your grill to medium-high heat. Guarantee the grill grates are clean and lightly oiled to prevent sticking.
- Grill the Mushrooms: Once marinated, remove the mushrooms from the bag or dish and place them on the preheated grill, gill side up. Grill for about 4-5 minutes per side, or until the mushrooms are tender and have developed a nice char. Be careful not to overcook them, as they can become too soft.
- Serve and Garnish: Remove the grilled mushrooms from the grill and transfer them to a serving platter. Optionally, sprinkle with fresh parsley for a pop of color and added freshness. Serve immediately while they’re warm and aromatic.
Extra Tips:
When selecting portobello mushrooms, look for caps that are firm and smooth, without any spots or blemishes. If the mushrooms have large stems, you may want to remove them before marinating to guarantee even cooking.
If you’re using a charcoal grill, let the coals burn until they’re covered with white ash to achieve the best heat. Remember to let the mushrooms rest for a few minutes after grilling to allow the juices to redistribute. For an added layer of flavor, consider adding a sprinkle of Parmesan cheese just before serving.
Enjoy your Garlic-Infused Grilled Portobello Mushrooms as a satisfying and healthy addition to your meal.
Spicy Grilled Sausages With Bell Peppers
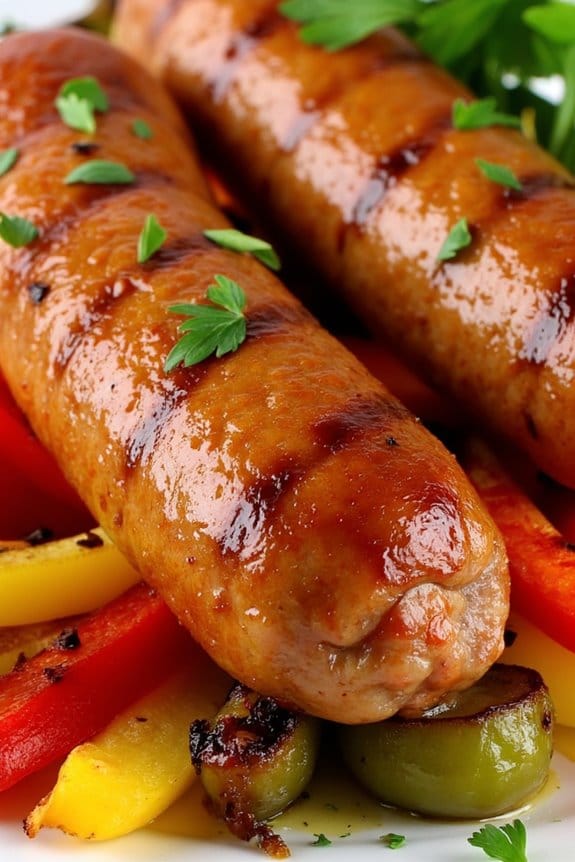
Spicy Grilled Sausages With Bell Peppers is a delightful dish that combines the smoky flavor of grilled sausages with the vibrant taste of bell peppers. This dish is perfect for a summer barbecue or a cozy dinner gathering.
The spicy kick from the sausages complements the sweetness of the bell peppers, creating a balanced and flavorful meal that’s sure to impress your family and friends.
The preparation is straightforward and requires minimal ingredients, making it an excellent choice for both novice and experienced cooks. The key to this dish lies in the quality of the sausages and the freshness of the bell peppers.
With a few simple steps, you can create a mouthwatering dish that’s both visually appealing and delicious. Serve this dish with a side of crusty bread or a fresh salad for a complete meal.
Ingredients (Serves 4-6):
- 6 spicy sausages
- 3 large bell peppers (red, yellow, and green)
- 2 tablespoons olive oil
- 1 teaspoon smoked paprika
- 1 teaspoon garlic powder
- Salt and pepper to taste
- Fresh parsley for garnish
Cooking Instructions:
- Prepare the Grill: Preheat your grill to medium-high heat. If you’re using a charcoal grill, wait until the coals are covered with a light layer of ash.
- Prepare the Vegetables: Wash the bell peppers and cut them into thick strips, removing the seeds and core. Place them in a large bowl.
- Season the Vegetables: Add olive oil, smoked paprika, garlic powder, salt, and pepper to the bowl with the bell peppers. Toss the peppers until they’re evenly coated with the seasoning.
- Grill the Sausages: Place the sausages on the preheated grill. Cook them for about 10-12 minutes, turning occasionally, until they’re browned and cooked through.
- Grill the Bell Peppers: Add the seasoned bell pepper strips to the grill. Cook them for about 5-7 minutes, turning occasionally, until they’re slightly charred and tender.
- Combine and Serve: Once the sausages and peppers are cooked, arrange them on a serving platter. Garnish with freshly chopped parsley. Serve immediately.
Extra Tips:
For added flavor, consider marinating the sausages in a mixture of olive oil, garlic, and your favorite spices for a few hours before grilling.
If you prefer a milder dish, you can use sweet Italian sausages instead. For an extra touch, add sliced onions to the grill along with the bell peppers.
Finally, if you’re using wooden skewers to secure the sausages and peppers, soak them in water for 30 minutes before grilling to prevent them from burning.
Grilled Pineapple: A Sweet Finale
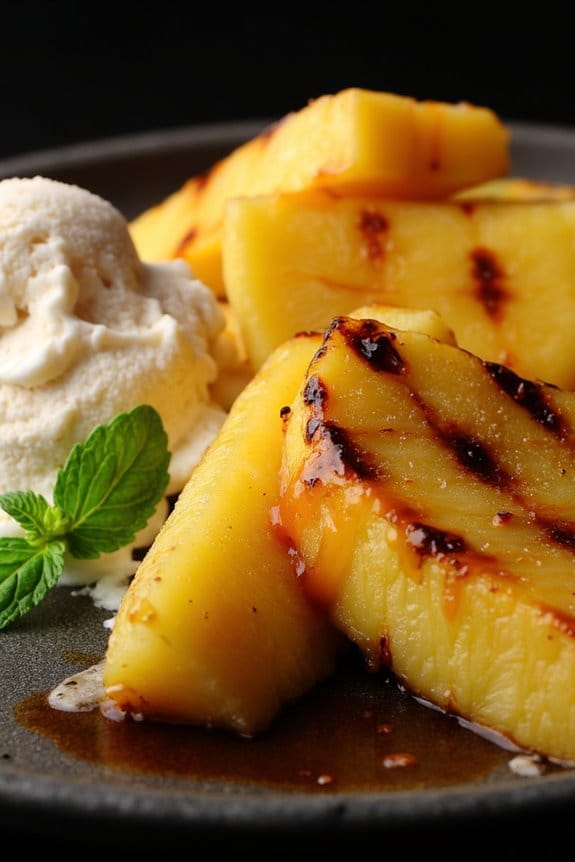
Grilled pineapple is a delightful and simple dessert that perfectly complements the flavors of a summer barbecue. This sweet and juicy dish isn’t only a revitalizing way to end a meal but also incredibly easy to prepare. The natural sugars in the pineapple caramelize beautifully on the grill, creating a golden-brown exterior that enhances the fruit’s natural sweetness.
Whether you’re hosting a large gathering or a small family dinner, grilled pineapple is sure to be a hit with everyone.
The key to this recipe is selecting a ripe pineapple, which will guarantee maximum sweetness and juiciness. When grilling, the addition of a light glaze made from honey, cinnamon, and a splash of lime juice elevates the flavors, adding a hint of spice and tang. This dish can be served on its own as a simple dessert or paired with a scoop of vanilla ice cream for a more indulgent finish.
Ingredients (Serves 4-6):
- 1 ripe pineapple
- 2 tablespoons honey
- 1 teaspoon ground cinnamon
- 1 tablespoon fresh lime juice
- Vanilla ice cream (optional, for serving)
Cooking Instructions:
- Prepare the Pineapple: Start by cutting off the top and bottom of the pineapple. Stand the pineapple upright and slice off the skin, making sure to remove all the eyes. Cut the pineapple into rings or long spears, depending on your preference. Remove the core if desired.
- Make the Glaze: In a small bowl, combine the honey, ground cinnamon, and fresh lime juice. Mix well until the ingredients are fully incorporated.
- Preheat the Grill: Heat your grill to medium-high. Make sure the grates are clean and lightly oiled to prevent the pineapple from sticking.
- Grill the Pineapple: Brush each pineapple piece with the honey-lime glaze on both sides. Place the pineapple pieces on the grill. Cook for 3-4 minutes on each side, or until grill marks appear and the pineapple is heated through.
- Serve: Remove the grilled pineapple from the grill and let them cool slightly. Serve them warm, either on their own or with a scoop of vanilla ice cream for an extra treat.
Extra Tips:
For best results, choose a pineapple that’s ripe and fragrant, as this will provide the best flavor. If you’re in a hurry, you can use canned pineapple rings, but fresh pineapple will yield the best texture and taste.
When grilling, keep an eye on the pineapple to prevent it from burning; the natural sugars can cause it to caramelize quickly. You can also experiment by adding a pinch of cayenne pepper to the glaze for a bit of heat or garnish with fresh mint for a revitalizing touch.