

Grilling is my favorite way to keep dinners stress-free. Picture yourself enjoying juicy grilled chicken or savoring a perfectly marinated steak. Add some vibrant veggie skewers or deliciously grilled salmon, and you have a meal to remember. From simple shrimp tacos to mouthwatering BBQ ribs, each recipe is a breeze to prepare and packed with flavor. Ready to explore more grilling ideas?
Quick Grilled Chicken Breasts For Dinner
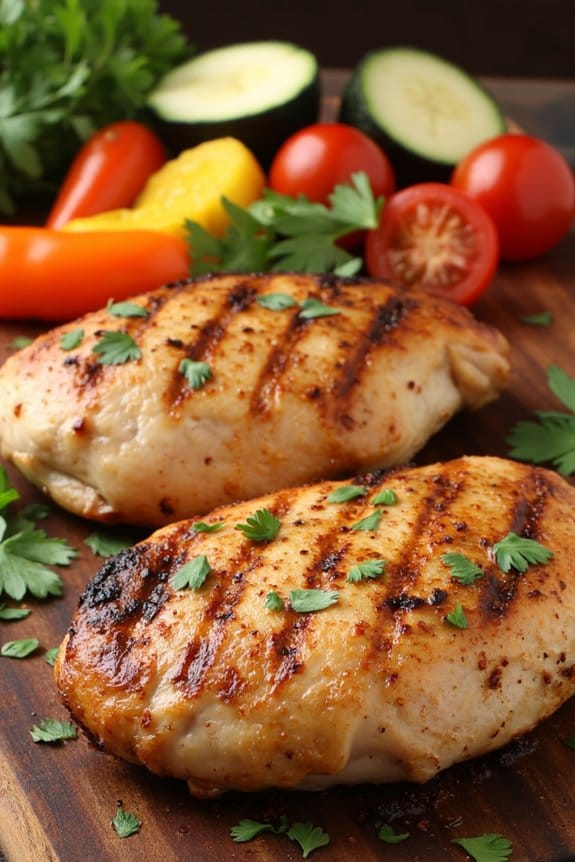
Grilling chicken breasts is a quick and healthy way to prepare a delicious dinner for your family or friends. This recipe for Quick Grilled Chicken Breasts is perfect for those busy weeknights when you want something that’s both nutritious and satisfying without spending hours in the kitchen. With just a few simple ingredients and a hot grill, you can have a meal ready in under 30 minutes that everyone will love.
The key to this recipe is in the marinade; it not only adds flavor but also helps keep the chicken juicy during the grilling process. Whether you’re planning a casual family dinner or a small gathering, these grilled chicken breasts are sure to be a hit. Pair them with a fresh salad or your favorite grilled veggies for a complete meal that’s both wholesome and tasty.
Ingredients (serves 4-6):
- 4-6 boneless, skinless chicken breasts
- 1/4 cup olive oil
- 3 tablespoons lemon juice
- 2 cloves garlic, minced
- 1 teaspoon dried oregano
- 1 teaspoon salt
- 1/2 teaspoon black pepper
- 1 teaspoon smoked paprika
Instructions:
- Prepare the Marinade: In a medium-sized bowl, whisk together the olive oil, lemon juice, minced garlic, dried oregano, salt, black pepper, and smoked paprika. This will create a flavorful marinade that enhances the taste of the chicken.
- Marinate the Chicken: Place the chicken breasts in a large resealable plastic bag or a shallow dish. Pour the marinade over the chicken, guaranteeing each piece is well coated. Seal the bag or cover the dish with plastic wrap. Let the chicken marinate in the refrigerator for at least 30 minutes, or up to 2 hours for deeper flavor.
- Preheat the Grill: Preheat your grill to medium-high heat. If using a charcoal grill, prepare the coals until they’re evenly ashed over. For a gas grill, preheat for about 10 minutes with the lid closed.
- Grill the Chicken: Remove the chicken breasts from the marinade and place them onto the grill. Discard any remaining marinade. Grill the chicken for about 6-7 minutes per side, or until the internal temperature reaches 165°F (75°C) and the juices run clear.
- Rest and Serve: Once cooked, remove the chicken from the grill and let it rest on a plate covered with foil for about 5 minutes. This resting period allows the juices to redistribute, keeping the chicken tender and juicy. Serve with your choice of sides.
Extra Tips:
To guarantee even cooking, pound the chicken breasts to an even thickness before marinating. This helps them cook more uniformly and prevents drying out. If you prefer a smokier flavor, consider adding wood chips to your grill. Always use a meat thermometer to check for doneness to avoid overcooking. For additional flavor, try adding fresh herbs like rosemary or thyme to the marinade. Enjoy your quick and delicious grilled chicken dinner!
Herb-Marinated Grilled Steak
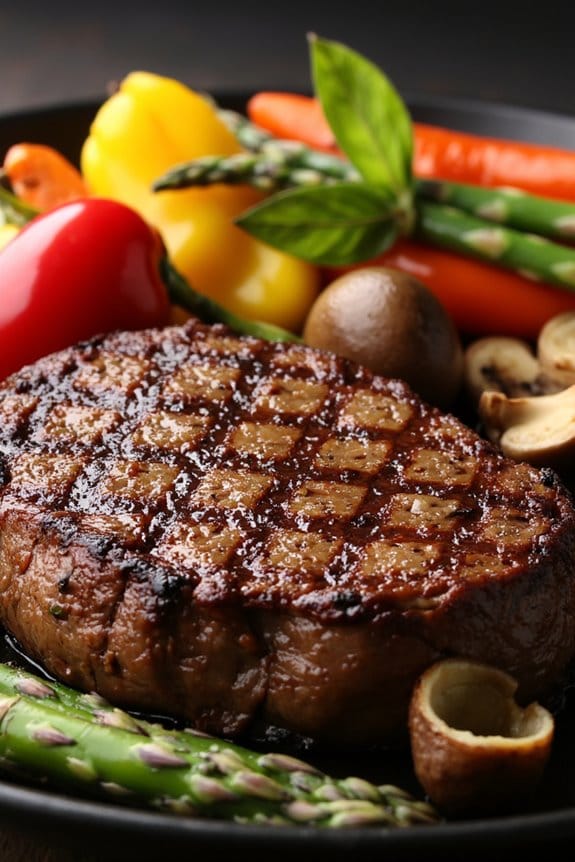
Elevate your summer dinners with the robust flavors of Herb-Marinated Grilled Steak. This dish combines the rich, hearty taste of a perfectly grilled steak with the aromatic and fresh essence of herbs. The marination process infuses the meat with a blend of herbs and spices, guaranteeing every bite is succulent and flavorful.
Whether you’re hosting a barbecue or enjoying a quiet dinner at home, this steak is sure to impress. The key to this dish is allowing the steak to marinate for several hours, or even overnight, to let the flavors fully penetrate the meat. Once grilled to perfection, the steak offers a mouthwatering taste experience that’s both simple and sophisticated.
Serve it alongside your favorite sides like grilled vegetables, a fresh salad, or a classic baked potato for a complete meal that satisfies every palate.
Ingredients (Serves 4-6):
- 2 pounds of ribeye or sirloin steak
- 1/4 cup olive oil
- 3 tablespoons balsamic vinegar
- 3 cloves garlic, minced
- 1 tablespoon fresh rosemary, chopped
- 1 tablespoon fresh thyme, chopped
- 1 tablespoon fresh parsley, chopped
- 1 teaspoon salt
- 1/2 teaspoon freshly ground black pepper
Cooking Instructions:
- Prepare the Marinade: In a medium bowl, combine olive oil, balsamic vinegar, minced garlic, rosemary, thyme, parsley, salt, and black pepper. Whisk the ingredients together until they’re well mixed.
- Marinate the Steak: Place the steak in a large resealable plastic bag or a shallow dish. Pour the marinade over the steak, making sure that it’s evenly coated. Seal the bag or cover the dish with plastic wrap and refrigerate for at least 4 hours, preferably overnight, to allow the flavors to penetrate the meat.
- Preheat the Grill: About 30 minutes before grilling, remove the steak from the refrigerator to bring it to room temperature. Preheat your grill to medium-high heat.
- Grill the Steak: Once the grill is hot, place the steak directly on the grates. Grill for 4-5 minutes on each side for medium-rare, or adjust the time based on your preferred level of doneness. Use a meat thermometer to verify accuracy; the internal temperature should reach 130°F for medium-rare.
- Rest the Steak: Remove the steak from the grill and let it rest on a cutting board for about 5-10 minutes. This allows the juices to redistribute, resulting in a more tender and juicy steak.
- Serve: Slice the steak against the grain into thick strips and serve immediately with your choice of sides.
Extra Tips:
For the best results, choose steaks that are at least 1 inch thick to guarantee they remain juicy after grilling. Avoid over-flipping the steak on the grill; turning it just once helps achieve a perfect sear.
If fresh herbs aren’t available, dried herbs can be used but reduce the quantity by a third, as dried herbs are more concentrated in flavor. Finally, always rest your steak after grilling to keep it juicy and flavorful.
Flavorful Grilled Veggie Skewers
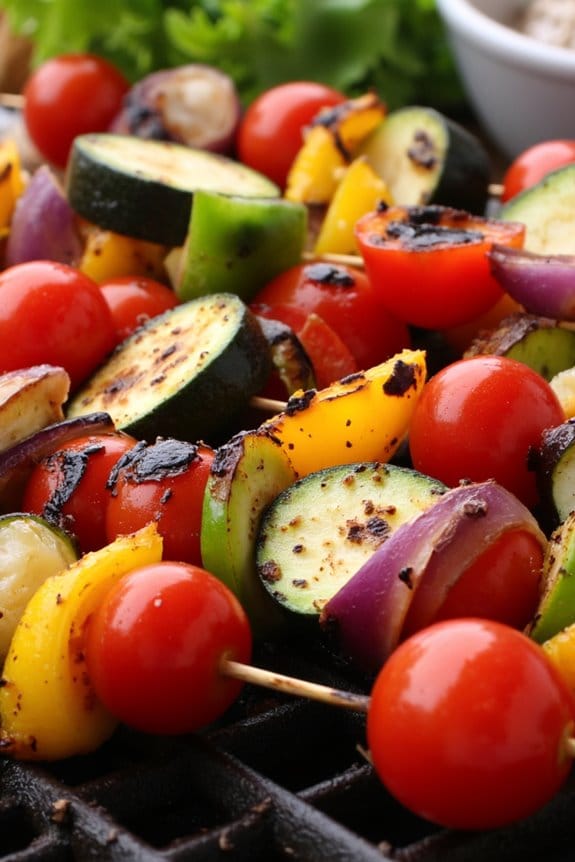
Grilled veggie skewers are a perfect addition to any summer dinner menu, offering a burst of color, flavor, and nutrition. This dish not only looks appealing but also brings out the natural sweetness and smokiness of fresh vegetables. By marinating the veggies in a simple yet flavorful mix of herbs and spices, you can enhance their taste and make them the star of your grilling night.
These skewers are a versatile side dish or can stand alone as a main course for a light and healthy meal. Incorporating a variety of vegetables guarantees a range of textures and flavors with every bite. To prepare these skewers, choose your favorite seasonal vegetables such as bell peppers, zucchini, cherry tomatoes, and red onions.
The combination isn’t only visually stunning but also provides a delightful mix of tastes. Grilling these skewers brings out the natural sugars in the vegetables, creating a caramelized crust that pairs beautifully with the savory marinade. Perfect for outdoor gatherings or a quick weeknight dinner, these skewers are sure to impress.
Ingredients for 4-6 servings:
- 2 large bell peppers (any color), cut into 1-inch pieces
- 2 medium zucchinis, sliced into rounds
- 1 pint cherry tomatoes
- 1 large red onion, cut into wedges
- 1/4 cup olive oil
- 3 tablespoons balsamic vinegar
- 2 cloves garlic, minced
- 1 teaspoon dried oregano
- 1 teaspoon dried thyme
- Salt and black pepper to taste
- Skewers (wooden or metal)
Cooking Instructions:
- Prepare the Marinade: In a large bowl, whisk together the olive oil, balsamic vinegar, minced garlic, oregano, thyme, salt, and black pepper. This mixture will serve as the marinade for the vegetables, infusing them with a rich and savory flavor.
- Marinate the Vegetables: Add the bell peppers, zucchinis, cherry tomatoes, and red onion to the bowl with the marinade. Toss the vegetables until they’re well-coated. Let them sit for at least 15-30 minutes to absorb the flavors. If using wooden skewers, soak them in water during this time to prevent burning on the grill.
- Assemble the Skewers: Thread the marinated vegetables onto the skewers, alternating the types of vegetables for a colorful presentation. Leave a little space between each piece to guarantee even cooking.
- Preheat the Grill: Heat your grill to medium-high heat. If using a charcoal grill, wait until the coals are glowing red with a thin layer of ash.
- Grill the Skewers: Place the skewers on the grill and cook for about 10-12 minutes, turning occasionally. The vegetables should be tender with a slight char on the outside. Be careful not to overcook to maintain their texture.
- Serve: Remove the skewers from the grill and serve immediately. They can be enjoyed as is or with a side of your favorite dipping sauce.
Extra Tips:
To amp up the flavor, consider adding a sprinkle of freshly chopped herbs like parsley or basil before serving. If you prefer a bit of heat, add a pinch of red pepper flakes to the marinade.
Always verify your grill is properly cleaned and oiled before placing the skewers to prevent sticking. Finally, experiment with different vegetables or even incorporate fruits like pineapple or peaches for a sweeter twist. Enjoy your grilled veggie skewers as a delightful and nutritious part of your grilling repertoire!
Grilled Salmon Fillets For Dinner
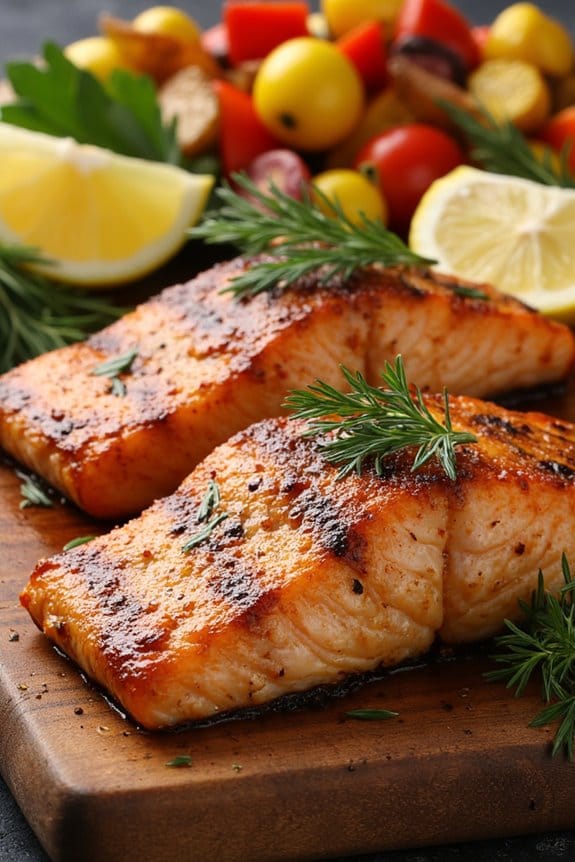
Grilled salmon fillets make for an exquisite dinner option that’s both healthy and delicious. This dish is perfect for those summer evenings when you want to enjoy a meal outdoors. The natural oils in the salmon help to keep the fish moist while grilling, and when combined with a simple yet flavorful marinade, the result is a meal that’s both satisfying and nutritious.
Grilled salmon pairs beautifully with a variety of side dishes, from light salads to roasted vegetables, making it a versatile choice for any dinner occasion.
For this recipe, we’ll be preparing salmon fillets with a zesty lemon and herb marinade that enhances the natural flavors of the fish. The marinade is quick to prepare and uses ingredients that you likely already have in your pantry. This dish serves 4-6 people, making it ideal for a family dinner or a small gathering of friends. With minimal prep and cook time, you can enjoy a gourmet meal with ease.
Ingredients (Serves 4-6):
- 4-6 salmon fillets (about 6 oz each)
- 1/4 cup olive oil
- 2 tablespoons lemon juice
- 2 cloves garlic, minced
- 1 tablespoon fresh dill, chopped
- 1 tablespoon fresh parsley, chopped
- 1 teaspoon salt
- 1/2 teaspoon black pepper
- Lemon slices, for garnish
Cooking Instructions:
- Prepare the Marinade: In a small bowl, combine olive oil, lemon juice, minced garlic, chopped dill, chopped parsley, salt, and black pepper. Whisk together until well combined.
- Marinate the Salmon: Place the salmon fillets in a shallow dish or a resealable plastic bag. Pour the marinade over the salmon, making certain each fillet is well coated. Marinate in the refrigerator for at least 30 minutes, or up to 2 hours for maximum flavor.
- Preheat the Grill: Preheat your grill to medium-high heat. If using a charcoal grill, prepare a two-zone fire.
- Grill the Salmon: Lightly oil the grill grates to prevent sticking. Place the salmon fillets skin-side down on the grill. Cook for about 4-5 minutes per side, depending on the thickness of the fillets, until the salmon is opaque and flakes easily with a fork.
- Remove and Rest: Carefully remove the salmon from the grill using a spatula. Allow the fillets to rest for a few minutes before serving.
- Garnish and Serve: Garnish the grilled salmon with lemon slices and serve immediately with your choice of side dishes.
Extra Tips:
When grilling salmon, it’s important to keep an eye on the cooking time to avoid overcooking, which can dry out the fish. If you prefer, you can use a fish basket or foil packet to prevent the fillets from sticking or breaking apart on the grill.
Additionally, using a meat thermometer can help guarantee perfect results; the internal temperature of the salmon should reach 145°F. For extra flavor, consider adding a splash of white wine to the marinade or sprinkling a pinch of red pepper flakes for a subtle kick.
Grill Up Some Classic BBQ Ribs
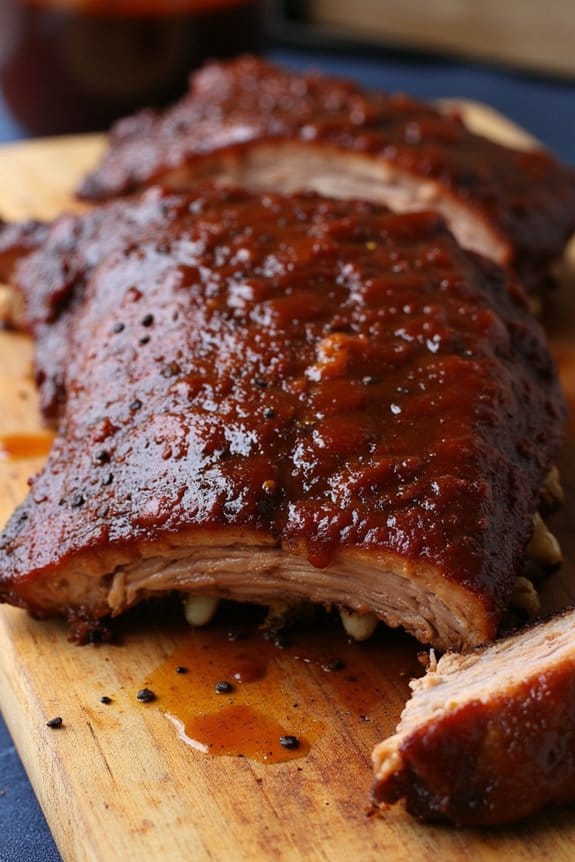
For a memorable dinner that showcases the best of backyard grilling, few dishes can compete with the allure of classic BBQ ribs. These tender, smoky, and flavorful ribs are a staple at many summer gatherings and are sure to be a hit at your next dinner party. The secret to perfect BBQ ribs lies in a balance of a well-seasoned rub, a flavorful BBQ sauce, and the slow cooking process that allows the meat to become tender while absorbing the smoky essence of the grill.
Preparing BBQ ribs at home isn’t as intimidating as it may seem. With a bit of patience and the right techniques, you can achieve restaurant-quality ribs that are fall-off-the-bone delicious. This recipe is designed to serve 4-6 people, making it ideal for a family dinner or a small get-together with friends. Whether you’re a seasoned grill master or a novice looking to impress, these classic BBQ ribs will elevate your grilling game to new heights.
Ingredients for 4-6 servings:
- 2 racks of pork ribs (about 4-5 pounds total)
- 1/4 cup brown sugar
- 1 tablespoon smoked paprika
- 1 tablespoon garlic powder
- 1 tablespoon onion powder
- 1 tablespoon salt
- 1 teaspoon black pepper
- 1 teaspoon cayenne pepper (optional for heat)
- 1 cup of your favorite BBQ sauce
- 2 tablespoons apple cider vinegar
- 1/2 cup apple juice
Cooking Instructions:
- Prepare the Ribs: Begin by removing the silver skin membrane from the back of the ribs. This will allow the rub to penetrate the meat more effectively and guarantee tender ribs. Use a knife to gently lift the membrane, then use a paper towel to grip and peel it off completely.
- Make the Dry Rub: In a small bowl, combine the brown sugar, smoked paprika, garlic powder, onion powder, salt, black pepper, and cayenne pepper if using. Mix well to create your dry rub.
- Season the Ribs: Generously apply the dry rub to both sides of the ribs, pressing it into the meat to ensure it adheres well. Let the ribs sit at room temperature for about 30 minutes to absorb the flavors.
- Preheat the Grill: Preheat your grill to medium-low heat (about 250°F). If using a charcoal grill, arrange the coals on one side for indirect heat. For a gas grill, turn on only one side of the burners.
- Prepare a Foil Pouch: Place each rack of ribs on a large piece of aluminum foil. In a small bowl, mix together the apple cider vinegar and apple juice, then drizzle it over the ribs before wrapping them tightly in the foil. This will keep the ribs moist during cooking.
- Grill the Ribs: Place the foil-wrapped ribs on the grill over indirect heat. Close the lid and cook for about 2.5 to 3 hours, or until the ribs are tender and the meat pulls away from the bones easily.
- Apply the BBQ Sauce: Carefully remove the ribs from the foil and place them directly on the grill over direct heat. Brush the ribs generously with BBQ sauce and grill for an additional 10-15 minutes, flipping once and basting as desired, until the sauce caramelizes and becomes slightly sticky.
- Rest and Serve: Once done, remove the ribs from the grill and let them rest for about 10 minutes before slicing. This resting period allows the juices to redistribute within the meat, guaranteeing each bite is juicy and flavorful.
Extra Tips:
For the best results, consider preparing the ribs and applying the rub the night before grilling. This extra time allows the flavors to penetrate deeper into the meat, resulting in more flavorful ribs.
Additionally, if you prefer a smokier flavor, add wood chips to your grill. Soak the chips in water for about 30 minutes, then place them in a smoker box or wrap them in foil with holes poked through and set them on the coals or directly on the gas burner.
Finally, remember to keep the grill lid closed as much as possible to maintain a consistent cooking temperature and to enhance the smoky flavor.
Simple Grilled Shrimp Tacos With Fresh Salsa

Grilled shrimp tacos are a delightful and easy-to-make meal perfect for any evening gathering or family dinner. The succulent shrimp marinated in a blend of spices and lime juice adds a burst of flavor when paired with fresh salsa and warm corn tortillas. This dish isn’t only quick to prepare but also offers a healthy and vibrant option that can be customized with your favorite toppings.
Whether you’re entertaining guests or simply want a delicious dinner with minimal effort, these shrimp tacos are sure to impress.
The key to this recipe is balancing the smoky char from the grill with the invigorating zest of homemade salsa. The salsa, made with ripe tomatoes, crunchy onions, and zesty cilantro, complements the spicy shrimp perfectly. The combination of textures and flavors creates a memorable dish that’s both satisfying and nutritious.
Serve these tacos with a side of lime wedges and your choice of toppings like avocado, cheese, or a dollop of sour cream to elevate the experience.
Ingredients for 4-6 servings:
- 1 1/2 pounds large shrimp, peeled and deveined
- 2 tablespoons olive oil
- 2 teaspoons chili powder
- 1 teaspoon cumin
- 1 teaspoon paprika
- 1/2 teaspoon garlic powder
- 1/4 teaspoon cayenne pepper (optional)
- Salt and pepper to taste
- Juice of 2 limes
- 12 corn tortillas
- 2 cups chopped tomatoes
- 1/2 cup finely chopped red onion
- 1/4 cup chopped fresh cilantro
- 1 jalapeño, seeded and finely chopped
- 1 tablespoon lime juice
- Salt to taste
- Optional toppings: sliced avocado, crumbled cheese, sour cream, lime wedges
Cooking Instructions:
- Prepare the Shrimp Marinade: In a large bowl, combine olive oil, chili powder, cumin, paprika, garlic powder, cayenne pepper, salt, and pepper. Add the shrimp and lime juice, then toss to coat. Allow the shrimp to marinate for at least 15 minutes while you prepare the salsa.
- Make the Fresh Salsa: In a separate bowl, combine chopped tomatoes, red onion, cilantro, jalapeño, and lime juice. Season with salt to taste. Mix well and set aside to let the flavors meld.
- Preheat the Grill: Heat your grill to medium-high heat. Make sure the grates are clean and lightly oiled to prevent sticking.
- Grill the Shrimp: Thread the marinated shrimp onto skewers for easier handling. Place the skewers on the grill and cook for 2-3 minutes on each side, or until the shrimp are opaque and have nice grill marks.
- Warm the Tortillas: While the shrimp are grilling, warm the corn tortillas on the grill for about 30 seconds on each side, until they’re pliable and slightly charred.
- Assemble the Tacos: Remove the shrimp from the skewers and divide them among the warm tortillas. Top with the fresh salsa and any optional toppings you desire.
Extra Tips:
For the best flavor, try to use fresh, high-quality shrimp and ripe tomatoes for the salsa. If using wooden skewers, soak them in water for at least 30 minutes before grilling to prevent burning.
You can adjust the heat level by adding more or less cayenne pepper and jalapeño according to your preference. When grilling, keep a close eye on the shrimp to avoid overcooking, as they cook quickly and can become rubbery if left too long on the grill.
Enjoy your tacos with a side of margaritas for a complete fiesta!
Grilled Portobello Mushroom Burgers
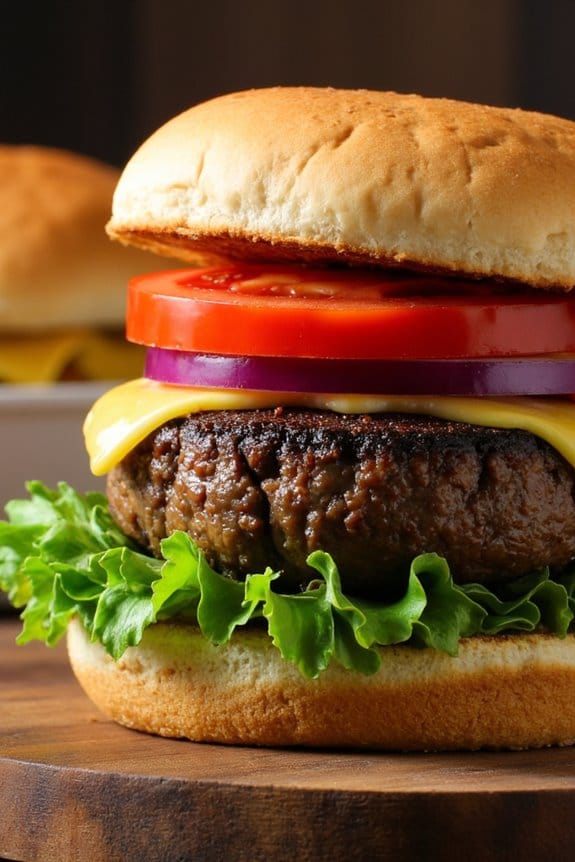
Grilled Portobello Mushroom Burgers are a delightful and hearty option for those seeking a flavorful vegetarian alternative to traditional beef burgers. These juicy mushrooms soak up marinades beautifully, delivering a punch of taste with each bite. When grilled, they develop a smoky aroma and a tender texture that makes them perfect for a satisfying meal.
Whether you’re a vegetarian or simply looking to reduce your meat intake, these burgers are a delicious option that will impress both vegetarians and meat-lovers alike. This recipe combines the earthy flavors of portobello mushrooms with a zesty marinade, fresh toppings, and a soft bun to create a wholesome and filling meal.
The robust taste of the mushrooms pairs wonderfully with melted cheese, fresh greens, and a tangy sauce. These burgers are perfect for a casual dinner or a backyard BBQ, offering a gourmet experience with minimal effort. Gather your friends and family, and enjoy these savory delights with your favorite sides.
Ingredients for 4-6 servings:
- 4-6 large portobello mushroom caps
- 1/4 cup balsamic vinegar
- 2 tablespoons olive oil
- 1 tablespoon soy sauce
- 2 garlic cloves, minced
- Salt and pepper to taste
- 4-6 slices of cheese (optional, such as provolone or cheddar)
- 4-6 burger buns
- Lettuce leaves
- Tomato slices
- Red onion slices
- Condiments of choice (such as mayonnaise, mustard, or ketchup)
Cooking Instructions:
- Prepare the Marinade: In a small bowl, combine the balsamic vinegar, olive oil, soy sauce, minced garlic, salt, and pepper. Mix well to create a flavorful marinade.
- Marinate the Mushrooms: Place the portobello mushroom caps in a shallow dish or a resealable plastic bag. Pour the marinade over the mushrooms, ensuring they’re evenly coated. Allow them to marinate for at least 30 minutes to 1 hour, turning occasionally to soak up the flavors.
- Preheat the Grill: Heat your grill to medium-high heat. If using a grill pan indoors, preheat it over medium-high heat as well.
- Grill the Mushrooms: Remove the mushrooms from the marinade and place them on the grill, gill side up. Grill for about 5-7 minutes on each side, or until they’re tender and have grill marks. If using cheese, place a slice on each mushroom during the last minute of grilling to allow it to melt.
- Toast the Buns: While the mushrooms are grilling, lightly toast the burger buns on the grill for 1-2 minutes until golden brown.
- Assemble the Burgers: Spread your chosen condiments on the bottom bun. Place a grilled mushroom cap on top, followed by lettuce leaves, tomato slices, and red onion slices. Top with the other half of the bun.
- Serve and Enjoy: Serve the burgers immediately while warm, accompanied by your favorite sides such as fries, coleslaw, or a mixed salad.
Extra Tips:
For the best results, choose portobello mushrooms that are firm and evenly sized, ensuring they cook evenly on the grill. Feel free to customize the toppings and condiments to suit your taste.
You can add a spicy kick with jalapeños or a smoky flavor with a dab of barbecue sauce. These mushrooms can also be marinated overnight for an even deeper flavor. If you prefer a vegan option, skip the cheese or use a plant-based alternative. Enjoy experimenting with different toppings to create your signature grilled portobello mushroom burger!
Grilled Pineapple For A Sweet Finish
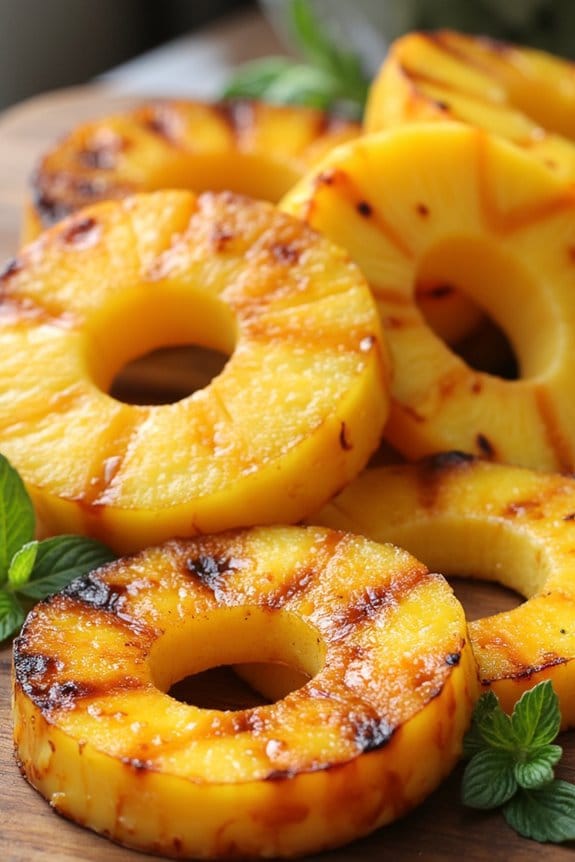
Grilled Pineapple is a delightful and unexpected sweet treat that can serve as a perfect finish to any smart grilling dinner. This tropical fruit, when grilled, develops a rich and smoky flavor with a hint of caramelization that enhances its natural sweetness.
Whether you’re hosting a summer barbecue or simply looking to add a unique touch to your meal, Grilled Pineapple is easy to prepare and serves as a revitalizing, health-conscious dessert option.
Perfect for sharing, this dessert is ideal for serving 4-6 people. It requires minimal ingredients and effort but promises maximum flavor and satisfaction. The slight char from the grill pairs beautifully with a sprinkle of cinnamon or a drizzle of honey, creating a harmonic blend of flavors that will leave your guests craving more.
Enjoy Grilled Pineapple on its own, or serve it alongside ice cream or yogurt for an even more indulgent experience.
Ingredients for 4-6 people:
- 1 ripe pineapple, peeled, cored, and cut into rings or wedges
- 1/4 cup honey
- 1 teaspoon ground cinnamon
- 1 tablespoon melted butter or coconut oil (optional)
- Vanilla ice cream or Greek yogurt (optional, for serving)
Cooking Instructions:
- Prepare the Pineapple:
- Start by peeling and coring the pineapple. Cut it into thick rings or wedges of approximately 1/2 inch to 1 inch in thickness. This guarantees that they hold up well on the grill.
- Preheat the Grill:
- Set your grill to medium-high heat. Confirm the grates are clean to prevent sticking and achieve good grill marks.
- Mix the Topping:
- In a small bowl, mix honey and cinnamon. If desired, add melted butter or coconut oil to the mixture for an extra layer of flavor.
- Coat the Pineapple:
- Brush each pineapple piece with the honey-cinnamon mixture, ensuring an even coat on all sides. This will help the pineapple caramelize beautifully on the grill.
- Grill the Pineapple:
- Place the pineapple slices on the preheated grill. Cook for about 3-4 minutes on each side or until grill marks appear and the pineapple is heated through.
- Serve:
- Remove the pineapple from the grill and let it cool slightly before serving. For an enhanced experience, serve with a scoop of vanilla ice cream or a dollop of Greek yogurt.
Extra Tips:
For the best results, use a ripe pineapple that’s sweet and juicy. You can tell a pineapple is ripe if it has a sweet aroma at the stem and its leaves pull out easily.
If you prefer a more intense sweetness, consider adding a sprinkle of brown sugar along with the honey-cinnamon mixture. To add a touch of freshness, garnish with fresh mint leaves before serving.
Adjust grilling time based on the thickness and ripeness of the pineapple to achieve the desired level of caramelization.
Grilled Pizza With Easy Toppings

Grilled pizza is a delicious and creative way to enjoy a classic dish with a smoky twist. The high heat of the grill gives the crust a perfectly crispy texture while adding a subtle charred flavor that complements the toppings beautifully. This method isn’t only quick but also allows for a fun, interactive dining experience.
Whether you’re hosting a backyard barbecue or simply looking for a unique dinner idea, grilled pizza is certain to impress your guests and family alike.
This recipe focuses on simplicity and flavor, offering a variety of easy toppings that cater to different taste preferences. With a base of ready-made pizza dough and a selection of fresh ingredients, you can customize each pizza to suit your liking. The versatility of this dish makes it perfect for family dinners or gatherings, as everyone can create their own masterpiece.
Gather your favorite toppings, fire up the grill, and get ready to enjoy a delicious meal.
Ingredients (Serves 4-6):
- 1 pound of store-bought pizza dough
- 2 tablespoons olive oil
- 1 cup pizza sauce
- 2 cups shredded mozzarella cheese
- 1 cup sliced pepperoni
- 1 cup sliced mushrooms
- 1 cup sliced bell peppers
- 1/2 cup sliced black olives
- 1/2 cup thinly sliced red onion
- Fresh basil leaves for garnish
Cooking Instructions:
- Preheat the Grill: Begin by preheating your grill to medium-high heat, approximately 450°F (232°C). This guarantees that the grill is hot enough to cook the pizza dough quickly.
- Prepare the Dough: On a lightly floured surface, roll out the pizza dough into a thin, round shape. Brush both sides of the dough lightly with olive oil to prevent sticking and to enhance flavor.
- Grill the Dough: Place the oiled dough directly onto the grill grates. Grill for 2-3 minutes, or until the bottom is firm and has grill marks. Use tongs to flip the dough over.
- Add Toppings: Quickly spread a thin layer of pizza sauce over the grilled side of the dough. Sprinkle mozzarella cheese evenly, followed by pepperoni, mushrooms, bell peppers, black olives, and red onion. Close the grill lid to melt the cheese and cook the toppings, about 3-4 minutes.
- Finish the Pizza: Once the cheese is bubbly and the toppings are cooked to your liking, carefully remove the pizza from the grill using a pizza peel or large spatula.
- Garnish and Serve: Allow the pizza to cool slightly before garnishing with fresh basil leaves. Slice and serve hot.
Extra Tips:
For the best results, make sure your grill is properly cleaned and oiled before you start cooking. This will prevent the pizza dough from sticking and guarantee even cooking.
Feel free to experiment with different toppings based on your preferences; grilled pizza is an excellent opportunity to use seasonal ingredients or leftovers. If you have a pizza stone, you can also use it on the grill for an even crispier crust.
And remember, the key to a great grilled pizza is to keep an eye on the cooking time as it can vary depending on the heat of your grill.