

There’s just something special about the sizzle and aroma of grilling that can truly elevate a meal. Whether you’re a seasoned grill enthusiast or just starting out, I’ve gathered 14 mouthwatering grilled meal ideas perfect for everyday cooking. From succulent herb-marinated chicken to savory steak tips, these recipes are sure to add flavor and excitement to your menu. Ready for some culinary inspiration to transform your grilling game? Let’s fire up the grill and explore these delicious possibilities!
Grilled Chicken With Herb Marinade
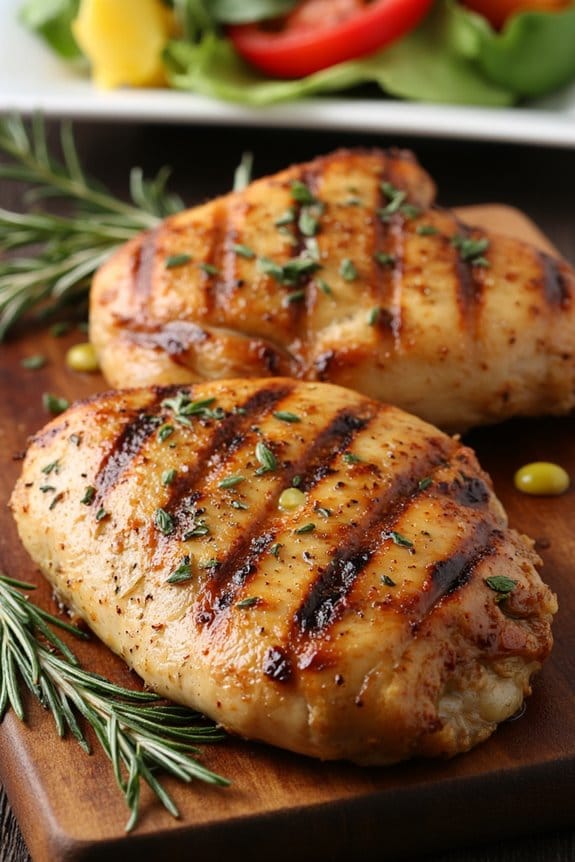
Grilled Chicken With Herb Marinade is a delightful dish that’s perfect for any occasion, whether it’s a casual family dinner or a weekend barbecue with friends. The key to this dish is in its vibrant herb marinade, which infuses the chicken with an irresistible blend of flavors. This marinade is made with a mix of fresh herbs, garlic, olive oil, and a splash of lemon juice, creating a harmonious taste that complements the smoky char from grilling.
The result is juicy, tender chicken with a zesty and aromatic crust that will have everyone coming back for seconds. This recipe serves 4-6 people, making it ideal for a small gathering. The chicken is marinated for at least two hours, allowing the flavors to penetrate deeply into the meat. Grilling the chicken not only adds a lovely smoky flavor but also guarantees a beautiful golden-brown finish.
Paired with a fresh salad or grilled vegetables, this dish is set to be a standout on your dining table. Let’s plunge into the ingredients you’ll need and the steps to perfecting this grilled masterpiece.
Ingredients:
- 4 to 6 boneless, skinless chicken breasts
- 1/4 cup olive oil
- 3 tablespoons fresh lemon juice
- 3 cloves garlic, minced
- 2 tablespoons fresh rosemary, chopped
- 2 tablespoons fresh thyme, chopped
- 2 tablespoons fresh basil, chopped
- 1 teaspoon salt
- 1/2 teaspoon black pepper
Cooking Instructions:
- Prepare the Marinade: In a medium-sized bowl, combine the olive oil, lemon juice, minced garlic, chopped rosemary, thyme, and basil. Add the salt and black pepper, and whisk everything together until well blended.
- Marinate the Chicken: Place the chicken breasts in a large resealable plastic bag or a shallow dish. Pour the herb marinade over the chicken, making sure all pieces are evenly coated. Seal the bag or cover the dish, and refrigerate for at least 2 hours, or overnight for deeper flavor.
- Preheat the Grill: When ready to cook, preheat your grill to medium-high heat. This should take about 10-15 minutes. If using a charcoal grill, make sure the coals are ashed over and hot.
- Grill the Chicken: Remove the chicken from the marinade, allowing any excess to drip off. Place the chicken on the preheated grill. Cook for 6-7 minutes per side, or until the internal temperature reaches 165°F (75°C), and the chicken is no longer pink in the center.
- Rest and Serve: Once cooked, transfer the chicken to a plate and let it rest for 5 minutes to allow the juices to redistribute. Serve hot, garnished with additional fresh herbs if desired.
Extra Tips:
To guarantee even cooking, it’s advisable to pound the chicken breasts to an even thickness before marinating. This will help prevent overcooking on the thinner parts of the chicken.
If you’re using a charcoal grill, consider adding wood chips for an extra smoky flavor. For those who prefer a bit of heat, adding a pinch of red pepper flakes to the marinade can give the chicken a subtle kick.
Finally, always remember to clean your grill grates before cooking to prevent sticking and achieve those perfect grill marks.
Perfectly Grilled Steak Tips
Grilled steak tips are a delicious and versatile option for any barbecue or family meal. This dish offers a savory and slightly charred exterior, with a juicy and tender interior that’s packed with flavor. Whether you’re hosting a summer cookout or simply enjoying a cozy dinner at home, perfectly grilled steak tips will make for an impressive main course that everyone will love.
With just a few simple ingredients and a little bit of preparation, you can create restaurant-quality steak tips in your own backyard. To achieve the ideal grilled steak tips, it’s important to start with quality meat and a flavorful marinade. The marinade not only enhances the taste but also helps tenderize the meat.
Once marinated, the steak tips are quickly seared on a hot grill to lock in the juices and create a beautiful crust. This recipe is designed to serve 4-6 people, making it perfect for a small gathering or a family meal. Follow the steps below to create a mouthwatering dish that will be a hit with your guests.
Ingredients for 4-6 servings:
- 2 pounds of sirloin steak tips
- 1/4 cup olive oil
- 1/4 cup soy sauce
- 2 tablespoons Worcestershire sauce
- 1 tablespoon balsamic vinegar
- 3 cloves garlic, minced
- 1 tablespoon brown sugar
- 1 teaspoon freshly ground black pepper
- 1/2 teaspoon salt
- 1 teaspoon dried rosemary
- 1 tablespoon Dijon mustard
Cooking Instructions:
1. Prepare the Marinade: In a medium-sized bowl, combine olive oil, soy sauce, Worcestershire sauce, balsamic vinegar, minced garlic, brown sugar, black pepper, salt, dried rosemary, and Dijon mustard. Whisk the ingredients together until well blended.
2. Marinate the Steak Tips: Place the steak tips in a large resealable plastic bag or a shallow dish. Pour the marinade over the steak tips, making sure that they’re evenly coated. Seal the bag or cover the dish with plastic wrap and refrigerate for at least 2 hours, or overnight for maximum flavor.
3. Preheat the Grill: About 30 minutes before you plan to grill, remove the steak tips from the refrigerator to allow them to come to room temperature. Preheat your grill to medium-high heat, approximately 400°F (200°C).
4. Grill the Steak Tips: Lightly oil the grill grates to prevent sticking. Remove the steak tips from the marinade, allowing excess marinade to drip off. Place the steak tips on the grill and cook for about 4-5 minutes on each side, or until they reach your desired level of doneness.
Use a meat thermometer to ascertain the internal temperature is at least 135°F (57°C) for medium-rare or adjust to your preference.
5. Rest and Serve: Once cooked, remove the steak tips from the grill and let them rest for 5 minutes. This allows the juices to redistribute throughout the meat. Slice the steak tips against the grain for maximum tenderness and serve immediately.
Extra Tips:
For the best results, always choose high-quality steak tips, such as sirloin or tenderloin, which are known for their tenderness and flavor. If you prefer your steak tips well done, extend the grilling time slightly, but be cautious not to overcook, as this can lead to dryness.
Additionally, experimenting with different herbs and spices in the marinade can add unique flavors to the dish, allowing you to tailor it to your personal taste preferences. Finally, make sure your grill is preheated and hot before placing the steak tips on, as this will help achieve that perfect sear.
Garlic Butter Grilled Shrimp Skewers
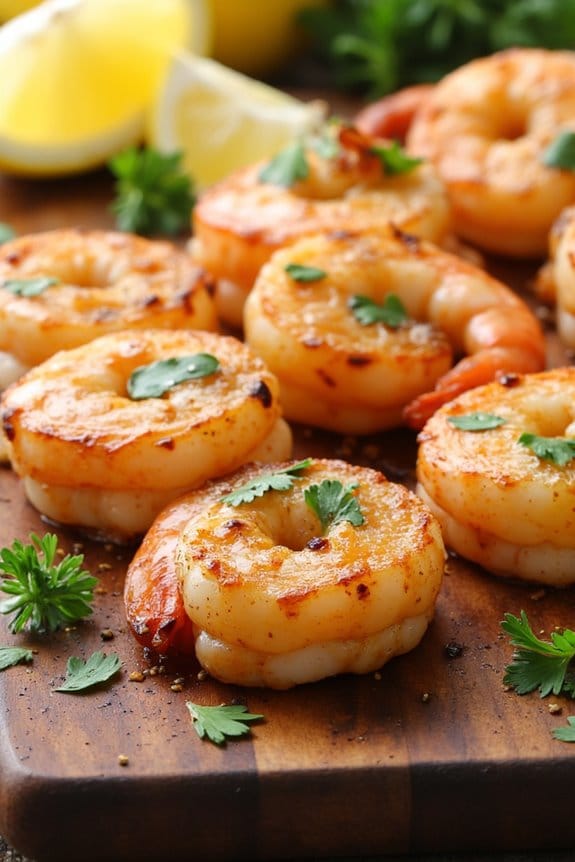
Garlic Butter Grilled Shrimp Skewers are a delightful and easy-to-make dish perfect for summer barbecues or a quick weeknight dinner. The succulent shrimp are marinated in a rich garlic butter sauce that infuses them with flavor and keeps them juicy as they grill. This dish isn’t only packed with flavor but also quick to prepare, making it a go-to option for seafood lovers looking to impress their guests or enjoy a delicious meal with minimal effort.
The combination of garlic, butter, and fresh herbs creates a mouthwatering aroma that will captivate anyone within smelling distance of the grill. These skewers can be served as a main course alongside a fresh salad or grilled vegetables, or as a tasty appetizer. The key to achieving perfectly grilled shrimp is to keep an eye on them as they cook quickly, guaranteeing they remain tender and juicy.
Follow the recipe below to create a savory and satisfying Garlic Butter Grilled Shrimp Skewers dish for 4-6 people.
Ingredients:
- 2 pounds large shrimp, peeled and deveined
- 1/2 cup unsalted butter, melted
- 4 cloves garlic, minced
- 2 tablespoons lemon juice
- 1 tablespoon chopped fresh parsley
- 1 teaspoon salt
- 1/2 teaspoon black pepper
- Wooden or metal skewers
Cooking Instructions:
- Prepare the Marinade: In a medium bowl, combine the melted butter, minced garlic, lemon juice, chopped parsley, salt, and black pepper. Mix well until all ingredients are fully incorporated.
- Marinate the Shrimp: Add the peeled and deveined shrimp to the bowl and toss until they’re evenly coated with the garlic butter mixture. Cover the bowl with plastic wrap and let the shrimp marinate in the refrigerator for at least 30 minutes to allow the flavors to meld.
- Preheat the Grill: While the shrimp are marinating, preheat your grill to medium-high heat. If you’re using wooden skewers, soak them in water for about 10 minutes to prevent them from burning during grilling.
- Skewer the Shrimp: Once marinated, thread the shrimp onto the skewers, ensuring they’re evenly spaced for even cooking. Reserve any remaining marinade for later use.
- Grill the Shrimp: Place the skewers on the preheated grill. Cook for about 2-3 minutes on each side, or until the shrimp turn pink and opaque. Be careful not to overcook them, as they can become tough.
- Baste with Remaining Marinade: During the last minute of grilling, brush the shrimp with the reserved marinade for an extra boost of flavor.
- Serve and Enjoy: Remove the shrimp skewers from the grill and transfer them to a serving platter. Garnish with additional fresh parsley if desired, and serve immediately.
Extra Tips:
To guarantee the best results, choose fresh shrimp whenever possible, as they offer a sweeter and more robust flavor than frozen varieties. If you prefer a smoky flavor, consider adding a pinch of smoked paprika to the marinade.
Additionally, using metal skewers can help the shrimp cook more evenly, as they conduct heat along the entire length of the skewer. For an extra citrusy punch, serve the skewers with lemon wedges on the side.
Grilled Salmon With Lemon and Dill
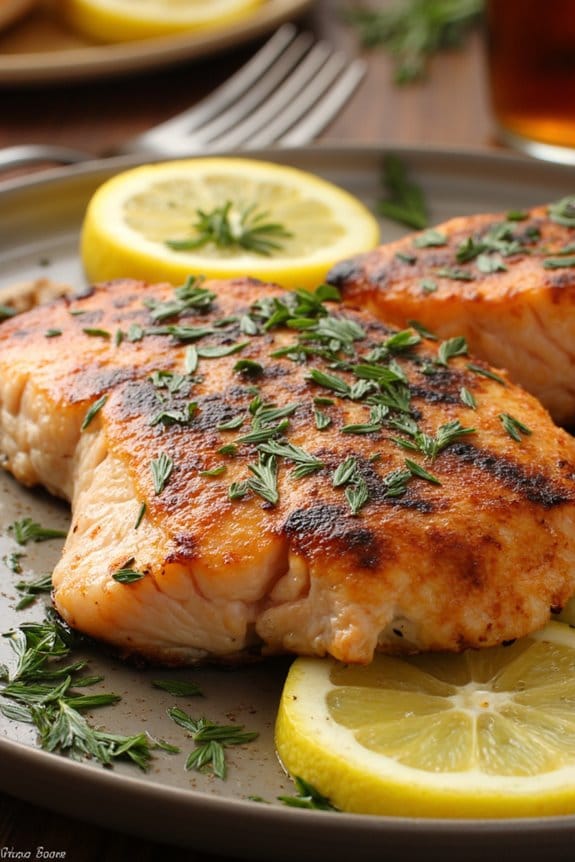
Grilled Salmon With Lemon and Dill is a delightful and healthy dish that’s perfect for a summer barbecue or a cozy family dinner. The combination of fresh dill and zesty lemon elevates the natural flavors of the salmon, making it a revitalizing and satisfying meal. This recipe is simple to prepare, yet elegant enough to impress your guests.
The key to achieving a perfect salmon is in the grilling technique, which imparts a smoky flavor while keeping the fish moist and flaky. Ideal for serving 4-6 people, this dish pairs well with a variety of sides such as roasted vegetables, a light salad, or even a serving of fluffy rice. The aromatic dill and citrusy lemon not only enhance the taste but also add a vibrant color to the presentation.
Whether you’re a seasoned griller or a novice, this recipe will guide you through the steps to achieve a perfectly grilled salmon that everyone will enjoy.
Ingredients:
- 4-6 salmon fillets (about 6 oz each)
- 2 tablespoons olive oil
- Salt and pepper to taste
- 2 lemons (one for juicing, one for slicing)
- 1 bunch fresh dill, chopped
- 3 cloves garlic, minced
- 1 tablespoon Dijon mustard
Cooking Instructions:
- Prepare the Marinade: In a small bowl, mix together olive oil, the juice of one lemon, minced garlic, Dijon mustard, chopped dill, salt, and pepper. Stir until well combined. This marinade will infuse the salmon with flavor and keep it moist during grilling.
- Marinate the Salmon: Place the salmon fillets in a shallow dish or a resealable plastic bag. Pour the marinade over the fillets, making sure they’re evenly coated. Let the salmon marinate in the refrigerator for at least 30 minutes, or up to 2 hours for more intense flavor.
- Preheat the Grill: While the salmon is marinating, preheat your grill to medium-high heat (about 375°F to 400°F). Make sure the grates are clean and lightly oiled to prevent the fish from sticking.
- Grill the Salmon: Remove the salmon from the marinade and place it on the grill, skin-side down. Close the lid and grill for about 4-5 minutes per side, depending on the thickness of the fillets. The salmon should be opaque and easily flake with a fork when done.
- Serve: Once cooked, remove the salmon from the grill and let it rest for a couple of minutes. Garnish with lemon slices and additional fresh dill before serving.
Extra Tips:
To guarantee your salmon stays juicy and doesn’t stick to the grill, make sure to oil the grill grates well and use a fish spatula for easy flipping.
If you prefer a milder flavor, consider using a cedar plank for grilling, which adds a subtle smoky aroma to the fish. Additionally, avoid overcooking by keeping a close eye on the salmon; it should be just cooked through and still slightly translucent in the center when removed from the grill, as it will continue to cook with residual heat.
Grilled Lamb Chops With Rosemary
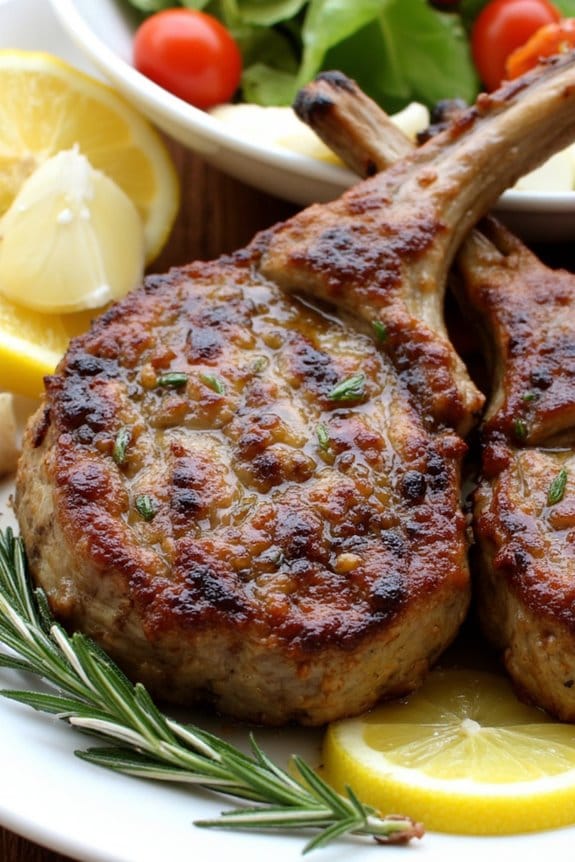
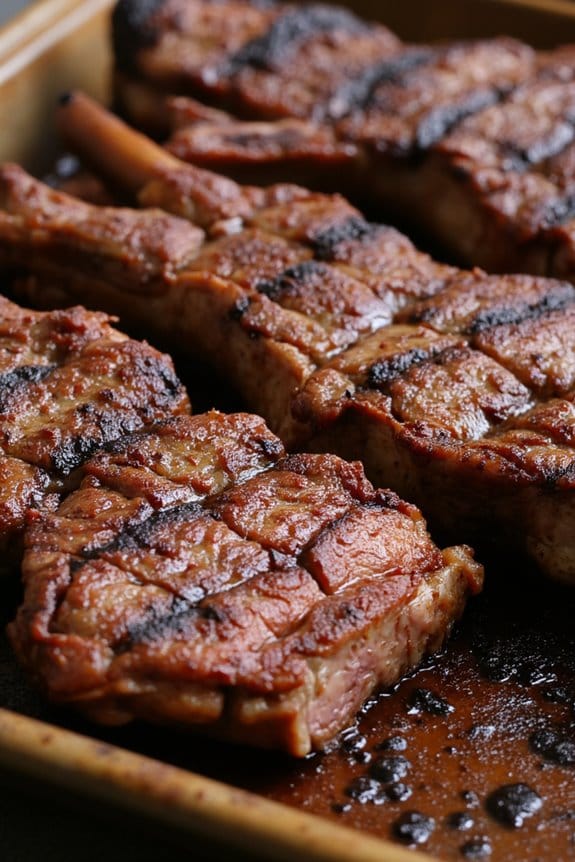
Grilled lamb chops with rosemary offer a deliciously savory and aromatic dish that’s perfect for any occasion. The robust flavor of lamb pairs beautifully with the fragrant rosemary, and when grilled to perfection, the result is a tender, juicy, and flavorful meal that will impress your guests.
This dish isn’t only packed with flavor but also simple and quick to prepare, making it an excellent choice for both weeknight dinners and special gatherings.
The key to this dish lies in the quality of the lamb chops and the freshness of the rosemary. Using fresh herbs and a good cut of meat will enhance the natural flavors, creating an unforgettable culinary experience.
Pair these chops with a side of roasted vegetables or a fresh salad, and you have a complete meal that’s both nutritious and satisfying.
Ingredients for 4-6 servings:
- 8 lamb chops
- 3 tablespoons olive oil
- 4 cloves garlic, minced
- 2 tablespoons fresh rosemary, chopped
- Salt and pepper to taste
- 1 lemon, sliced for garnish
Cooking Instructions:
- Prepare the Marinade: In a small bowl, combine olive oil, minced garlic, chopped rosemary, salt, and pepper. Mix well to create a flavorful marinade.
- Marinate the Lamb Chops: Place the lamb chops in a shallow dish or a resealable plastic bag. Pour the marinade over the chops, making certain they’re evenly coated. Cover the dish or seal the bag and refrigerate for at least 1 hour, or up to overnight for a more intense flavor.
- Preheat the Grill: When ready to cook, preheat your grill to medium-high heat. This should take about 10-15 minutes, making sure the grill is hot enough to sear the lamb chops and lock in their juices.
- Grill the Lamb Chops: Remove the lamb chops from the marinade, allowing any excess to drip off. Place them on the grill and cook for about 3-4 minutes per side, depending on thickness and desired doneness. Use a meat thermometer to verify the internal temperature reaches at least 145°F for medium-rare.
- Rest and Serve: Once cooked to your liking, remove the lamb chops from the grill and let them rest for about 5 minutes. This allows the juices to redistribute throughout the meat. Garnish with lemon slices and serve hot.
Extra Tips:
When grilling lamb chops, it’s vital not to overcook them, as this can lead to a tough and dry texture. Always aim for a nice sear on the outside while keeping the inside juicy.
If you don’t have access to fresh rosemary, dried rosemary can be used, but use slightly less as dried herbs are more concentrated. Finally, always allow the chops to rest after grilling; this step is important for maintaining their tenderness and guaranteeing full flavor absorption.
Barbecue Glazed Grilled Pork Chops
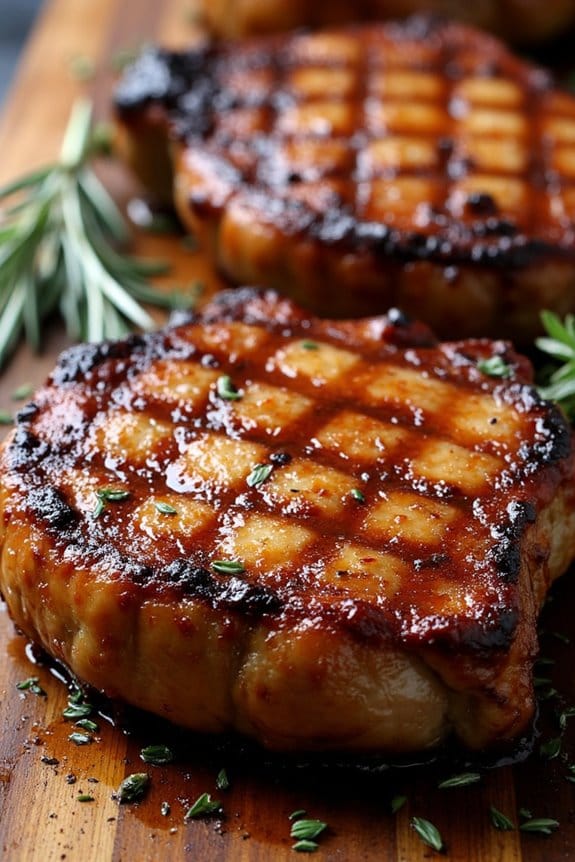
Grilling pork chops is a fantastic way to bring out their natural flavors while adding a smoky, charred taste that’s simply irresistible. By using a barbecue glaze, you can elevate the flavor profile of the pork chops, infusing them with a sweet and tangy taste that complements the savory meat perfectly.
Whether you’re hosting a summer cookout or simply looking for a delicious weeknight dinner, barbecue glazed grilled pork chops are sure to be a hit with family and friends.
To create the ultimate barbecue glazed grilled pork chops, it’s important to select the right cut of meat. Opt for bone-in pork chops for added flavor and juiciness. The barbecue glaze, made from a combination of classic ingredients like ketchup, brown sugar, and apple cider vinegar, will caramelize beautifully on the grill, adding a delightful crust to the chops.
Pair these pork chops with your favorite side dishes, such as grilled vegetables or a crisp salad, for a complete and satisfying meal.
Ingredients (Serves 4-6):
- 4-6 bone-in pork chops (about 1 inch thick)
- 1 cup barbecue sauce
- 2 tablespoons brown sugar
- 2 tablespoons apple cider vinegar
- 1 tablespoon Worcestershire sauce
- 1 teaspoon garlic powder
- 1 teaspoon onion powder
- 1 teaspoon smoked paprika
- Salt and pepper to taste
- Olive oil
Cooking Instructions:
- Prepare the Grill: Preheat your grill to medium-high heat. Make sure the grates are clean and lightly oiled to prevent sticking.
- Make the Barbecue Glaze: In a medium bowl, combine the barbecue sauce, brown sugar, apple cider vinegar, Worcestershire sauce, garlic powder, onion powder, and smoked paprika. Mix well until all ingredients are fully incorporated.
- Season the Pork Chops: Pat the pork chops dry with paper towels. Rub both sides of each chop with olive oil, then season generously with salt and pepper.
- Grill the Pork Chops: Place the pork chops on the grill. Cook for 4-5 minutes on one side until grill marks appear and the meat releases easily from the grate.
- Apply the Glaze: Flip the pork chops and generously brush the barbecue glaze on the cooked side. Cook for another 4-5 minutes, then flip again and brush the glaze on the other side. Continue grilling until the internal temperature reaches 145°F (63°C) using a meat thermometer.
- Rest the Chops: Once cooked, remove the pork chops from the grill and let them rest for about 5 minutes. This allows the juices to redistribute, ensuring tender and juicy meat.
Extra Tips:
For extra flavor, marinate the pork chops in half of the barbecue glaze for 1-2 hours before grilling. This will infuse the meat with even more flavor.
If you prefer a thicker glaze, simmer the remaining glaze ingredients in a saucepan over medium heat until it reduces and thickens. Remember to adjust the grilling time based on the thickness of your pork chops. Thicker chops will require a few extra minutes on the grill to reach the desired internal temperature.
Enjoy your barbecue glazed grilled pork chops with a side of corn on the cob or a rejuvenating coleslaw for a perfect summer meal.
Grilled Portobello Mushrooms With Balsamic Glaze

Grilled Portobello Mushrooms with Balsamic Glaze is a flavorful and satisfying vegetarian dish that can serve as a main course or a hearty side. The meaty texture of Portobello mushrooms makes them a fantastic substitute for meat, while the balsamic glaze adds a tangy sweetness that enhances the natural umami of the mushrooms. This dish is perfect for a summer barbecue or a cozy indoor grill session, offering a healthy and delicious option for both vegetarians and meat-lovers alike.
Preparing this dish is relatively simple and requires minimal ingredients, making it an ideal choice for a quick yet impressive meal. The key to achieving the best flavor is in the marination process, allowing the mushrooms to soak up the balsamic glaze and seasoning. This recipe is crafted to serve 4-6 people, guaranteeing that everyone at the table can enjoy this savory delight.
Ingredients (Serves 4-6):
- 6 large Portobello mushroom caps
- 1/4 cup balsamic vinegar
- 3 tablespoons olive oil
- 3 cloves garlic, minced
- 1 tablespoon soy sauce
- 1 tablespoon honey or maple syrup
- Salt and pepper to taste
- Fresh parsley or basil for garnish (optional)
Cooking Instructions:
- Prepare the Marinade: In a small bowl, whisk together the balsamic vinegar, olive oil, minced garlic, soy sauce, honey or maple syrup, salt, and pepper until well combined.
- Marinate the Mushrooms: Place the Portobello mushroom caps in a large resealable plastic bag or a shallow dish. Pour the marinade over the mushrooms, making sure they’re evenly coated. Seal the bag or cover the dish and let the mushrooms marinate for at least 30 minutes, or up to 2 hours in the refrigerator for deeper flavor.
- Preheat the Grill: Preheat your outdoor grill or indoor grill pan to medium-high heat. Lightly oil the grill grates to prevent sticking.
- Grill the Mushrooms: Remove the mushrooms from the marinade and place them on the hot grill, gill side down. Grill for about 5-7 minutes on each side, or until they’re tender and have nice grill marks. Baste the mushrooms with any remaining marinade during grilling to enhance the flavor.
- Serve: Once grilled to perfection, remove the mushrooms from the grill and let them rest for a minute. Slice the mushrooms if desired and garnish with fresh parsley or basil before serving.
Extra Tips:
When selecting your Portobello mushrooms, look for caps that are firm and not overly moist to guarantee the best texture. If you prefer a smokier flavor, consider adding a pinch of smoked paprika to the marinade.
For those who enjoy a bit of heat, a dash of red pepper flakes can add a nice kick. Remember to adjust the balsamic glaze to your taste preference; if you prefer it less sweet, reduce the honey or maple syrup slightly.
Enjoy these mushrooms as a standalone dish, or serve them on a bun with your favorite toppings for a delicious Portobello burger.
Smoky Grilled Vegetables Delight
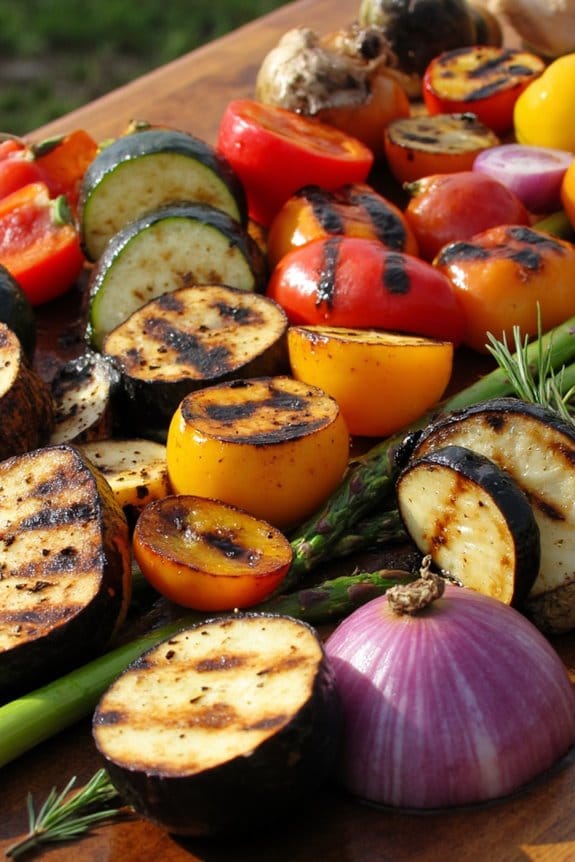
Smoky Grilled Vegetables Delight is a vibrant medley of seasonal vegetables that are marinated in a savory blend of herbs and spices, then grilled to perfection. This dish is perfect for any barbecue or outdoor gathering, offering a healthy, colorful addition to your menu. The smoky flavors from the grill combined with the natural sweetness of the vegetables make this dish a crowd-pleaser, whether served as a side or a main course for vegetarians.
With its vivid colors and robust flavors, the Smoky Grilled Vegetables Delight isn’t only visually appealing but also packed with nutrients. This recipe is simple to prepare and can be customized with your favorite vegetables, making it versatile and adaptable to whatever is fresh and in season. Prepare to wow your guests with this delicious, healthy dish that captures the essence of summer grilling.
Ingredients (Serves 4-6):
- 2 large zucchinis
- 2 red bell peppers
- 2 yellow bell peppers
- 1 large red onion
- 1 bunch of asparagus
- 1 eggplant
- 1/4 cup olive oil
- 3 tablespoons balsamic vinegar
- 3 cloves garlic, minced
- 1 tablespoon fresh thyme leaves
- 1 tablespoon fresh rosemary, chopped
- Salt and pepper to taste
Instructions:
- Prepare the Vegetables: Wash all the vegetables thoroughly. Slice the zucchinis, bell peppers, and eggplant into thick strips. Cut the red onion into wedges. Trim the ends of the asparagus.
- Make the Marinade: In a large bowl, mix together the olive oil, balsamic vinegar, minced garlic, thyme, rosemary, salt, and pepper. Stir well to combine.
- Marinate the Vegetables: Add the sliced vegetables to the bowl with the marinade. Toss them well to guarantee they’re evenly coated. Cover the bowl and let the vegetables marinate for at least 30 minutes, or up to 2 hours for more intense flavor.
- Preheat the Grill: Preheat your grill to medium-high heat. If using a charcoal grill, allow the coals to become white hot before cooking.
- Grill the Vegetables: Place the marinated vegetables directly on the grill grates or use a grill basket for easier handling. Grill for about 3-5 minutes per side, or until the vegetables are tender and have nice grill marks.
- Serve: Once grilled to your preference, remove the vegetables from the grill and arrange them on a serving platter. Sprinkle a little more salt and pepper if needed, and serve warm.
Extra Tips:
For an added layer of flavor, consider adding a sprinkle of smoked paprika or a dash of chili flakes to the marinade for a bit of heat. If you’re looking for a slightly sweet contrast, drizzle a touch of honey over the vegetables before serving.
Additionally, to prevent the vegetables from sticking to the grill, make sure the grates are well-oiled or consider using a grill basket. Feel free to swap in any of your favorite seasonal vegetables to personalize this dish to your liking.
Grilled Corn on the Cob With Spicy Lime
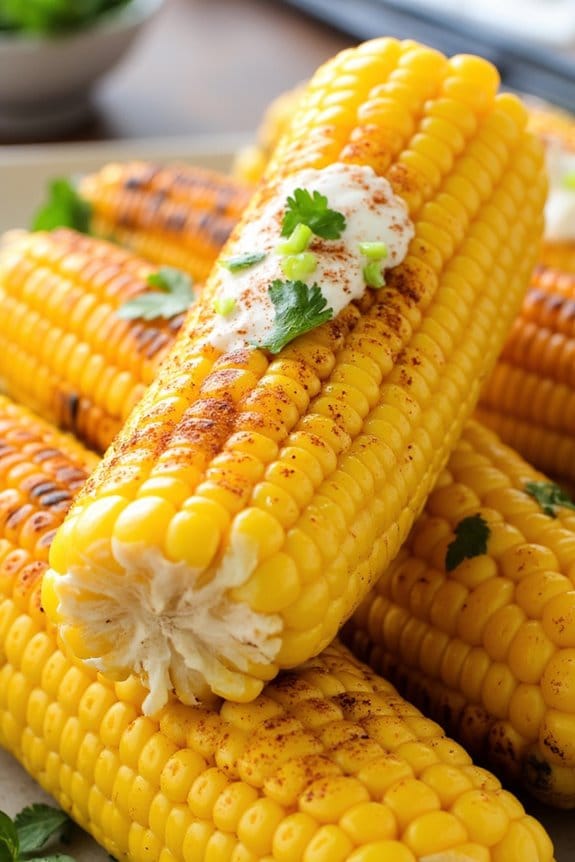
Grilled corn on the cob is a summer staple that’s simple to prepare and full of flavor. When paired with a spicy lime butter, it takes this classic dish to a whole new level of deliciousness. The combination of sweet, smoky corn and tangy, spicy lime butter creates a wonderful balance that’s sure to impress your guests at any barbecue or outdoor gathering.
This dish isn’t only incredibly tasty but also visually appealing, with the vibrant colors of the corn and the zest of the lime making for a beautiful presentation.
Preparing Grilled Corn on the Cob With Spicy Lime is an enjoyable experience that allows you to embrace the essence of summer cooking. The process is straightforward, and the aroma of corn grilling over an open flame is simply irresistible.
Whether you’re a seasoned grill master or a beginner, this recipe is easy to follow and will have everyone coming back for more. Let’s explore the ingredients you’ll need and the steps to make this mouthwatering dish for 4-6 people.
Ingredients:
- 6 ears of corn, husks removed
- 1/2 cup unsalted butter, softened
- 1 lime, zested and juiced
- 1 teaspoon chili powder
- 1/2 teaspoon cayenne pepper
- 1/2 teaspoon smoked paprika
- 1/2 teaspoon salt
- 1/4 teaspoon black pepper
- Chopped fresh cilantro, for garnish (optional)
- Lime wedges, for serving (optional)
Instructions:
- Preheat the Grill: Begin by preheating your grill to medium-high heat. This will provide the right amount of heat to cook the corn evenly and give it a nice char.
- Prepare the Spicy Lime Butter: In a small bowl, combine the softened butter, lime zest, lime juice, chili powder, cayenne pepper, smoked paprika, salt, and black pepper. Mix well until all the ingredients are fully incorporated. Set aside.
- Grill the Corn: Place the corn directly on the grill grates. Close the lid and grill for about 10-15 minutes, turning occasionally, until the corn is tender and slightly charred on all sides.
- Apply the Spicy Lime Butter: Once the corn is cooked, remove it from the grill. Using a brush or a spoon, generously coat each ear of corn with the prepared spicy lime butter while it’s still hot, ensuring that the butter melts and seeps into the kernels.
- Serve: Transfer the corn to a serving platter. If desired, garnish with chopped fresh cilantro and serve with lime wedges on the side for an extra burst of citrus flavor.
Extra Tips:
For the best results, choose fresh corn with bright green husks and golden silk. Soaking the corn in water for about 15 minutes before grilling can help in keeping it moist and prevent the husks from burning if you choose to grill with them on.
If you prefer less spice, you can adjust the amount of cayenne pepper or omit it altogether. Additionally, the spicy lime butter can be made ahead of time and stored in the refrigerator, allowing the flavors to meld together beautifully.
Grilled Avocado With Salsa Fresca
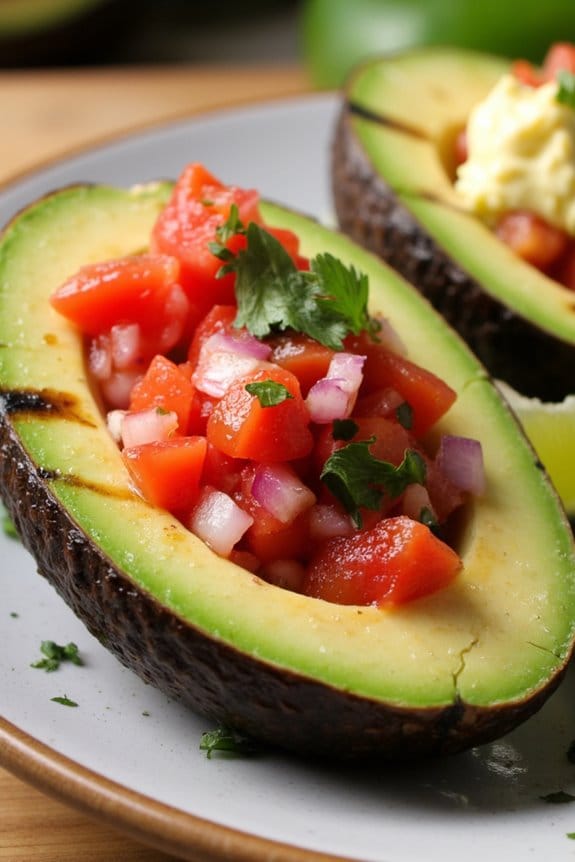
Grilled Avocado With Salsa Fresca is a delightful and healthy dish that combines the creamy texture of avocado with the fresh, zesty flavors of salsa fresca. This easy-to-make recipe is perfect for summer barbecues or as a unique appetizer for any gathering. The smoky char from grilling the avocado enhances its natural richness, while the salsa fresca brings a burst of color and freshness, balancing the dish beautifully.
Whether you’re a fan of avocados or simply looking for a new grilling adventure, this recipe is bound to impress your family and friends. The combination of warm, grilled avocados and cool, tangy salsa isn’t only delicious but also packed with nutrients. Avocados are a great source of healthy fats, fiber, and vitamins, making this dish a nutritious choice.
The salsa fresca, made from fresh tomatoes, onions, and cilantro, adds a dose of antioxidants and a vibrant taste that complements the creamy avocado perfectly. This dish can be served as a starter, a side, or even a light main course. With its simple preparation and impressive presentation, Grilled Avocado With Salsa Fresca is bound to become a favorite in your recipe collection.
Ingredients for Grilled Avocado With Salsa Fresca (Serves 4-6):
- 3 ripe avocados
- 2 tablespoons olive oil
- 1 teaspoon salt
- 1/2 teaspoon black pepper
- 2 medium tomatoes, diced
- 1 small red onion, finely chopped
- 1 jalapeño pepper, seeded and minced
- 1/4 cup fresh cilantro, chopped
- Juice of 2 limes
- Salt to taste
- Optional: Tortilla chips for serving
Cooking Instructions:
- Prepare the Grill:
- Preheat your grill to medium-high heat. If using a charcoal grill, confirm the coals are evenly distributed for consistent heat.
- Prepare the Avocados:
- Cut the avocados in half lengthwise and remove the pits. Brush the cut sides with olive oil and season with salt and black pepper.
- Grill the Avocados:
- Place the avocado halves cut side down on the grill. Cook for about 2-3 minutes until grill marks appear and the flesh is slightly charred. Remove from the grill and set aside.
- Make the Salsa Fresca:
- In a bowl, combine the diced tomatoes, chopped red onion, minced jalapeño, and cilantro. Add the lime juice and mix well. Season with salt to taste.
- Assemble the Dish:
- Spoon the salsa fresca generously into the center of each grilled avocado half. Serve immediately, optionally with tortilla chips on the side for scooping.
Extra Tips:
When selecting avocados for grilling, choose ones that are ripe but still firm to the touch; they shouldn’t be overly soft. This will assure they hold up well on the grill.
To prevent the avocado flesh from sticking to the grill, make sure the grates are clean and well-oiled. If you prefer a spicier salsa, you can leave some of the seeds in the jalapeño or add a pinch of cayenne pepper. Enjoy experimenting with different herbs or add-ins like diced mango for a twist on the classic salsa fresca.
Grilled Flatbread Pizza With Toppings

Grilled flatbread pizza is a delightfully versatile dish that combines the crispy texture of a grilled base with a variety of delicious toppings. This easy-to-make dish is perfect for a casual gathering or a family dinner, offering a customizable approach to pizza that allows everyone to enjoy their favorite flavors.
The process of grilling the flatbread adds a smoky flavor and a satisfying crunch that you just can’t get from a traditional oven-baked pizza. Whether you prefer classic toppings like pepperoni and mozzarella or more adventurous combinations, grilled flatbread pizza is sure to be a hit.
The beauty of this dish lies in its simplicity and adaptability. You can prepare the dough ahead of time, or even use store-bought flatbread for convenience. The key is to have a hot grill ready to create that perfect crispy base.
Once your flatbread is grilled to perfection, the topping options are endless. From fresh vegetables and herbs to gourmet cheeses and meats, you can tailor each pizza to suit your taste. This recipe will guide you through creating a delicious grilled flatbread pizza for 4-6 people, guaranteeing that everyone leaves the table satisfied.
Ingredients for 4-6 servings:
- 4 flatbreads (store-bought or homemade)
- 1 cup tomato sauce
- 2 cups shredded mozzarella cheese
- 1 cup pepperoni slices
- 1 red onion, thinly sliced
- 1 bell pepper, thinly sliced
- 1/2 cup black olives, sliced
- 1/4 cup fresh basil leaves
- 2 tablespoons olive oil
- Salt and pepper to taste
Cooking Instructions:
- Prepare the Grill: Preheat your grill to medium-high heat. Confirm the grates are clean and lightly oil them to prevent sticking.
- Prepare the Flatbreads: Brush each flatbread lightly with olive oil on both sides. This will help them crisp up nicely on the grill.
- Grill the Flatbreads: Place the flatbreads directly on the grill. Grill for 2-3 minutes on one side until grill marks appear, then flip and grill for another 1-2 minutes. Remove from the grill and set aside.
- Add Pizza Sauce and Toppings: Spread a thin layer of tomato sauce over the grilled side of each flatbread. Sprinkle mozzarella cheese evenly over the sauce. Add your desired toppings, such as pepperoni, red onion, bell pepper, and black olives.
- Grill the Pizzas: Carefully place the topped flatbreads back on the grill. Close the grill lid and cook for 5-7 minutes, or until the cheese is melted and bubbly.
- Finish and Serve: Remove the pizzas from the grill. Sprinkle fresh basil leaves over the top, and season with salt and pepper to taste. Slice and serve immediately.
Extra Tips:
For the best results, confirm your grill is hot before you start grilling the flatbreads. This will help achieve a crispy crust without drying out the base.
If you’re using homemade flatbread dough, roll it out thinly to ensure it cooks through on the grill. Feel free to experiment with different cheeses and toppings to find your perfect flavor combination.
Grilled flatbread pizza is also a great way to use up leftover ingredients from your fridge.
Spice up Your Meal With Grilled Sausage and Peppers

Transform your regular weeknight dinner into an exciting culinary experience with this Grilled Sausage and Peppers recipe. Perfect for both a cozy family meal and a lively backyard gathering, this dish offers a delightful mix of spicy, savory, and smoky flavors. The combination of juicy sausages and vibrant, charred peppers provides a satisfying, hearty meal that’s both simple to prepare and certain to impress.
Whether you opt for mild or spicy sausages, the end result is a colorful and aromatic feast that captures the essence of summer grilling. This recipe allows for flexibility, accommodating various tastes and dietary preferences. You can choose from a variety of sausages, including pork, chicken, or even plant-based options, to suit your needs.
The peppers add a sweet and slightly tangy contrast to the savory sausages, while a touch of olive oil, garlic, and herbs brings everything together beautifully. Serve this dish with crusty bread, over a bed of rice, or with a simple salad to complete your meal. With minimal preparation and cooking time, Grilled Sausage and Peppers is an ideal choice for busy evenings or when you’re entertaining guests.
Ingredients (serving size: 4-6 people):
- 6 sausages (Italian, chicken, or plant-based)
- 3 large bell peppers (assorted colors)
- 1 large red onion
- 3 tablespoons olive oil
- 3 cloves garlic, minced
- 1 teaspoon dried oregano
- 1 teaspoon dried basil
- Salt and pepper to taste
- Fresh parsley, chopped (for garnish)
- Optional: crusty bread or rolls for serving
Cooking Instructions:
- Preheat the Grill: Begin by preheating your grill to medium-high heat. If using a charcoal grill, verify the coals are ashed over and evenly distributed.
- Prepare the Vegetables: While the grill is heating, wash and dry the bell peppers. Cut them into thick strips, removing the seeds and stems. Peel and slice the onion into thick rings.
- Season the Vegetables: In a large mixing bowl, combine the bell peppers and onion slices. Add olive oil, minced garlic, oregano, basil, salt, and pepper. Toss the vegetables until they’re evenly coated with the seasoning.
- Grill the Sausages: Place the sausages on the grill, ensuring they’re spaced evenly. Grill them for about 10-12 minutes, turning occasionally, until they’re cooked through and have nice grill marks.
- Grill the Vegetables: As the sausages cook, place the seasoned bell peppers and onion slices on the grill. Grill them for about 8-10 minutes, turning occasionally, until they’re tender and slightly charred.
- Combine and Serve: Once the sausages and vegetables are cooked, remove them from the grill. Arrange the sausages on a serving platter, topped with the grilled peppers and onions. Garnish with fresh parsley before serving.
- Optional: Serve the grilled sausage and peppers with crusty bread or rolls on the side for a complete meal.
Extra Tips:
When selecting sausages for this dish, consider the preferences of your guests or family. Spicy sausages can add an extra kick, while milder versions may be more suitable for children or those sensitive to heat.
For a more complex flavor, consider marinating the sausages in a mixture of olive oil, garlic, and herbs for a few hours before grilling. Additionally, if you prefer softer vegetables, wrap them in aluminum foil before placing them on the grill. This will steam the vegetables while still allowing them to absorb the smoky grill flavors.
Finally, don’t forget to let the sausages rest for a few minutes after grilling to allow the juices to redistribute, guaranteeing a juicy bite every time.
Sweet Grilled Pineapple With Honey Lime Drizzle

Sweet Grilled Pineapple With Honey Lime Drizzle is a delicious and invigorating dessert that’s perfect for summer gatherings or as a light, flavorful treat any time of the year. This dish combines the natural sweetness of ripe pineapple with a zesty honey lime drizzle that enhances the fruit’s flavor.
Grilling the pineapple caramelizes its sugars, adding a subtle smoky flavor that pairs beautifully with the tangy lime and sweet honey. This recipe is easy to prepare, making it a great choice for both novice and experienced cooks looking to impress their guests with minimal effort.
The secret to this delightful dish lies in its simplicity and the balance of flavors. The honey lime drizzle complements the grilled pineapple perfectly, offering a contrast of sweet and tart that tantalizes the taste buds.
This recipe yields enough to serve 4-6 people, making it an ideal choice for family dinners, barbecues, or potlucks. With just a few ingredients and simple preparation, Sweet Grilled Pineapple With Honey Lime Drizzle is a go-to recipe for any occasion.
Ingredients (Serves 4-6):
- 1 ripe pineapple
- 1/4 cup honey
- 1 lime (zest and juice)
- 1 tablespoon melted butter
- 1/2 teaspoon ground cinnamon
- A pinch of salt
Cooking Instructions:
- Prepare the Pineapple:
- Begin by slicing off the top and bottom of the pineapple. Stand the pineapple upright and carefully slice off the skin, following the natural curve of the fruit. Remove any remaining “eyes” with a small knife or a paring knife.
- Cut the pineapple into rings, about 1/2 inch thick. Use a small round cutter or a knife to remove the core from each slice. Alternatively, you can cut the pineapple into wedges if preferred.
- Preheat the Grill:
- Preheat your grill to medium-high heat. If using a charcoal grill, make certain the coals are evenly distributed and covered with white ash before grilling.
- Prepare the Honey Lime Drizzle:
- In a small bowl, mix the honey, lime zest, lime juice, melted butter, ground cinnamon, and a pinch of salt. Stir until well combined.
- Grill the Pineapple:
- Once the grill is hot, place the pineapple slices directly onto the grill grates. Grill for about 3-4 minutes on each side, or until grill marks appear and the pineapple is slightly caramelized.
- Add the Honey Lime Drizzle:
- Remove the pineapple from the grill and transfer to a serving platter. Drizzle the honey lime mixture over the warm pineapple slices, ensuring each piece is coated evenly.
- Serve and Enjoy:
- Serve the sweet grilled pineapple immediately as a standalone dessert or alongside vanilla ice cream for an extra treat.
Extra Tips:
When selecting a pineapple, look for one that’s fragrant and has a slight give when pressed. This indicates ripeness and guarantees the best flavor.
If you’re short on time, you can prepare the honey lime drizzle in advance and store it in the refrigerator for up to a day. Allow it to return to room temperature and stir well before using.
For an added flavor twist, consider sprinkling shredded coconut or chopped mint leaves over the grilled pineapple just before serving. These additions will enhance the tropical flavor profile and offer a delightful variation to this easy yet impressive dish.
Juicy Grilled Turkey Burgers
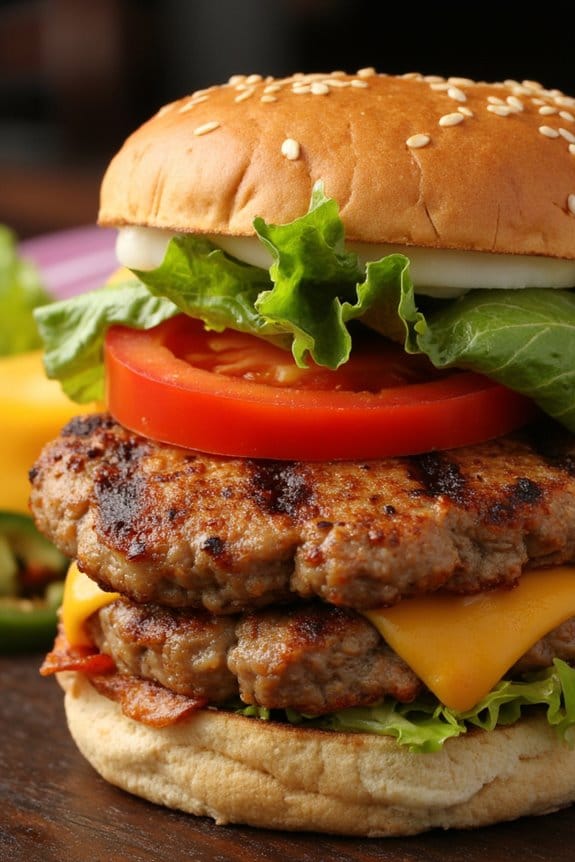
Grilled turkey burgers are a delectable and healthier alternative to traditional beef burgers, perfect for those who are looking to enjoy a lighter meal without sacrificing flavor. The secret to making juicy turkey burgers lies in using ground turkey that contains a bit of fat to keep the patties moist during grilling.
Adding flavorful ingredients like onions, garlic, and a blend of spices can elevate the taste, making these burgers a hit at any barbecue or family dinner. Served on a toasted bun with fresh toppings, these turkey burgers are certain to satisfy any craving.
When preparing turkey burgers, it’s important to handle the meat gently and avoid over-mixing, which can result in a tough texture. Allow the patties to chill before grilling to help them hold their shape and develop a perfect crust.
With these techniques, you can create a batch of turkey burgers that aren’t only juicy but also packed with flavor. Here’s a recipe to serve 4-6 people.
Ingredients:
- 2 pounds ground turkey
- 1/2 cup bread crumbs
- 1/4 cup finely chopped onion
- 2 cloves garlic, minced
- 1 tablespoon Worcestershire sauce
- 1 teaspoon salt
- 1/2 teaspoon black pepper
- 1 teaspoon smoked paprika
- 1 teaspoon dried oregano
- 1 egg
- 6 burger buns
- Lettuce, tomato, and other preferred toppings
- Optional: cheese slices
Cooking Instructions:
- Prepare the Mixture: In a large mixing bowl, combine ground turkey, bread crumbs, chopped onion, minced garlic, Worcestershire sauce, salt, pepper, smoked paprika, dried oregano, and the egg. Using your hands or a spoon, gently mix the ingredients until just combined, being careful not to over-mix.
- Form the Patties: Divide the mixture into 6 equal portions and shape each portion into a patty about 1/2-inch thick. Make a slight indentation in the center of each patty to prevent them from puffing up while cooking.
- Chill the Patties: Place the formed patties on a plate or tray, cover them with plastic wrap, and refrigerate for at least 30 minutes. This step helps the patties firm up and hold their shape on the grill.
- Preheat the Grill: Preheat your grill to medium-high heat. Lightly oil the grill grates to prevent sticking.
- Grill the Patties: Place the chilled patties on the preheated grill. Cook each side for about 5-6 minutes or until the internal temperature reaches 165°F (74°C). If using cheese, add a slice on top of each patty during the last minute of cooking and close the grill lid to melt the cheese.
- Toast the Buns: While the patties are grilling, lightly toast the buns on the grill for 1-2 minutes until golden brown.
- Assemble the Burgers: Once the patties are cooked and the buns are toasted, assemble your burgers with the patty, lettuce, tomato, and any other preferred toppings. Serve immediately.
Extra Tips:
To guarantee your turkey burgers remain juicy, avoid pressing down on the patties while they’re cooking, as this can squeeze out essential juices.
If you prefer a spicier kick, consider adding a pinch of cayenne pepper or diced jalapeños to the mixture. Additionally, using a meat thermometer will ensure perfectly cooked burgers without the risk of being undercooked.
For an added touch of flavor, consider brushing the patties with a bit of olive oil or your favorite sauce before grilling.