

Ready to spice up your grilling game with some fresh ideas?
We’re exploring a variety of meats that will bring a whole new level of flavor to your BBQ nights.
From the savory taste of lamb chops and bison burgers to the unique flavors of quail and venison steaks, there’s something for everyone.
Curious about trying alligator or ostrich burgers?
Each offers a delicious twist that will surely impress your guests and satisfy your adventurous palate.
Grilled Lamb Chops: Enhance Flavor With Marinades
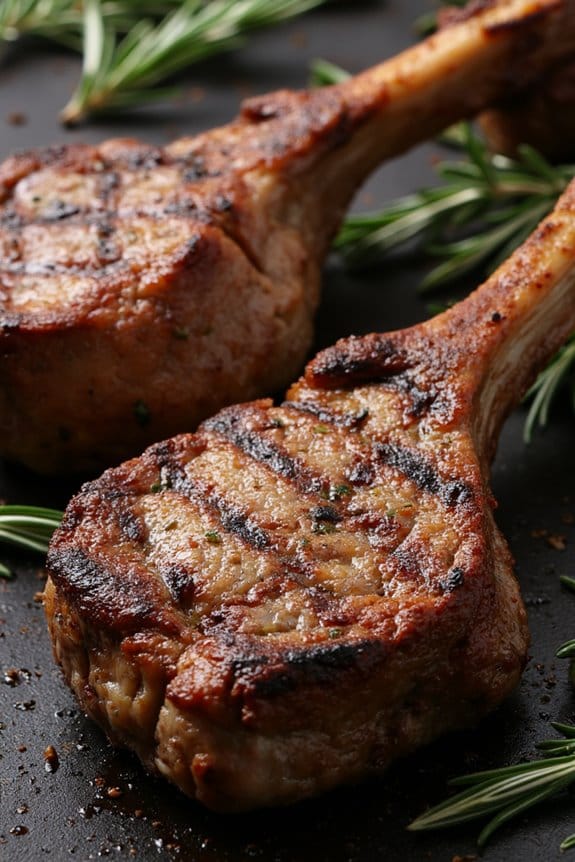
Grilled Lamb Chops are a delightful addition to any dinner table, offering a succulent and flavorful meat option that’s sure to impress. The key to enhancing the natural flavors of lamb is through the use of a well-prepared marinade. Marinades not only infuse the meat with additional taste but also help in tenderizing it, resulting in juicy and flavorful lamb chops. By preparing a simple yet aromatic marinade, you can elevate the taste and experience of your grilled lamb chops.
To achieve the best results, it’s important to allow the lamb chops to rest in the marinade before grilling. This resting period gives the flavors enough time to penetrate the meat, making each bite a burst of deliciousness. When grilling, aim for a perfect medium-rare to medium doneness, which allows the lamb to remain tender and juicy. Follow these instructions to create a memorable dish that your family and friends will love.
Ingredients (Serves 4-6):
- 12 lamb chops
- 1/4 cup olive oil
- 3 cloves garlic, minced
- 2 tablespoons fresh rosemary, chopped
- 2 tablespoons fresh thyme, chopped
- 1 tablespoon Dijon mustard
- 1 tablespoon lemon juice
- 1 teaspoon salt
- 1/2 teaspoon black pepper
Cooking Instructions:
- Prepare the Marinade: In a medium-sized bowl, combine the olive oil, minced garlic, chopped rosemary, chopped thyme, Dijon mustard, lemon juice, salt, and black pepper. Mix well to create a smooth marinade.
- Marinate the Lamb Chops: Place the lamb chops in a large resealable plastic bag or a shallow dish. Pour the marinade over the lamb, affirming each chop is well-coated. Seal the bag or cover the dish and refrigerate for at least 2 hours, preferably overnight, to allow the flavors to permeate the meat.
- Preheat the Grill: About 30 minutes before cooking, remove the lamb chops from the refrigerator to allow them to reach room temperature. Preheat your grill to medium-high heat, around 400°F (200°C).
- Grill the Lamb Chops: Once the grill is hot, place the lamb chops on the grill grates. Cook for about 3-4 minutes on each side for medium-rare, or until the internal temperature reaches 145°F (63°C). Adjust the time if you prefer your lamb more or less done.
- Rest the Chops: Remove the lamb chops from the grill and let them rest for 5 minutes. This allows the juices to redistribute within the meat, ensuring moist and flavorful chops.
- Serve and Enjoy: Arrange the lamb chops on a serving platter and garnish with additional fresh herbs if desired. Serve hot and enjoy with your choice of sides.
Extra Tips:
For best results, use fresh herbs and high-quality olive oil in your marinade. If you prefer a more intense flavor, you can add a teaspoon of balsamic vinegar or a pinch of red pepper flakes to the marinade.
When grilling, avoid overcrowding the grill to affirm even cooking and a good sear on each chop. Always use a meat thermometer to check for doneness, as overcooked lamb can become tough.
Finally, let the lamb chops rest after grilling to lock in the juices, resulting in a more tender and juicy bite.
Grill Bison Burgers: Juicy and Lean Alternatives
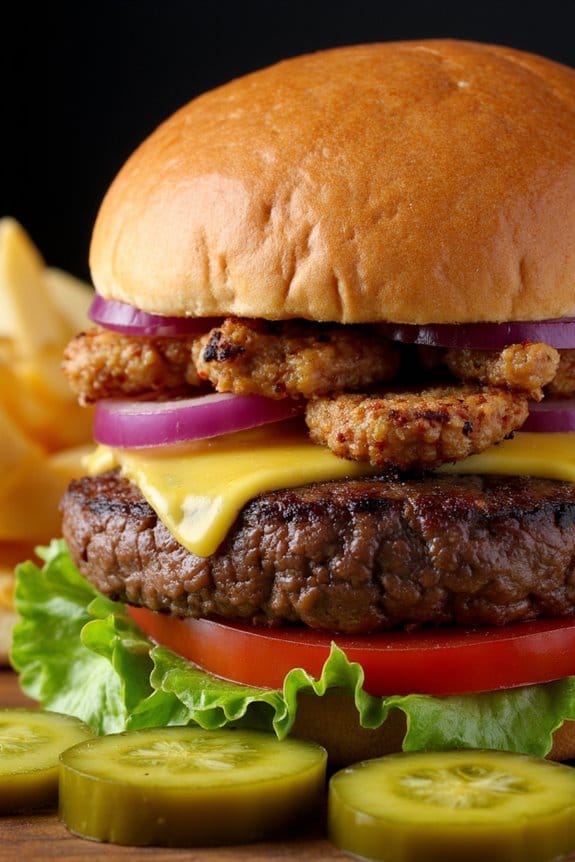
Bison burgers are a fantastic choice for those looking to enjoy a burger that’s both flavorful and lean. Bison meat is lower in fat and calories compared to traditional beef, making it a healthier option without sacrificing taste. The rich, slightly sweet flavor of bison pairs perfectly with various toppings and condiments, allowing you to customize your burger to your liking.
Grilling bison burgers enhances their natural flavors, and with the right technique, you can keep them juicy and delicious. To create a perfect bison burger, it’s important to pay attention to the cooking process. Bison is leaner than beef, so it cooks faster and can dry out if overcooked. The key is to cook the patties to just the right temperature, guaranteeing they remain moist while achieving a desirable sear on the outside.
By following this recipe and utilizing some helpful tips, you can enjoy a delectable bison burger that’s sure to please the whole family.
Ingredients for 4-6 People:
- 2 pounds ground bison
- 1 teaspoon salt
- 1/2 teaspoon black pepper
- 1 teaspoon garlic powder
- 1 teaspoon onion powder
- 1 tablespoon Worcestershire sauce
- 4-6 burger buns
- Slices of cheese (optional)
- Lettuce leaves
- Tomato slices
- Onion slices
- Pickles
- Condiments (such as ketchup, mustard, mayonnaise)
Cooking Instructions:
- Prepare the Bison Patties: In a large mixing bowl, combine ground bison, salt, pepper, garlic powder, onion powder, and Worcestershire sauce. Mix gently with your hands until all the ingredients are evenly incorporated. Be careful not to overwork the meat, as this can lead to tough burgers.
- Shape the Patties: Divide the mixture into 4 to 6 equal portions, depending on your desired patty size. Shape each portion into a patty about 3/4 inch thick. Make a small indentation in the center of each patty with your thumb; this helps them cook evenly without puffing up.
- Preheat the Grill: Heat your grill to medium-high heat, around 400°F (200°C). Make sure the grates are clean and well-oiled to prevent sticking.
- Grill the Patties: Place the bison patties on the preheated grill. Cook for about 4-5 minutes on the first side. Flip the patties and cook for an additional 3-4 minutes for medium-rare, or until the internal temperature reaches 135°F (57°C). If desired, add a slice of cheese during the last minute of cooking.
- Toast the Buns: While the patties are cooking, place the burger buns on the grill for about 1-2 minutes or until they’re lightly toasted.
- Assemble the Burgers: Remove the patties from the grill and let them rest for a minute. Assemble the burgers by placing each patty on a bun and adding lettuce, tomato, onion, pickles, and your choice of condiments. Serve immediately.
Extra Tips:
To guarantee your bison burgers are juicy and flavorful, avoid pressing down on the patties while they’re cooking, as this releases the natural juices. Additionally, if you prefer a different level of doneness, adjust the cooking time accordingly, but be cautious not to overcook, as bison is leaner and can dry out easily.
For added flavor, you can experiment with different seasonings or toppings, such as sautéed mushrooms or avocado slices. Enjoy your delicious, healthy bison burgers!
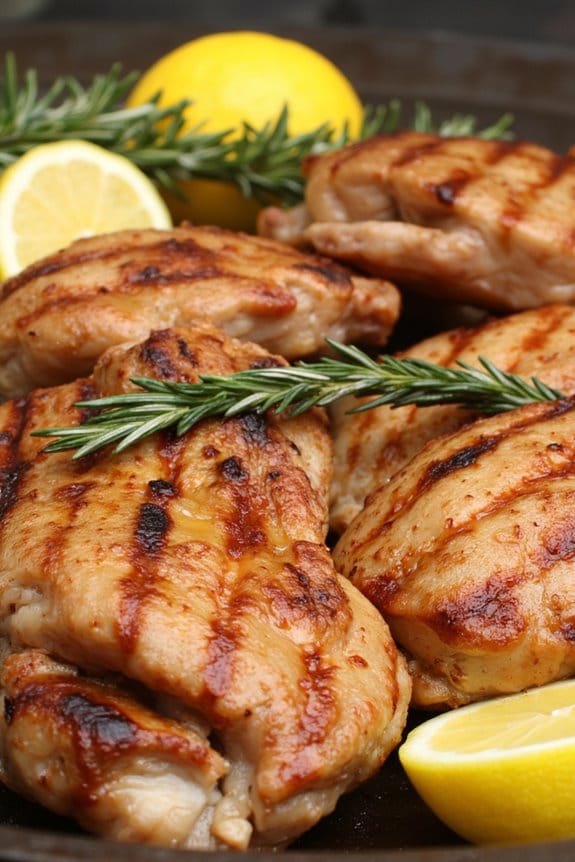
Delight in Grilled Quail: Small and Flavorful
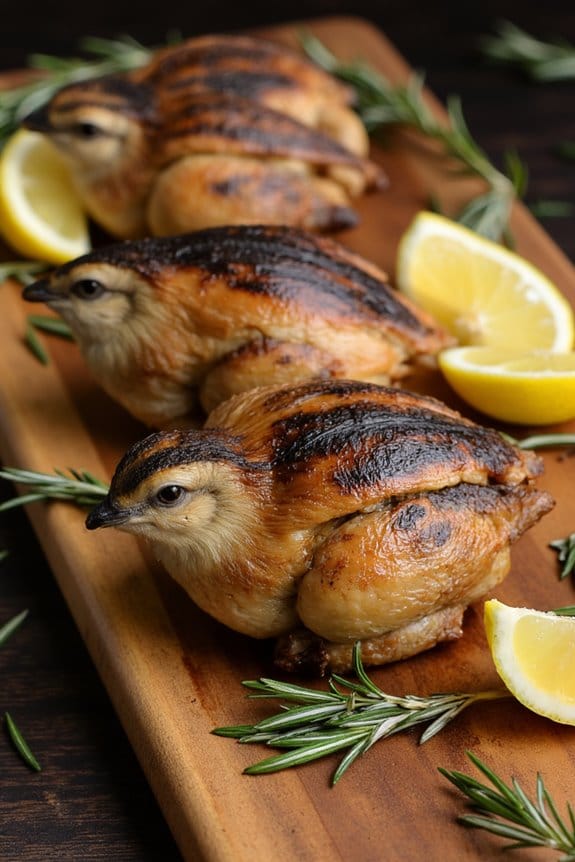
Indulging in grilled quail is a culinary experience that combines the richness of wild game with a smoky, savory finish. Quail, a small game bird, is known for its tender meat and unique flavor, making it a perfect choice for grilling enthusiasts looking to try something new.
When cooked over an open flame or on a grill, quail develops a beautiful char and retains its juiciness, resulting in a dish that’s both sophisticated and deeply satisfying. Paired with a fresh herb marinade, grilled quail offers a delicate balance of flavors that can transform any dinner into a gourmet feast.
To grill quail successfully, it’s important to use fresh ingredients that enhance the bird’s natural taste without overwhelming it. A blend of olive oil, lemon juice, garlic, and fresh herbs like rosemary and thyme creates a marinade that not only tenderizes the meat but also infuses it with aromatic flavors.
The grilling process is quick due to the quail’s small size, making it an ideal option for a speedy yet impressive meal. This recipe serves 4 to 6 people, making it perfect for a small gathering of friends or family.
Ingredients:
- 6 whole quails
- 1/4 cup extra-virgin olive oil
- 2 tablespoons fresh lemon juice
- 4 cloves garlic, minced
- 2 teaspoons fresh rosemary, chopped
- 2 teaspoons fresh thyme, chopped
- Salt and freshly ground black pepper, to taste
- Lemon wedges, for serving
Cooking Instructions:
- Prepare the Quail: Rinse the quail under cold water and pat them dry with paper towels. This guarantees the marinade will adhere properly.
- Make the Marinade: In a small bowl, combine the olive oil, lemon juice, minced garlic, rosemary, thyme, salt, and pepper. Whisk the ingredients together until well combined.
- Marinate the Quail: Place the quails in a large bowl or resealable plastic bag. Pour the marinade over the quail, making sure each bird is well coated. Seal the bag or cover the bowl and refrigerate for at least 1 hour, or up to 4 hours for deeper flavor.
- Preheat the Grill: Heat your grill to medium-high heat. If using a charcoal grill, confirm the coals are white-hot.
- Grill the Quail: Remove the quail from the marinade and place them on the grill. Cook for about 3-4 minutes on each side, or until the internal temperature reaches 165°F (74°C) and the skin is crispy and browned.
- Serve: Remove the quail from the grill and let them rest for a few minutes. Serve the grilled quail with lemon wedges on the side for an added burst of freshness.
Extra Tips:
When grilling quail, be mindful of the cooking time, as these birds cook quickly and can easily become overdone. It’s advisable to use a meat thermometer to confirm they reach the proper internal temperature without drying out.
Additionally, if you’re looking to add a smoky flavor, consider using wood chips during the grilling process. Experiment with different types of wood such as applewood or hickory to find your preferred taste.
Finally, make sure to let the quail rest before serving to allow the juices to redistribute, guaranteeing moist and flavorful meat.
Savor Venison Steaks: Rich and Gamey Treats
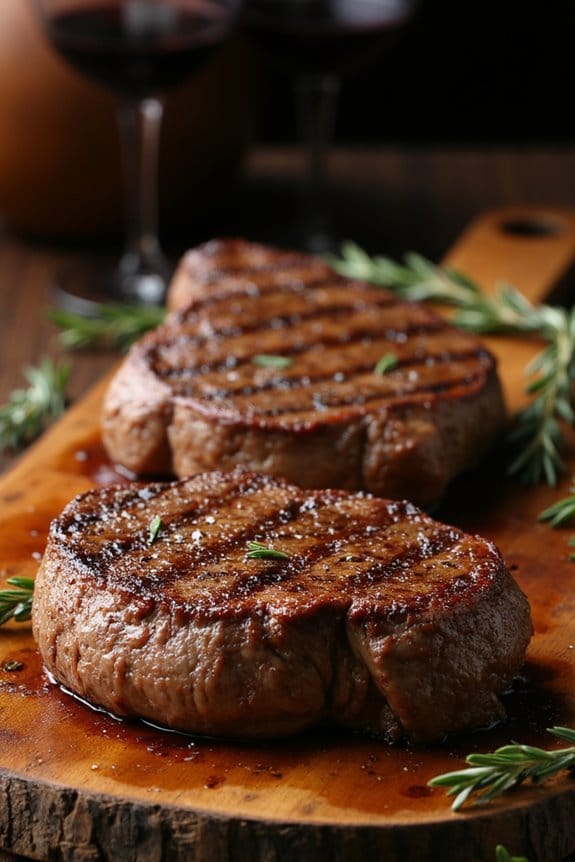
Venison steaks are a delectable option for those who appreciate rich, gamey flavors and are looking to add a touch of sophistication to their dinner menu. These steaks come from deer and are known for their lean, tender quality, making them a healthier alternative to beef.
Grilling venison steaks to perfection can enhance their natural flavors, resulting in a mouth-watering dish that’s sure to impress family and friends. The key to preparing these steaks lies in the proper marination and careful grilling, guaranteeing they remain juicy and flavorful while avoiding the dryness often associated with game meats.
Perfect for an outdoor grill session, venison steaks can be complemented with a variety of side dishes to create a well-rounded meal. To bring out the best in venison, a marinade featuring robust ingredients like red wine, garlic, and rosemary can add depth and complexity to the meat’s flavor profile.
Grilling the steaks over medium-high heat allows for a delicious crust to form on the outside while keeping the inside tender and succulent. Whether you’re an experienced grill master or a novice, this recipe offers a straightforward approach to achieving restaurant-quality venison steaks right at home.
Ingredients (Serves 4-6):
- 4-6 venison steaks, approximately 1 inch thick
- 1 cup red wine
- 1/4 cup olive oil
- 3 cloves garlic, minced
- 2 tablespoons fresh rosemary, chopped
- 1 tablespoon Worcestershire sauce
- Salt and pepper to taste
- Optional: Fresh thyme sprigs for garnish
Cooking Instructions:
- Prepare the Marinade: In a mixing bowl, combine red wine, olive oil, minced garlic, chopped rosemary, Worcestershire sauce, salt, and pepper. Whisk together until well mixed.
- Marinate the Steaks: Place the venison steaks in a large resealable plastic bag or shallow dish. Pour the marinade over the steaks, making sure they’re fully submerged. Seal the bag or cover the dish and refrigerate for at least 2 hours, or overnight for best results.
- Preheat the Grill: Heat your grill to medium-high heat, approximately 400°F (200°C). If using a charcoal grill, wait until the coals are covered with white ash.
- Grill the Steaks: Remove the steaks from the marinade and let any excess drip off. Place the steaks on the grill and cook for 4-5 minutes per side for medium-rare, or adjust the time to your preferred level of doneness. Use a meat thermometer to verify the internal temperature reaches 130°F (54°C) for medium-rare.
- Rest the Steaks: Once cooked, remove the steaks from the grill and let them rest for 5-10 minutes. This allows the juices to redistribute, making the steaks more tender and flavorful.
- Serve and Garnish: Transfer the steaks to a serving platter and garnish with fresh thyme sprigs if desired. Serve immediately with your choice of side dishes.
Extra Tips:
When grilling venison steaks, it’s essential not to overcook them, as they’re leaner than beef and can dry out easily. Always use a meat thermometer to check for doneness, as the visual cues can be misleading.
Additionally, allowing the steaks to marinate overnight will enhance their flavor considerably. If you prefer a smokier taste, consider adding a handful of wood chips to the grill before cooking.
Finally, pairing venison with a robust red wine or a hearty side like garlic mashed potatoes can complement the dish beautifully.
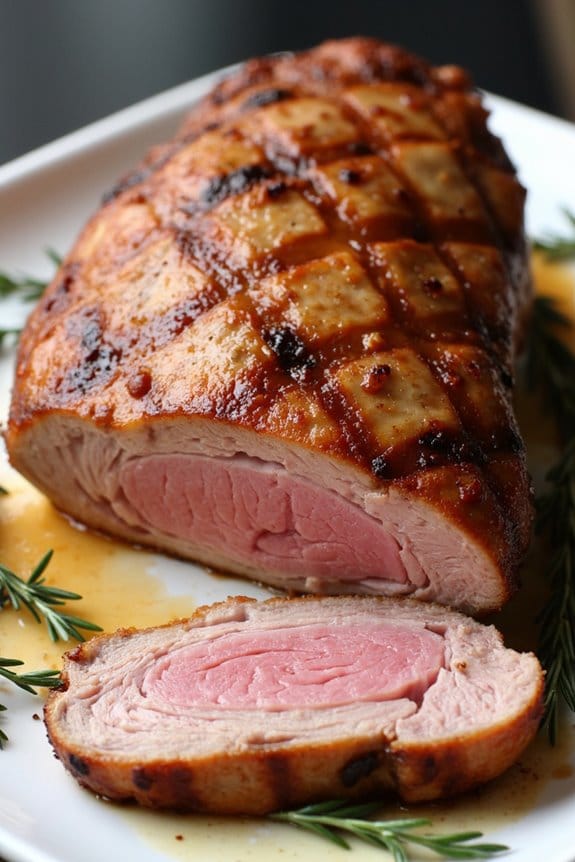
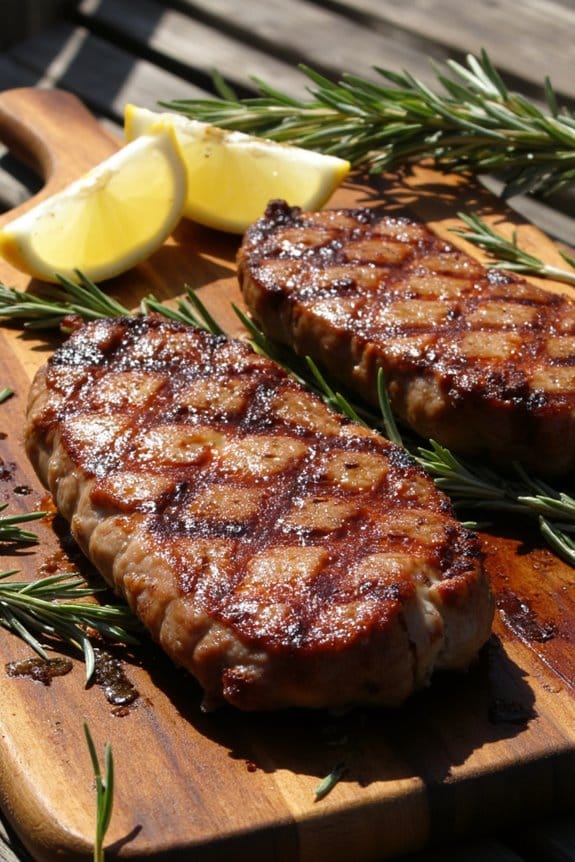
Master Grilled Pork Tenderloin: Techniques and Flavors
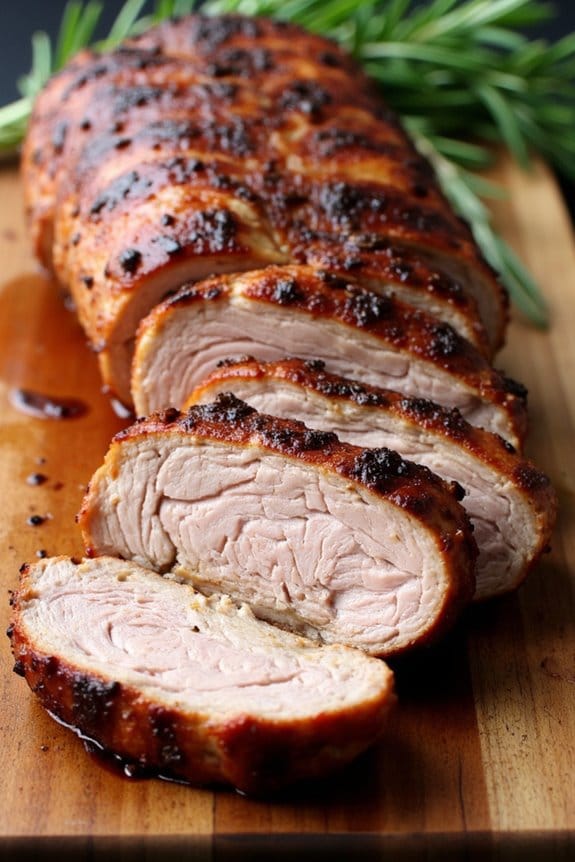
Grilled pork tenderloin is a succulent and flavorful dish that’s perfect for a family dinner or a gathering with friends. This lean cut of pork is ideal for grilling as it cooks quickly and absorbs marinades beautifully. By mastering a few simple techniques, you can transform a humble pork tenderloin into a gourmet meal. The key to achieving a juicy and tender result lies in the preparation and the grill’s temperature control.
With the right blend of spices and herbs, you can elevate the natural flavors of the meat, creating a dish that’s both simple and sophisticated.
To start, you’ll want to select a high-quality pork tenderloin, ideally from a trusted butcher or a reputable grocery store. A good tenderloin should be firm to the touch and have a slight pink hue. Marinating the pork is crucial for infusing it with flavor and guaranteeing that it remains moist during cooking. A marinade that balances sweetness, acidity, and spice will complement the pork perfectly.
Grilling the tenderloin over medium-high heat helps to sear the outside, locking in the juices while developing a delicious caramelized crust. With a few straightforward steps, you can create a mouthwatering grilled pork tenderloin that’s sure to impress.
Ingredients (Serves 4-6):
- 2 pork tenderloins (about 1 pound each)
- 1/4 cup olive oil
- 1/4 cup soy sauce
- 2 tablespoons honey
- 2 tablespoons Dijon mustard
- 4 cloves garlic, minced
- 1 tablespoon fresh rosemary, chopped
- 1 tablespoon fresh thyme leaves
- Salt and pepper to taste
Cooking Instructions:
- Prepare the Marinade: In a mixing bowl, combine the olive oil, soy sauce, honey, Dijon mustard, minced garlic, rosemary, and thyme. Stir well until all ingredients are fully integrated.
- Marinate the Pork: Place the pork tenderloins in a large resealable plastic bag or a shallow dish. Pour the marinade over the pork, guaranteeing that it’s well coated. Seal the bag or cover the dish with plastic wrap, then refrigerate for at least 2 hours or overnight for the best results.
- Preheat the Grill: About 30 minutes before you plan to grill, remove the pork from the refrigerator to bring it to room temperature. Preheat your grill to medium-high heat, approximately 375°F to 400°F.
- Grill the Pork: Remove the pork from the marinade and pat dry with paper towels. Season with salt and pepper. Place the tenderloins on the grill, and cook for about 15-20 minutes, turning every 5 minutes, until the internal temperature reaches 145°F for medium-rare or 160°F for medium.
- Rest the Meat: Once cooked, remove the pork from the grill and let it rest for 5-10 minutes. This allows the juices to redistribute throughout the meat, guaranteeing that each bite is juicy and flavorful.
- Slice and Serve: Cut the pork into 1/2-inch thick slices and serve immediately. Pair with your favorite sides for a complete meal.
Extra Tips:
For best results, always use a meat thermometer to check the internal temperature of the pork. This guarantees that it’s cooked to the perfect level of doneness without overcooking.
If you prefer a smokier flavor, consider adding wood chips to your grill. Additionally, if you’re short on time, a quick marinade of at least 30 minutes will still yield a tasty result, though overnight marinating is ideal.
Be sure to keep the grill lid closed as much as possible during cooking to maintain a steady temperature and prevent flare-ups.
Crispy Duck Breast: Perfect Grilled Skin and Juicy Meat
Few dishes can rival the luxurious taste and texture of a perfectly cooked duck breast. Achieving that sought-after golden, crispy skin while maintaining the tender, juicy meat beneath is a culinary art that brings a touch of sophistication to any meal. Grilling duck breast not only enhances its rich flavor but also adds a delightful smokiness that complements the natural sweetness of the meat.
Whether you’re hosting a dinner party or simply indulging in a gourmet dinner at home, this recipe for crispy duck breast will make a memorable centerpiece.
To prepare duck breast successfully, it’s vital to focus on both technique and quality ingredients. Selecting fresh duck breasts with the skin intact is important for achieving the crispy exterior that makes this dish so irresistible. Additionally, allowing the duck to come to room temperature before grilling guarantees even cooking.
With a few key steps and careful attention, you can create a restaurant-quality duck breast that’s both succulent and flavorful, with a skin so crisp it practically crackles beneath your fork.
Ingredients (Serves 4-6 people):
- 4 duck breasts, skin-on
- Salt
- Black pepper
- Olive oil
- Fresh thyme sprigs
- 2 cloves garlic, minced
- 1 lemon, juiced
Cooking Instructions:
- Preparation: Remove the duck breasts from the refrigerator and let them come to room temperature (about 20-30 minutes). This helps guarantee even cooking.
- Score the Skin: Using a sharp knife, gently score the skin of each duck breast in a crosshatch pattern, being careful not to cut into the meat. This allows the fat to render out more easily and helps the skin crisp up.
- Season: Generously season both sides of the duck breasts with salt and black pepper.
- Heat the Grill: Preheat your grill to medium-high heat. If using a charcoal grill, prepare a two-zone fire with hot coals on one side and no coals on the other.
- Sear the Duck: Lightly brush the duck skin with olive oil to prevent sticking. Place the duck breasts skin-side down on the hot side of the grill. Sear for about 4-5 minutes until the skin is crispy and golden brown.
- Grill Indirectly: Move the duck breasts to the cooler side of the grill (or lower the heat if using a gas grill). Close the grill lid and cook for an additional 8-10 minutes, or until the internal temperature reaches 135°F (for medium-rare).
- Rest the Meat: Remove the duck breasts from the grill and let them rest for 5 minutes. This allows the juices to redistribute throughout the meat.
- Finish with Flavor: While resting, drizzle the duck breasts with fresh lemon juice and sprinkle with minced garlic and thyme leaves. This adds a burst of freshness and aroma.
Extra Tips:
For the crispiest skin, make sure the duck breasts are patted dry with paper towels before scoring and seasoning. Additionally, starting with a cold grill pan can help render more fat and enhance crispiness if you’re using a stovetop grill.
Always use a meat thermometer to guarantee precision in cooking, as duck is best enjoyed at medium-rare to maintain its tenderness and flavor. Finally, consider pairing the duck with a simple arugula salad or roasted vegetables to round out the meal and complement the rich, savory notes of the grilled duck breast.
Enjoy Grilled Rabbit: Lean and Sweet
Grilled rabbit is a delightful and unique dish that offers a lean and slightly sweet flavor profile, perfect for a summer barbecue or an adventurous dinner. The tender meat absorbs marinades well, making it a versatile choice for grilling. When properly prepared, grilled rabbit can be as succulent and flavorful as any traditional barbecue favorite.
For this recipe, we’ll prepare a simple yet delicious herb marinade to infuse the rabbit with fresh flavors. The combination of herbs, garlic, and olive oil will enhance the natural sweetness of the rabbit, creating a mouth-watering dish that will be the highlight of your dinner table. Serve it alongside fresh vegetables or a crisp salad to complete the meal.
Ingredients (Serves 4-6):
- 2 whole rabbits, cleaned and cut into pieces
- 1/4 cup olive oil
- 3 tablespoons fresh lemon juice
- 4 cloves garlic, minced
- 1 tablespoon fresh rosemary, chopped
- 1 tablespoon fresh thyme, chopped
- 1 tablespoon fresh parsley, chopped
- Salt and pepper to taste
- Lemon wedges for serving
Instructions:
- Prepare the Marinade: In a small bowl, combine olive oil, lemon juice, minced garlic, rosemary, thyme, parsley, salt, and pepper. Mix well to guarantee the herbs and garlic are evenly distributed throughout the oil and lemon juice.
- Marinate the Rabbit: Place the rabbit pieces in a large resealable plastic bag or a shallow dish. Pour the marinade over the rabbit, ensuring each piece is well coated. Seal the bag or cover the dish, and refrigerate for at least 2 hours, preferably overnight, to allow the flavors to penetrate the meat.
- Preheat the Grill: When ready to cook, preheat your grill to medium-high heat. If using charcoal, ensure the coals are hot and have a light coating of ash.
- Grill the Rabbit: Remove the rabbit pieces from the marinade, allowing any excess to drip off. Place the rabbit on the grill, skin-side down if applicable. Grill for about 15-20 minutes per side, or until the internal temperature reaches 160°F (71°C) and the meat is no longer pink. Turn occasionally to prevent burning and to guarantee even cooking.
- Rest and Serve: Once cooked, remove the rabbit from the grill and let it rest for 5 minutes. This allows the juices to redistribute throughout the meat. Serve with lemon wedges on the side for an added citrus burst.
Extra Tips:
When grilling rabbit, make sure to monitor the heat closely, as rabbit is a lean meat that can dry out quickly if overcooked. To keep the meat moist, consider basting it with a little extra marinade or olive oil during grilling.
Additionally, using a meat thermometer can help guarantee the rabbit is cooked perfectly without guesswork. If you prefer a smoky flavor, you can add soaked wood chips to the grill for an extra layer of taste.
Enjoy your grilled rabbit as a unique and flavorful main course that’s sure to impress.
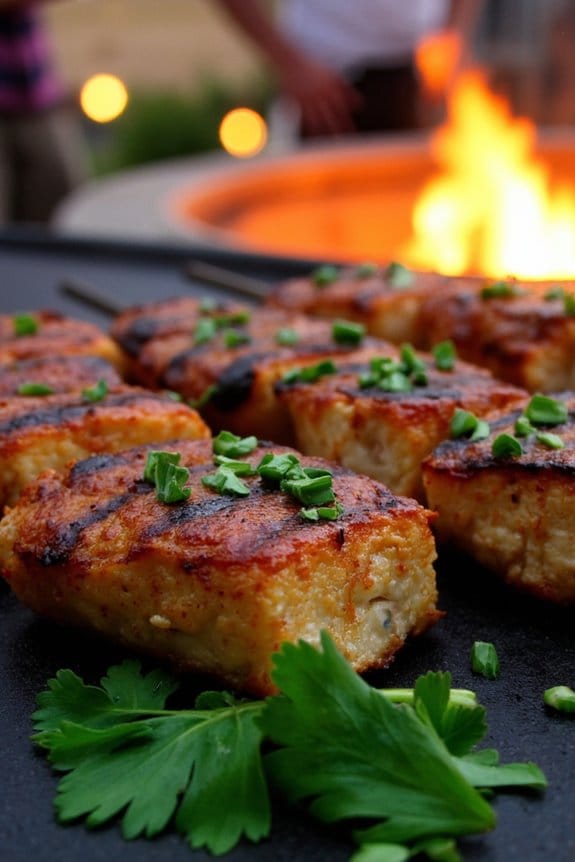
Why You’ll Love Grilled Swordfish Steaks
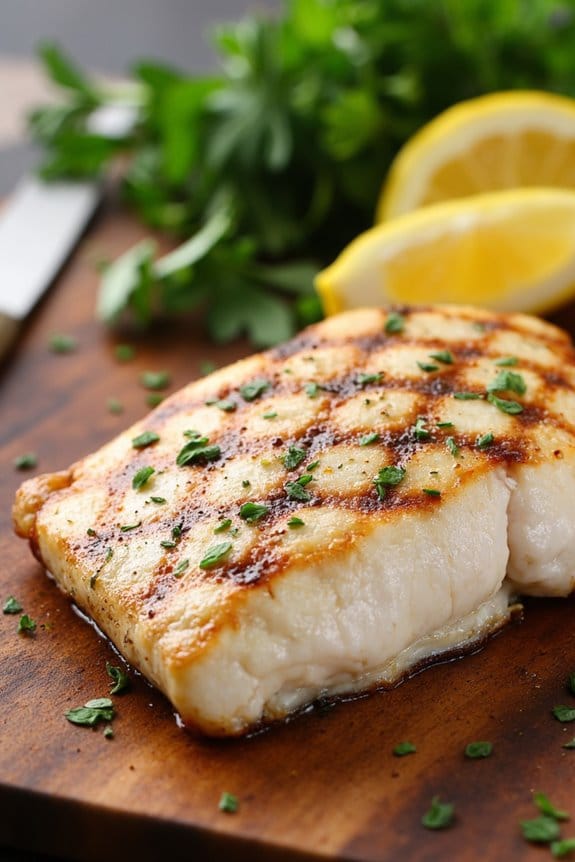
Grilled Swordfish Steaks are a delightful addition to any dinner table, offering a perfect blend of texture and flavor that’s both satisfying and incredibly delicious. Swordfish is known for its firm, meaty texture, making it an ideal candidate for grilling. With each bite, you’ll experience a delightful smokiness combined with the rich, slightly sweet taste of the fish. It’s a dish that’s both elegant and simple, making it perfect for both casual family dinners and special occasions.
The beauty of grilled swordfish lies not only in its taste but also in its versatility, as it pairs well with a variety of side dishes, from fresh salads to grilled vegetables. What truly sets Grilled Swordfish Steaks apart is their ability to absorb flavors from marinades and seasonings, making each bite a burst of flavor.
This recipe features a simple yet flavorful marinade that enhances the natural taste of the swordfish without overpowering it. The key is to strike a balance, allowing the subtle flavors of the fish to shine through while adding a hint of zest and freshness. Once grilled to perfection, these steaks have a slight char that complements their moist and tender interior. With this recipe, you’ll find that grilling swordfish isn’t only quick and easy but also incredibly rewarding.
Ingredients (Serves 4-6):
- 4-6 swordfish steaks, about 1 inch thick
- 1/4 cup olive oil
- 2 tablespoons lemon juice
- 2 tablespoons soy sauce
- 1 tablespoon minced garlic
- 1 teaspoon salt
- 1/2 teaspoon black pepper
- 1 tablespoon chopped fresh parsley
- Lemon wedges, for serving
Cooking Instructions:
- Prepare the Marinade: In a small bowl, whisk together the olive oil, lemon juice, soy sauce, minced garlic, salt, and black pepper. This mixture will serve as both a marinade and a basting sauce.
- Marinate the Swordfish: Place the swordfish steaks in a shallow dish or a resealable plastic bag. Pour the marinade over the steaks, making certain they’re evenly coated. Cover the dish or seal the bag and refrigerate for at least 30 minutes to allow the flavors to penetrate the fish.
- Preheat the Grill: Preheat your grill to medium-high heat. If using a charcoal grill, make certain the coals are evenly distributed for consistent cooking.
- Grill the Swordfish: Remove the swordfish steaks from the marinade and place them on the preheated grill. Discard the remaining marinade. Grill the steaks for about 4-5 minutes on each side, or until the fish is opaque and flakes easily with a fork. Avoid overcooking to maintain moisture.
- Baste and Serve: During the last minute of grilling, brush the steaks lightly with the remaining marinade mixture to enhance the flavor. Remove the steaks from the grill and let them rest for a few minutes. Sprinkle with fresh parsley and serve with lemon wedges.
Extra Tips:
When grilling swordfish, it’s important to keep an eye on the cooking time to prevent the fish from becoming dry. Swordfish steaks are thick, so they require slightly longer grilling times compared to other fish, but overcooking can lead to a tough texture.
If you prefer a bit of extra char, you can increase the heat during the last minute of grilling. Additionally, consider using a fish basket or lightly oiling the grill grates to prevent the fish from sticking. Feel free to experiment with other herbs and spices in the marinade to customize the flavor to your liking.
Grilling Alligator: Exotic and Lean Protein
If you’re looking for an exotic and lean protein to jazz up your grilling repertoire, alligator meat is a fantastic choice. Alligator has a mild flavor, somewhat similar to chicken or fish, and its firm texture makes it perfect for grilling. This recipe for Grilled Alligator with Citrus Marinade balances the meat’s rich taste with a bright and zesty marinade that enhances its natural flavors.
Whether you’re a seasoned griller or an adventurous cook, this dish is sure to impress your guests at your next backyard gathering.
Sourcing alligator meat may be unusual for some, but it’s increasingly becoming available in specialty stores and online. When preparing alligator, it’s essential to recognize that the meat is quite lean, so it benefits from marination to tenderize it and infuse it with flavor.
This recipe serves 4-6 people and is perfect for those who want to explore new culinary horizons. The citrus marinade not only tenderizes the meat but also adds a revitalizing zing that pairs beautifully with the smokiness of the grill.
Ingredients for 4-6 People:
- 2 pounds of alligator tail fillets, cleaned and cut into 1-inch cubes
- 1/4 cup olive oil
- 1/4 cup fresh lemon juice
- 1/4 cup fresh lime juice
- 3 cloves garlic, minced
- 1 tablespoon soy sauce
- 1 tablespoon honey
- 1 teaspoon ground black pepper
- 1/2 teaspoon salt
- 1/2 teaspoon smoked paprika
- Wooden or metal skewers
- Fresh parsley, chopped, for garnish
Instructions:
- Prepare the Marinade: In a large mixing bowl, combine the olive oil, lemon juice, lime juice, minced garlic, soy sauce, honey, ground black pepper, salt, and smoked paprika. Whisk the ingredients together until well combined to create the citrus marinade.
- Marinate the Alligator: Place the alligator cubes into the bowl with the marinade, ensuring that each piece is well coated. Cover the bowl with plastic wrap and refrigerate for at least 2 hours, or preferably overnight, to allow the flavors to penetrate the meat and tenderize it.
- Prepare the Grill: Preheat your grill to medium-high heat. If using wooden skewers, soak them in water for about 30 minutes before use to prevent them from burning during grilling.
- Skewer the Alligator: Remove the alligator from the marinade and thread the cubes onto the skewers, leaving a little space between each piece for even cooking. Discard any leftover marinade.
- Grill the Alligator: Place the skewers on the grill and cook for about 10-12 minutes, turning occasionally, until the alligator is cooked through and has a slightly charred exterior. The meat should be firm and opaque.
- Serve: Remove the alligator skewers from the grill and let them rest for a few minutes. Garnish with freshly chopped parsley before serving.
Extra Tips:
When grilling alligator, it’s vital to avoid overcooking as it can become tough due to its low fat content. Keep a close eye on the grill and aim for a perfectly cooked, juicy interior.
If you’re new to alligator meat, don’t worry too much about the exact cooking time; instead, focus on the texture, ensuring it’s firm but not rubbery. Also, feel free to experiment with different marinades and seasonings to suit your taste preferences, as alligator is quite adaptable to a variety of flavors.
Explore Kangaroo Fillets: Low-Fat Iron Boost
Kangaroo fillets are a delicious, nutritious, and environmentally friendly choice for your next grilling session. Known for their low-fat content and high iron levels, kangaroo meat is a tender and flavorful protein that pairs beautifully with a variety of herbs and spices.
In this recipe, we’ll prepare a delightful herb marinade that complements the natural taste of the meat, resulting in a dish that’s both mouth-watering and wholesome. Perfect for a family dinner or an outdoor barbecue, these grilled kangaroo fillets will surely impress your family and friends.
This recipe is designed to serve 4-6 people, making it ideal for a small gathering or a cozy dinner with loved ones. The marinade infuses the fillets with a burst of flavor while keeping the meat juicy and tender during grilling. Serve these succulent fillets with your choice of sides, such as grilled vegetables or a fresh salad, to create a balanced and satisfying meal.
Follow the steps below to prepare this delectable dish.
Ingredients:
- 4-6 kangaroo fillets (approximately 150-200 grams each)
- 1/4 cup olive oil
- 2 tablespoons balsamic vinegar
- 3 cloves garlic, minced
- 1 tablespoon fresh rosemary, chopped
- 1 tablespoon fresh thyme, chopped
- 1 tablespoon Dijon mustard
- Salt and pepper to taste
- Lemon wedges for serving
Cooking Instructions:
1. Prepare the Marinade:
In a medium-sized mixing bowl, combine the olive oil, balsamic vinegar, minced garlic, chopped rosemary, chopped thyme, and Dijon mustard. Whisk the ingredients together until well-blended. Season the marinade with salt and pepper to taste.
2. Marinate the Fillets:
Place the kangaroo fillets in a shallow dish or a zip-lock bag. Pour the marinade over the fillets, making sure they’re evenly coated. Seal the dish with plastic wrap or close the bag securely. Allow the fillets to marinate in the refrigerator for at least 1 hour, or up to 4 hours for a more intense flavor.
3. Preheat the Grill:
Preheat your grill to medium-high heat. If you’re using a charcoal grill, make sure the coals are hot and the grill grates are clean and lightly oiled to prevent sticking.
4. Grill the Fillets:
Remove the fillets from the marinade and let any excess marinade drip off. Place the fillets on the preheated grill. Cook for approximately 3-4 minutes on each side for medium-rare, or until your desired level of doneness is reached. Use a meat thermometer if needed; kangaroo fillets are best served when the internal temperature reaches 135°F (57°C).
5. Rest and Serve:
Once cooked, remove the fillets from the grill and let them rest for about 5 minutes. This allows the juices to redistribute throughout the meat, making sure each bite is tender and juicy. Serve the grilled kangaroo fillets with lemon wedges on the side for a rejuvenating citrus touch.
Extra Tips:
When cooking kangaroo fillets, it’s important not to overcook them, as they can quickly become tough due to their low-fat content. Aim for a medium-rare to medium doneness to retain their tenderness.
Additionally, make sure that the grill is hot before placing the fillets on it; this helps to achieve a nice sear while locking in the juices. If you prefer a smokier flavor, consider using wood chips on the grill for added depth to the dish. Enjoy your meal!
Heart-Healthy Ostrich Burgers: A Unique Choice

Ostrich meat is an excellent choice for those seeking a heart-healthy alternative to traditional beef burgers. Known for its rich flavor and lean profile, ostrich is lower in fat and cholesterol, making it a perfect option for a guilt-free barbecue.
These ostrich burgers pack a punch with their juicy texture and robust taste, offering a delightful twist to your standard burger fare. Perfect for a family gathering or a casual dinner with friends, these burgers are sure to impress with their unique flavor and nutritional benefits.
Creating the perfect ostrich burger involves carefully selecting complementary ingredients that enhance the natural taste of the meat while maintaining its health benefits. By incorporating fresh herbs and spices, you can elevate the flavor profile without adding unnecessary calories or fat.
Whether you’re an experienced grill master or a novice cook, this recipe is simple enough for anyone to follow and guarantees a delicious outcome that will have everyone coming back for seconds.
Ingredients for 4-6 servings:
- 2 pounds of ground ostrich meat
- 1 small onion, finely chopped
- 2 cloves of garlic, minced
- 1 tablespoon Worcestershire sauce
- 1 tablespoon Dijon mustard
- 1 teaspoon smoked paprika
- 1 teaspoon salt
- 1/2 teaspoon black pepper
- 1/4 cup fresh parsley, chopped
- 6 whole-grain hamburger buns
- Lettuce leaves
- Tomato slices
- Red onion slices
- Your choice of condiments (e.g., ketchup, mustard, mayonnaise)
Instructions:
- Prepare the Ostrich Mixture: In a large mixing bowl, combine the ground ostrich meat, finely chopped onion, minced garlic, Worcestershire sauce, Dijon mustard, smoked paprika, salt, black pepper, and chopped fresh parsley. Use your hands to mix the ingredients thoroughly until well combined.
- Form Patties: Divide the mixture into 6 equal portions and shape each portion into a patty about 3/4 inch thick. Confirm the patties are uniform in size to guarantee even cooking.
- Preheat the Grill: Heat your grill to medium-high heat. If using a charcoal grill, make sure the coals are evenly spread and fully heated. For a gas grill, preheat for about 10 minutes.
- Grill the Patties: Place the ostrich patties on the grill. Cook for approximately 4-5 minutes on each side, or until the internal temperature reaches 160°F (71°C). Avoid pressing down on the patties with a spatula to retain their juices.
- Toast the Buns: While the patties are grilling, lightly toast the hamburger buns on the grill for about 1-2 minutes until golden brown.
- Assemble the Burgers: Place a grilled ostrich patty on the bottom half of each bun. Top with lettuce, tomato slices, and red onion slices. Add your choice of condiments, and cover with the top half of the bun.
Extra Tips:
When grilling ostrich burgers, it’s important not to overcook them, as ostrich meat is lean and can dry out quickly. Aim for a medium-rare to medium doneness for the juiciest results.
Additionally, if you’re unable to find ground ostrich meat locally, consider ordering it from a specialty butcher or online retailer. Experiment with different toppings and condiments to tailor the burgers to your taste preferences, and enjoy the culinary adventure that comes with trying something new and healthy!
Bold Elk Steaks: Grilling a Lean Cut

Grilling elk steaks can be an exciting culinary endeavor, perfect for those who appreciate the unique flavors of game meat. Elk is notably leaner than beef, providing a rich, robust taste while offering a healthier option with less fat. When grilling elk, it’s important to pay attention to the cooking temperature and time, as overcooking can result in a tough and dry texture. Savor the bold flavors of these elk steaks, enhanced with a simple yet effective marinade, perfect for your next outdoor grill session.
For this recipe, we’re focusing on bringing out the natural flavors of elk with a marinade that complements rather than overpowers the meat. The key is to allow the steaks to marinate for several hours, guaranteeing they absorb the delightful blend of herbs and spices. This recipe is designed to serve 4-6 people, making it an excellent choice for family gatherings or a dinner party with friends. Fire up the grill and get ready to impress with these perfectly grilled elk steaks.
Ingredients (Serves 4-6):
- 4-6 elk steaks, approximately 6-8 ounces each
- 1/4 cup olive oil
- 2 tablespoons soy sauce
- 2 tablespoons Worcestershire sauce
- 3 cloves garlic, minced
- 1 teaspoon dried rosemary
- 1 teaspoon dried thyme
- 1 teaspoon black pepper
- 1/2 teaspoon salt
- 1 tablespoon lemon juice
Cooking Instructions:
- Prepare the Marinade: In a medium-sized bowl, combine olive oil, soy sauce, Worcestershire sauce, minced garlic, rosemary, thyme, black pepper, salt, and lemon juice. Mix well to make sure all ingredients are thoroughly combined.
- Marinate the Steaks: Place the elk steaks in a large resealable plastic bag or a shallow dish. Pour the marinade over the steaks, making sure each piece is well-coated. Seal the bag or cover the dish with plastic wrap and refrigerate for at least 4 hours, preferably overnight for deeper flavor infusion.
- Preheat the Grill: About 30 minutes before you’re ready to grill, remove the steaks from the refrigerator to allow them to reach room temperature. Preheat your grill to medium-high heat, approximately 400°F to 450°F.
- Grill the Steaks: Remove the steaks from the marinade, allowing excess liquid to drip off. Place the steaks on the grill and cook for 4-5 minutes on each side for medium-rare, depending on the thickness of the steaks. Use a meat thermometer to confirm the internal temperature reaches approximately 125°F for medium-rare.
- Rest the Steaks: Once cooked to your desired doneness, remove the steaks from the grill and let them rest on a plate, covered loosely with aluminum foil, for about 5-10 minutes. This allows the juices to redistribute, ensuring a moist and flavorful steak.
Extra Tips:
When grilling elk steaks, it’s essential not to overcook them due to their lean nature. Aim for medium-rare to medium doneness to retain the juiciness and tenderness of the meat. If you’re unsure about the doneness, use a meat thermometer for accuracy.
Additionally, consider pairing the steaks with a side of roasted vegetables or a fresh salad to complement the rich flavors of the elk. Remember, resting the meat after grilling is key to achieving the best texture and taste. Enjoy your bold elk steaks with your choice of sides and good company!