

There’s nothing quite like the joy of biting into a perfectly warm and melty grilled cheese sandwich. Whether you’re loyal to the classic cheddar and sourdough or excited to explore gourmet combinations like truffle oil and Brie, this collection is sure to spark your culinary creativity. From the spicy kick of jalapeño popper to the delightful blend of sweet apple and cheddar, these 12 cozy recipes are perfect for bringing comfort to chilly days. Get ready to discover your new favorite grilled cheese creation. Enjoy the cheesy goodness!
Classic Comfort: Traditional Grilled Cheese

There’s nothing quite like the nostalgic taste of a classic grilled cheese sandwich. With its crispy, golden-brown exterior and gooey, melted cheese interior, this timeless comfort food is a favorite among both kids and adults. Perfect for a quick lunch or a cozy dinner, the traditional grilled cheese is a simple yet satisfying dish that requires minimal ingredients and effort.
Its versatility allows you to pair it with a hot bowl of tomato soup or a fresh green salad, making it an ideal choice for any mealtime.
Creating the perfect grilled cheese requires a few essential components: bread, cheese, and butter. The secret to a great sandwich lies in the quality of these ingredients. Choose a hearty bread that can withstand the heat and hold the cheese, such as sourdough or French bread. For the cheese, a good melting cheese like cheddar, American, or gruyere works best.
Butter is used to achieve that crispy exterior, and for a touch of flavor, you may opt for a herb-infused or garlic butter. With these elements in place, you’re ready to make a classic grilled cheese that will delight your taste buds.
Ingredients (Serves 4-6):
- 12 slices of bread (such as sourdough or French bread)
- 12 slices of cheese (such as cheddar, American, or gruyere)
- 6 tablespoons of unsalted butter, softened
Cooking Instructions:
- Prepare the Bread: Lay out the slices of bread on a clean surface. Spread a thin layer of softened butter on one side of each slice. This will be the side that gets grilled, ensuring a crispy, golden-brown finish.
- Assemble the Sandwiches: Flip the bread slices so that the buttered sides are facing down. Place two slices of cheese on the unbuttered side of half of the bread slices. Top with the remaining bread slices, keeping the buttered side facing out.
- Heat the Pan: Preheat a large skillet or griddle over medium heat. It’s important to have the right temperature to melt the cheese without burning the bread.
- Grill the Sandwiches: Place the sandwiches in the skillet, ensuring they aren’t overcrowded. You may need to do this in batches. Cook for about 3-4 minutes on each side, pressing down gently with a spatula, until the bread is golden brown and the cheese has melted.
- Serve: Once cooked, remove the sandwiches from the skillet and let them cool for a minute before slicing. Serve hot, ideally with a side of tomato soup or a light salad.
Extra Tips:
For the best results, use room temperature butter, as it spreads more evenly on the bread, ensuring an even golden-brown crust. If you want to add a little twist to the classic recipe, consider incorporating additional ingredients like sliced tomatoes, bacon, or caramelized onions.
These can be layered between the cheese slices before grilling. Finally, to avoid sogginess, refrain from using too much butter or overcrowding the skillet, which can cause steaming rather than grilling. Enjoy your delicious classic grilled cheese!
Gourmet Indulgence: Truffle Oil and Brie
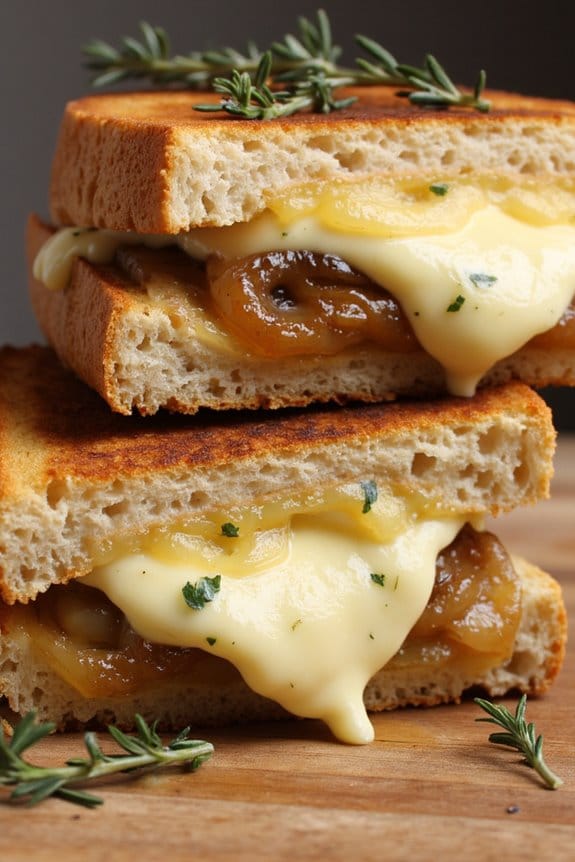
Elevate your grilled cheese game with this luxurious twist featuring the rich flavors of truffle oil and creamy Brie. Perfect for a special occasion or when you simply want to indulge, this gourmet grilled cheese combines the earthiness of truffle oil with the buttery smoothness of Brie, complemented by the sweet and tangy notes of caramelized onions. The result is a mouthwatering masterpiece that brings a touch of elegance to a beloved classic.
This recipe serves 4-6 people, making it an ideal choice for a small gathering or a sumptuous family meal. Each bite is a perfect balance of crisp, golden bread and the oozy perfection of melted cheese, leaving you with a dining experience that’s both comforting and sophisticated. Pair it with a simple green salad or a bowl of tomato bisque for a complete meal that will leave your guests asking for seconds.
Ingredients:
- 12 slices of sourdough bread
- 1 pound Brie cheese, rind removed and sliced
- 1/4 cup truffle oil
- 1 large onion, thinly sliced
- 2 tablespoons unsalted butter
- Salt and pepper to taste
- 1 tablespoon olive oil
- Optional: fresh thyme or arugula for garnish
Cooking Instructions:
- Prepare the Caramelized Onions: In a skillet over medium heat, add the olive oil and butter. Once the butter is melted, add the sliced onions. Stir occasionally and cook for about 20-25 minutes until the onions are golden brown and caramelized. Season with salt and pepper to taste, then set aside.
- Assemble the Sandwiches: Lay out the slices of sourdough bread. Drizzle or brush one side of each slice with truffle oil. On the non-oiled side, layer slices of Brie cheese evenly. Add a generous spoonful of caramelized onions on top of the Brie. Optionally, add fresh thyme or a few arugula leaves for added flavor.
- Cooking the Sandwiches: Preheat a large skillet or griddle over medium heat. Place the sandwiches, truffle oil-side down, onto the hot skillet. Cook for about 3-5 minutes on each side, or until the bread is golden brown and the Brie is thoroughly melted.
- Serve: Once cooked, remove the sandwiches from the skillet and let them cool slightly before slicing. Serve warm, garnished with additional thyme or arugula if desired.
Extra Tips:
For the best results, choose a high-quality Brie that melts easily and has a rich, creamy flavor. The truffle oil should be added sparingly; a little goes a long way to infuse the sandwich with its distinctive aroma. If you prefer a stronger truffle flavor, you can lightly drizzle additional oil over the finished sandwich.
Also, make certain your skillet is preheated properly to achieve that perfect golden crust without burning the bread. Enjoy your gourmet grilled cheese with a glass of your favorite wine for a truly indulgent experience.
For Spice Lovers: Jalapeño Popper Grilled Cheese
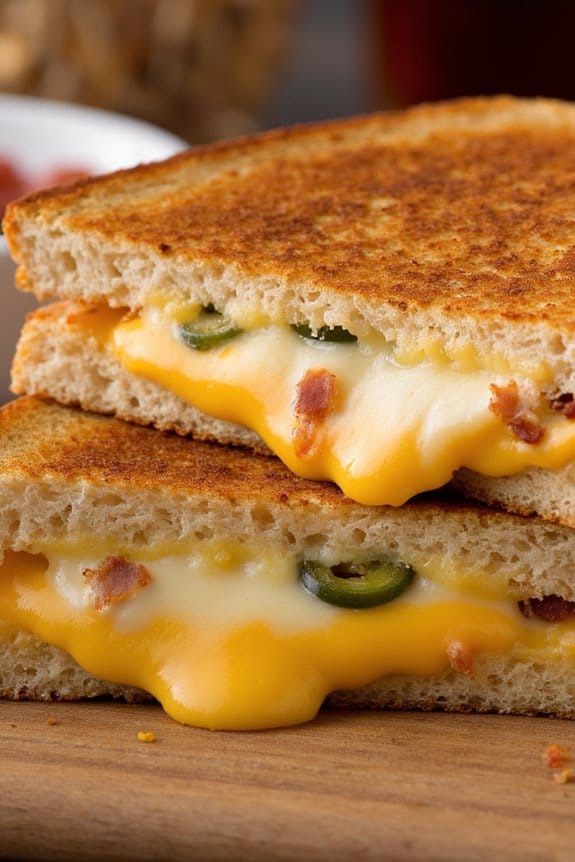
For those who crave a spicy kick, the Jalapeño Popper Grilled Cheese is the perfect comfort food with a twist. This dish takes the classic grilled cheese sandwich and infuses it with the bold flavors of a jalapeño popper. Creamy, cheesy, and with the right amount of heat, this grilled cheese is sure to satisfy your taste buds.
Whether you’re a fan of spicy foods or just looking to try something new, this recipe is a delightful way to elevate a simple sandwich into a gourmet experience. Perfect for a casual lunch or a quick dinner, the Jalapeño Popper Grilled Cheese is both easy to make and incredibly satisfying.
It combines the smoothness of cream cheese with the gooey goodness of cheddar, and the spicy punch of jalapeños. Balanced with crispy bacon and buttery, toasted bread, this dish is a harmony of flavors and textures. Preparing this for a group of friends or family will certainly make you the star of the kitchen, as this recipe serves 4-6 people and is sure to be a crowd-pleaser.
Ingredients (Serves 4-6)
- 8 slices of sourdough bread
- 1 cup cream cheese, softened
- 1 cup shredded cheddar cheese
- 1 cup shredded Monterey Jack cheese
- 4 jalapeños, seeded and diced
- 8 slices of cooked bacon, crumbled
- 4 tablespoons butter, softened
- Salt and pepper, to taste
Cooking Instructions
- Prepare the Jalapeño Mixture: In a medium bowl, combine the softened cream cheese, shredded cheddar, shredded Monterey Jack, diced jalapeños, crumbled bacon, salt, and pepper. Mix until well combined and the ingredients are evenly distributed.
- Butter the Bread: Spread a thin layer of softened butter on one side of each slice of sourdough bread. The buttered side will be the outer part of the sandwich, ensuring a golden, crispy finish.
- Assemble the Sandwiches: Lay four slices of bread, buttered side down, on a clean surface. Evenly distribute the jalapeño cream cheese mixture on top of these slices. Top each with another slice of bread, buttered side up, to form a sandwich.
- Preheat the Skillet: Heat a large skillet or griddle over medium heat. You want the skillet hot enough to toast the bread but not so hot that it burns before the cheese melts.
- Cook the Sandwiches: Place the sandwiches in the skillet, cooking them in batches if necessary. Cook for about 3-4 minutes on each side, or until the bread is golden brown and the cheese is melted. Press down gently with a spatula for even cooking.
- Serve Immediately: Once cooked, remove the sandwiches from the skillet and let them cool slightly before slicing them in half. Serve warm and enjoy the gooey, spicy, cheesy delight.
Extra Tips
When making the Jalapeño Popper Grilled Cheese, consider using gloves when handling the jalapeños to avoid any irritation. If you prefer a milder flavor, reduce the amount of jalapeños or remove the seeds and membranes, where most of the heat is concentrated.
For a smokier flavor, try adding a few dashes of smoked paprika to the cream cheese mixture. Additionally, using a panini press can help achieve a perfectly crispy texture on the outside while ensuring the cheese melts evenly inside.
Sweet Meets Savory: Apple and Cheddar
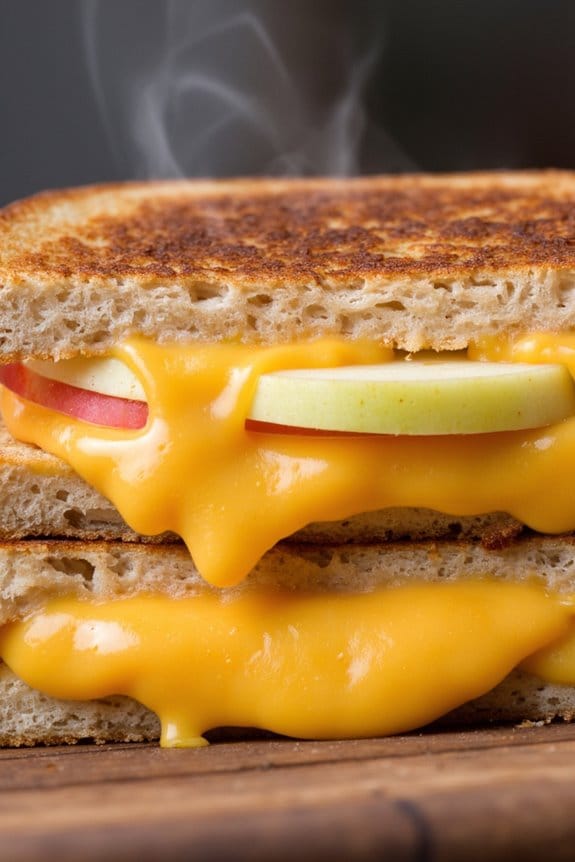
Grilled cheese sandwiches are a classic comfort food, beloved for their simplicity and rich flavors. However, adding a twist to the traditional recipe can elevate it to a whole new level. The Sweet Meets Savory: Apple and Cheddar grilled cheese combines the sharpness of cheddar cheese with the sweet and tart flavors of fresh apples. This combination creates a delightful contrast that’s both satisfying and indulgent. Ideal for lunch or a light dinner, this recipe brings a gourmet touch to a beloved classic.
Perfect for an afternoon treat or a family meal, this Apple and Cheddar Grilled Cheese is designed to serve 4-6 people, making it a great option for small gatherings or as a comforting meal for your loved ones. The combination of flavors is sure to impress, and with just a few simple ingredients, you can create an unforgettable dish. Enjoy the balance of sweet apple slices with the creamy, melted cheddar cheese, all encased in perfectly toasted bread.
Let’s plunge into this delectable recipe that promises to please both adults and children alike.
Ingredients (serves 4-6):
- 8-12 slices of sourdough bread
- 2-3 medium-sized apples (such as Granny Smith or Honeycrisp), thinly sliced
- 3 cups shredded sharp cheddar cheese
- 6 tablespoons unsalted butter, softened
- 2 tablespoons honey (optional)
- 1 teaspoon ground cinnamon (optional)
Cooking Instructions:
- Prepare the Bread: Lay out the slices of sourdough bread on a clean surface. Spread a thin layer of softened butter on one side of each slice. This will help create a golden, crispy crust when grilled.
- Assemble the Sandwiches: On the non-buttered side of half of the bread slices, layer a generous amount of shredded sharp cheddar cheese. Place a few thin slices of apple over the cheese. If desired, drizzle a small amount of honey and sprinkle a light dusting of cinnamon over the apples for an added layer of flavor.
- Close the Sandwiches: Top each assembled half with another slice of bread, buttered side facing outwards, to form a complete sandwich.
- Grill the Sandwiches: Heat a large skillet or griddle over medium heat. Place the sandwiches in the skillet, cooking in batches if necessary. Grill each side for about 3-4 minutes, or until the bread is golden brown and the cheese is melted. Press down lightly with a spatula to guarantee even heating.
- Rest and Serve: Once the sandwiches are grilled to perfection, remove them from the skillet and let them rest for a minute. This allows the cheese to set slightly, making it easier to slice. Cut each sandwich in half or quarters, and serve warm.
Extra Tips:
For the best results, choose apples that are firm and slightly tart, such as Granny Smith or Honeycrisp, as they provide a nice contrast with the cheddar cheese. If you prefer a more intense cheese flavor, consider using a combination of sharp and extra-sharp cheddar cheese.
Additionally, using sourdough bread adds a subtle tang that complements the sweet and savory elements of the sandwich. To prevent the apples from browning, slice them just before assembling the sandwiches.
Finally, consider using a panini press if you have one available, as it will create an evenly toasted and pressed sandwich.
Taste of the Mediterranean: Feta and Olive
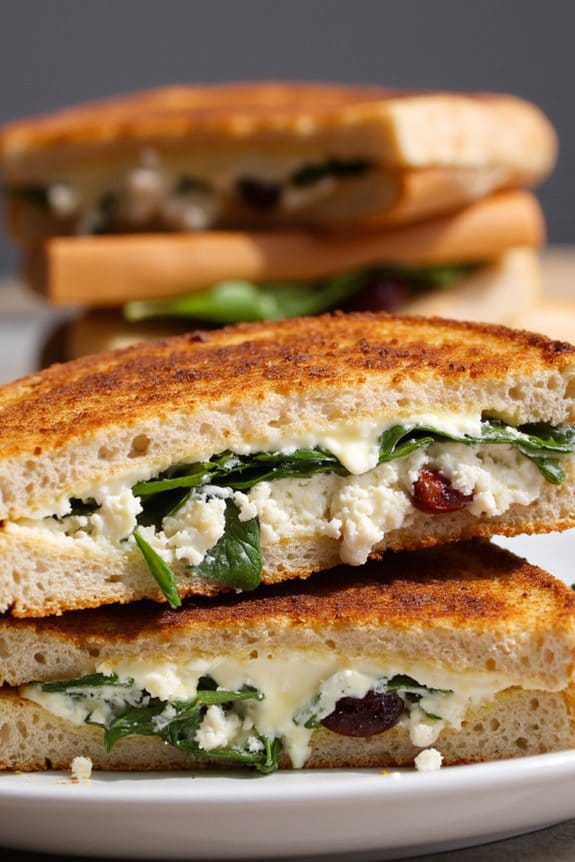
Transport your taste buds to the sun-drenched coasts of the Mediterranean with this flavorful Feta and Olive Grilled Cheese. This delightful twist on the classic sandwich combines the tangy, creamy goodness of feta cheese with the briny bite of olives, enveloped in golden, crispy bread. Perfect for a quick lunch or a comforting dinner, this grilled cheese is both sophisticated and simple to prepare, making it an ideal choice for entertaining or a cozy night in.
The robust flavors of the Mediterranean are highlighted by the addition of fresh herbs and a hint of garlic, creating a complex yet harmonious taste profile. The feta cheese melts beautifully, blending with the olives to create a luscious filling that contrasts perfectly with the crunchy exterior. This dish is sure to be a hit with both cheese lovers and those seeking a new culinary adventure.
Ingredients (Serves 4-6):
- 8 slices of rustic bread (sourdough or ciabatta recommended)
- 1 cup crumbled feta cheese
- 1/2 cup pitted Kalamata olives, chopped
- 1/4 cup fresh basil leaves, chopped
- 1/4 cup fresh parsley, chopped
- 1 garlic clove, minced
- 1/4 cup sun-dried tomatoes, finely chopped (optional)
- 1/4 cup olive oil
- Salt and pepper to taste
- Butter for grilling
Cooking Instructions:
- Prepare the Filling: In a medium bowl, combine the crumbled feta cheese, chopped olives, basil, parsley, minced garlic, and sun-dried tomatoes (if using). Mix well until all ingredients are evenly distributed. Season with salt and pepper to taste, keeping in mind that feta and olives are naturally salty.
- Assemble the Sandwiches: Lay out the slices of bread on a clean surface. Evenly distribute the feta and olive mixture over half of the bread slices. Top with the remaining bread slices to form sandwiches.
- Preheat the Pan: Heat a large skillet or griddle over medium heat. Add a small amount of butter to the pan, allowing it to melt and coat the surface evenly.
- Grill the Sandwiches: Carefully place the sandwiches in the pan. Cook for 3-4 minutes on one side until the bread is golden and crispy. Carefully flip the sandwiches and grill the other side for an additional 3-4 minutes, pressing down gently with a spatula to guarantee even cooking. The cheese should be melted, and the bread should be a nice golden brown.
- Serve: Once cooked, remove the sandwiches from the skillet and let them rest for a minute. Slice each sandwich in half and serve warm, possibly with a side salad or a bowl of tomato soup for a complete meal.
Extra Tips:
For an added depth of flavor, try drizzling a little balsamic glaze over the finished sandwiches before serving. If you prefer a milder cheese, you could substitute half of the feta with mozzarella or goat cheese.
Additionally, if you want to make these sandwiches ahead of time, you can prepare the feta and olive mixture and refrigerate it until you’re ready to assemble and grill the sandwiches. This dish pairs wonderfully with a crisp white wine or a light, fruity red to complement the Mediterranean flavors.
The Ultimate Pair: Bacon and Tomato Grilled Cheese
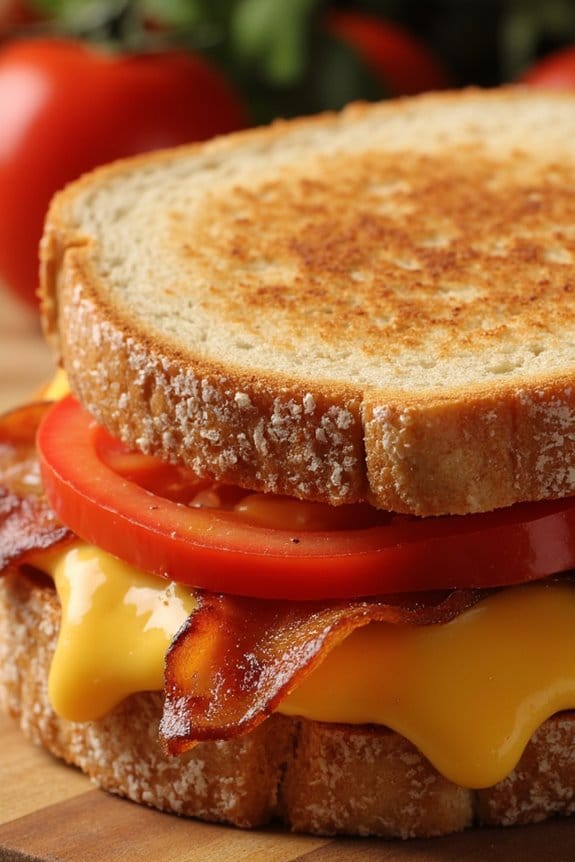
There’s nothing quite like the classic comfort of a grilled cheese sandwich, and when you add crispy bacon and juicy tomatoes into the mix, you elevate it to a whole new level of deliciousness. The salty, savory flavor of bacon pairs perfectly with the tangy sweetness of ripe tomatoes, all nestled between layers of gooey melted cheese and perfectly toasted bread.
This recipe for The Ultimate Pair: Bacon and Tomato Grilled Cheese is a delightful twist on the classic sandwich that’s certain to please anyone who tries it.
Whether you’re preparing a quick lunch for your family or hosting a casual gathering with friends, this grilled cheese will be a hit. With just a few simple ingredients, you can create a meal that’s both satisfying and indulgent. The combination of flavors and textures in this sandwich makes it a versatile dish that can be enjoyed any time of the year.
Follow this recipe to create a delicious serving for 4-6 people, and let the compliments roll in.
Ingredients (Serves 4-6):
- 8-12 slices of sourdough or your preferred bread
- 8-12 slices of bacon
- 2-3 large ripe tomatoes, sliced
- 8-12 slices of cheddar cheese
- 4-6 tablespoons of butter, softened
- Salt and pepper to taste
Cooking Instructions:
- Prepare the Bacon: Start by cooking the bacon in a skillet over medium heat until it’s crispy. Place the cooked bacon on a plate lined with paper towels to drain excess grease. Set aside.
- Slice the Tomatoes: While the bacon is cooking, slice the tomatoes. Pat them dry with a paper towel to remove excess moisture, which will prevent the sandwich from becoming soggy.
- Assemble the Sandwiches: Take two slices of bread for each sandwich. Spread a thin layer of softened butter on one side of each slice. On the unbuttered side of one slice, layer a slice of cheese, two slices of bacon, and a few slices of tomato. Season the tomatoes with a pinch of salt and pepper. Top with another slice of cheese and close the sandwich with the other slice of bread, buttered side facing out.
- Grill the Sandwiches: Heat a skillet over medium-low heat. Place the sandwiches in the skillet, pressing down gently with a spatula. Cook until the bread is golden brown and crispy, about 3-4 minutes per side, and the cheese is melted. Adjust the heat if necessary to guarantee the bread doesn’t burn before the cheese melts.
- Serve and Enjoy: Remove the sandwiches from the skillet and let them rest for a minute before slicing. This will make sure that the cheese stays in place. Cut the sandwiches in half and serve warm.
Extra Tips:
For the best results, choose a good quality bread that holds up well to grilling, such as sourdough or a rustic country loaf. If you prefer a more complex flavor, consider using a combination of cheeses like cheddar and mozzarella.
Additionally, you can add a smear of mayonnaise or a thin layer of mustard inside the sandwich for an extra tang. To make the bacon extra crispy, consider baking it in the oven instead of frying.
Remember to keep an eye on the heat while grilling to achieve the perfect golden crust without burning the bread.
Vegan Delight: Creamy Avocado and Dairy-Free Cheese
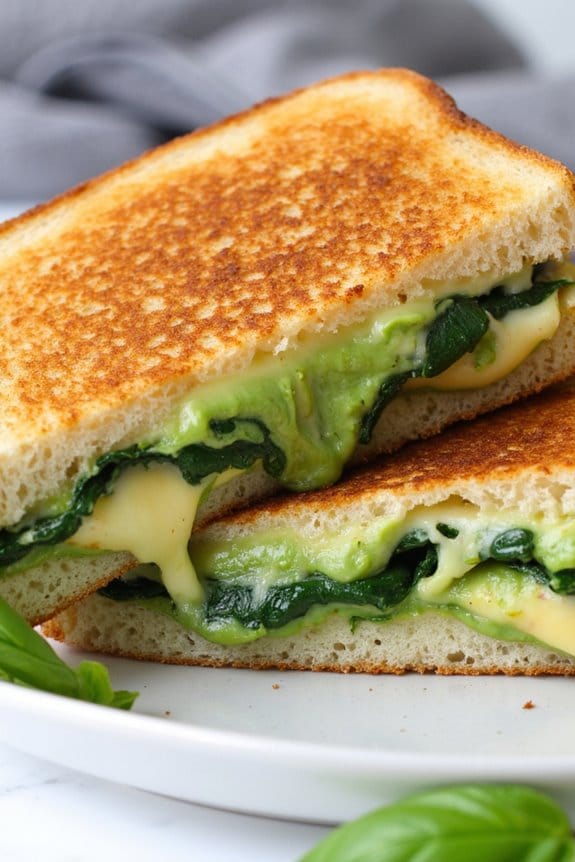
Indulge in the luscious flavors of our Vegan Delight: Creamy Avocado and Dairy-Free Cheese Grilled Cheese. This delectable sandwich combines creamy avocado with rich, melty dairy-free cheese for a plant-based twist on a classic comfort food.
Whether you’re a seasoned vegan or simply looking to explore more plant-based options, this recipe promises to satisfy your cravings with its buttery crunch and creamy interior. Perfect for lunch, dinner, or even a hearty snack, this grilled cheese is sure to become a new favorite in your kitchen repertoire.
Crafted with simple, wholesome ingredients, this recipe is both delicious and easy to prepare. The creamy avocado adds a luscious texture, while the dairy-free cheese provides that essential gooeyness that makes a grilled cheese sandwich so irresistible.
Pair these with your favorite bread and some fresh herbs, and you have a dish that’s not only satisfying but also nutritious. This recipe serves 4-6 people, making it ideal for family meals or entertaining guests.
Ingredients:
- 8 slices of your favorite bread (sourdough or whole grain recommended)
- 2 large ripe avocados
- 8 slices of dairy-free cheese (such as cheddar or mozzarella-style)
- 4 tablespoons of dairy-free butter or margarine
- A handful of fresh spinach leaves
- Salt and pepper to taste
- Optional: Fresh basil leaves for garnish
Cooking Instructions:
1. Prepare the Avocado Spread: Start by slicing the ripe avocados in half, remove the pit, and scoop the flesh into a bowl. Mash the avocado with a fork until smooth. Add a pinch of salt and pepper to taste, mixing thoroughly to combine.
2. Butter the Bread: Take your bread slices and spread a generous amount of dairy-free butter on one side of each slice. This will help achieve that golden, crispy texture when grilled.
3. Assemble the Sandwiches: Lay four slices of bread, buttered side down, on a clean surface. Spread a thick layer of the avocado mixture evenly over each slice. Add a few spinach leaves on top of the avocado, then place a slice of dairy-free cheese over the spinach.
Top with the remaining slices of bread, buttered side up.
4. Grill the Sandwiches: Heat a large skillet or griddle over medium heat. Place the assembled sandwiches on the skillet. Cook for about 3-4 minutes on each side, or until the bread is golden brown and the cheese has melted.
5. Serve and Enjoy: Remove the sandwiches from the skillet and let them cool slightly. Slice each sandwich in half and serve immediately. Garnish with fresh basil leaves if desired.
Extra Tips:
For the best results, use ripe avocados that are soft but not overripe. They should be easy to mash and creamy without any brown spots.
If you prefer a bit of texture, you can leave some avocado chunks in the spread. Additionally, if you have access to a panini press, it can help achieve an even crispier texture on your grilled cheese.
Finally, feel free to experiment with different types of dairy-free cheese to find your favorite combination.
Breakfast Boost: Egg and Spinach Melt
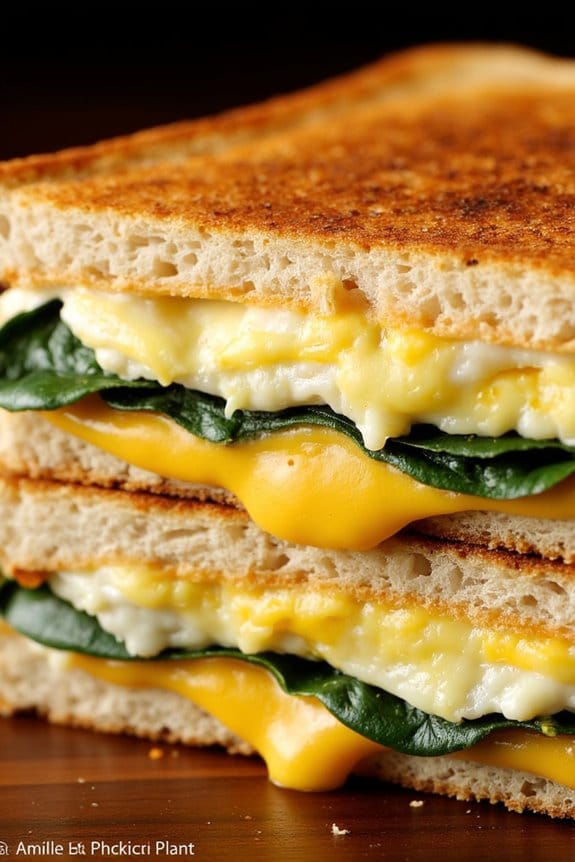
Start your day with a delicious and nutritious twist on the classic grilled cheese sandwich. Our Egg and Spinach Melt combines the creamy goodness of melted cheese with the rich flavors of eggs and fresh spinach. This breakfast boost isn’t only satisfying but also packed with protein and nutrients to keep you energized throughout the morning.
Perfect for a cozy weekend brunch or a quick weekday breakfast, this dish is sure to become a family favorite.
The Egg and Spinach Melt brings together the heartiness of eggs and the freshness of spinach, all embraced by golden, crispy bread and gooey melted cheese. The combination of textures and flavors creates a delightful symphony in every bite.
Whether you’re serving it to family or friends, this recipe is designed to please and can easily be adjusted to serve a crowd. Prepare to savor every mouthful of this comforting and fulfilling meal.
Ingredients (Serves 4-6):
- 8 large eggs
- 1 cup fresh spinach leaves, chopped
- 2 tablespoons milk
- Salt and pepper to taste
- 2 tablespoons butter
- 8 slices of bread (your choice of type)
- 1 cup shredded cheese (Cheddar, Mozzarella, or a blend)
- 1 tablespoon olive oil
- Optional: 1/2 cup cooked bacon bits or diced ham
Cooking Instructions:
- Prepare the Egg Mixture: In a medium-sized bowl, whisk together the eggs, milk, salt, and pepper until fully combined. Stir in the chopped spinach and optional cooked bacon bits or diced ham, if using.
- Cook the Eggs: Heat a non-stick skillet over medium heat and add a tablespoon of olive oil. Pour in the egg mixture and cook, stirring gently, until the eggs are fully set but still slightly soft. Remove from heat and set aside.
- Assemble the Sandwiches: Spread butter on one side of each slice of bread. Lay four slices of bread, buttered side down, on a clean surface. Evenly distribute the cooked egg and spinach mixture over the bread slices. Sprinkle shredded cheese over the eggs, then top with the remaining bread slices, buttered side up.
- Cook the Sandwiches: Preheat a large skillet or griddle over medium heat. Place the sandwiches in the skillet and cook for about 3-4 minutes on each side, or until the bread is golden brown and the cheese has melted. Press down gently with a spatula to guarantee even cooking.
- Serve: Once cooked, remove the sandwiches from the skillet. Let them cool for a minute before slicing each sandwich in half. Serve warm and enjoy the melty goodness.
Extra Tips:
For an extra crispy finish, you can sprinkle a little cheese on the outside of the bread before grilling, which will create a cheesy crust.
If you prefer a spicier kick, add a pinch of red pepper flakes to the egg mixture. For those who love variety, feel free to swap spinach with other greens like kale or arugula, or experiment with different cheese types to match your taste preferences.
Decadent Treat: Nutella and Banana Grilled Cheese
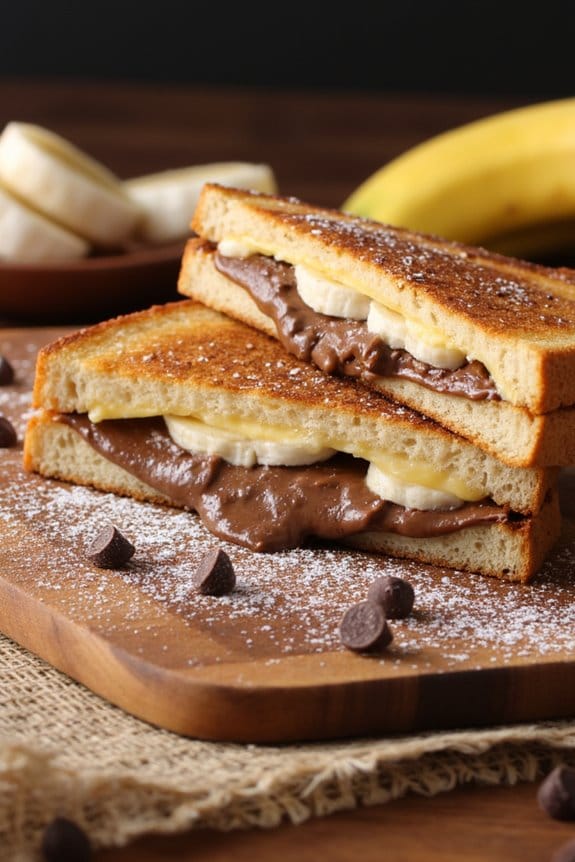
Grilled cheese is a classic comfort food, but when you add a sweet twist to it, it transforms into a decadent treat perfect for breakfast or dessert. The Nutella and Banana Grilled Cheese is a delightful combination of creamy hazelnut spread, fresh bananas, and buttery toasted bread. This dish isn’t only easy to prepare but also incredibly satisfying, making it a favorite for both kids and adults alike. The gooey goodness of melted Nutella and the natural sweetness of bananas make this grilled cheese a must-try indulgence.
Perfect for a weekend brunch or a sweet snack, this Nutella and Banana Grilled Cheese recipe serves 4-6 people, depending on portion sizes. It’s simple yet delicious, requiring only a few ingredients that you probably already have in your pantry. The combination of flavors and textures will make you wonder why you haven’t tried this sooner. Follow the recipe below to create a dish that’s certain to become a staple in your household.
Ingredients (serves 4-6):
- 8 to 12 slices of white or whole wheat bread
- 1 cup of Nutella
- 4 to 6 ripe bananas
- 1/2 cup of unsalted butter, softened
- Optional: powdered sugar for dusting
Instructions:
- Prepare the Bread: Lay out your slices of bread on a clean surface. Spread a generous amount of Nutella on one side of each slice. Ascertain the Nutella is evenly distributed so every bite is filled with creamy hazelnut goodness.
- Slice the Bananas: Peel the bananas and slice them into thin, even circles. Arrange the banana slices on top of the Nutella layer on half of the bread slices. Use about one banana per sandwich, adjusting depending on the size of the bananas.
- Assemble the Sandwich: Place the remaining slices of bread on top of the banana-covered slices to form a sandwich. Press down gently to ascertain the ingredients stick together.
- Butter the Bread: Spread a thin layer of softened butter on the outside of each sandwich. This will help achieve that golden, crispy crust when grilling.
- Heat the Pan: Preheat a large skillet or griddle over medium heat. You want it hot enough to melt the butter and toast the bread without burning it.
- Grill the Sandwiches: Place the sandwiches in the skillet, buttered side down. Cook for about 3-4 minutes on each side, or until the bread is golden brown and the Nutella is melted. Keep an eye on them to avoid burning.
- Serve: Once cooked, remove the sandwiches from the skillet and let them cool for a minute. Slice them in half, dust with powdered sugar if desired, and serve warm.
Extra Tips:
For an even more decadent treat, consider adding a sprinkle of cinnamon or a few chocolate chips to the Nutella layer before adding the bananas.
If you prefer a less sweet version, opt for a whole wheat bread to balance out the flavors. This recipe can also be adapted to cater to different dietary needs by using gluten-free bread or a vegan chocolate spread.
Adjust the amount of Nutella and bananas based on personal preference for sweetness and texture. Enjoy your delicious creation with a glass of milk or a scoop of vanilla ice cream for an extra indulgent experience.
Harvest Special: Pumpkin and Sage Grilled Cheese
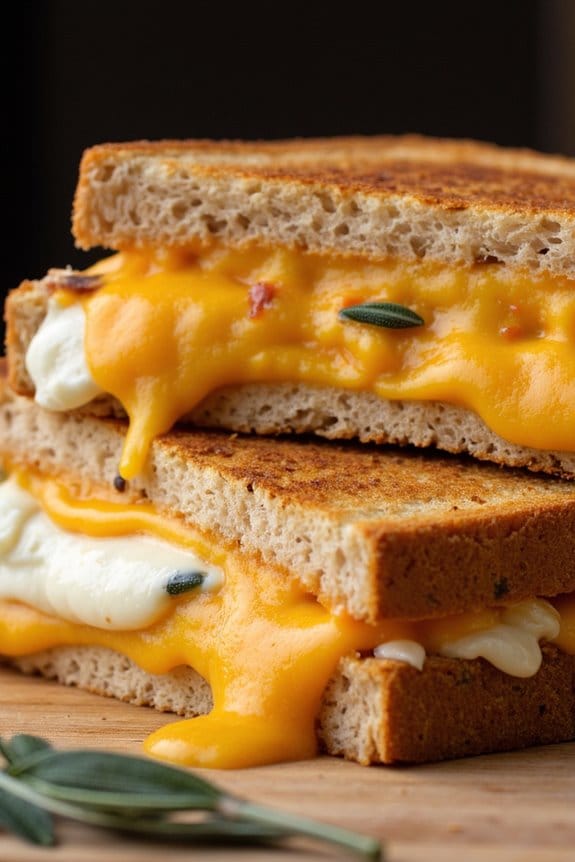
As the leaves turn golden and the air becomes crisp, there’s nothing quite like indulging in the warm, comforting flavors of autumn. A Harvest Special: Pumpkin and Sage Grilled Cheese combines the rich, earthy sweetness of pumpkin with the aromatic allure of fresh sage, all nestled between slices of perfectly toasted bread with gooey melted cheese. This sandwich is a delightful way to celebrate the bounty of the harvest season and will surely be a hit at your next family gathering or cozy night in.
The secret to this grilled cheese’s irresistible flavor lies in the balance of its ingredients. The creamy pumpkin puree, paired with the nutty, savory undertones of sage, creates a sophisticated twist on a classic favorite. Add in the mild sharpness of your chosen cheese, and you have a sandwich that not only warms the soul but also excites the palate. This recipe serves 4-6 people, making it perfect for sharing with loved ones or savoring as leftovers.
Ingredients for Harvest Special: Pumpkin and Sage Grilled Cheese (serves 4-6):
- 8-12 slices of sourdough bread
- 1 cup canned pumpkin puree
- 2 tablespoons fresh sage leaves, finely chopped
- 2 cups shredded Gruyère cheese
- 1 cup shredded mozzarella cheese
- 4 tablespoons butter, softened
- Salt and pepper to taste
Cooking Instructions:
- Prepare the Pumpkin Mixture: In a medium bowl, combine the pumpkin puree with the finely chopped sage. Season with salt and pepper to taste. Mix well until the ingredients are thoroughly combined and set aside.
- Assemble the Sandwiches: Lay out the slices of sourdough bread. Spread a generous layer of the pumpkin and sage mixture on half of the slices. Sprinkle an even amount of shredded Gruyère and mozzarella cheese over the pumpkin mixture. Top with the remaining slices of bread to form sandwiches.
- Butter the Bread: Spread a layer of softened butter on the outside of each sandwich. This will help achieve a golden, crispy crust when grilling.
- Grill the Sandwiches: Preheat a large skillet or griddle over medium heat. Place the sandwiches on the skillet, buttered side down. Cook for about 3-4 minutes on each side until the bread is golden brown and the cheese is melted. Adjust the heat as necessary to avoid burning.
- Serve: Once fully cooked, remove the sandwiches from the skillet. Allow them to rest for a minute before slicing to let the cheese settle slightly. Serve warm and enjoy the taste of fall in every bite.
Extra Tips:
For an extra burst of flavor, consider adding a drizzle of balsamic glaze just before serving. It complements the sweetness of the pumpkin and adds a tangy depth to the sandwich.
Additionally, using a mixture of cheeses can elevate the dish; consider adding a touch of gouda or cheddar for more complexity.
Finally, if you’re looking to add a protein element, thin slices of turkey or ham can be included in the sandwich for a more substantial meal.
Zesty Combo: BBQ Chicken and Cheddar Melt
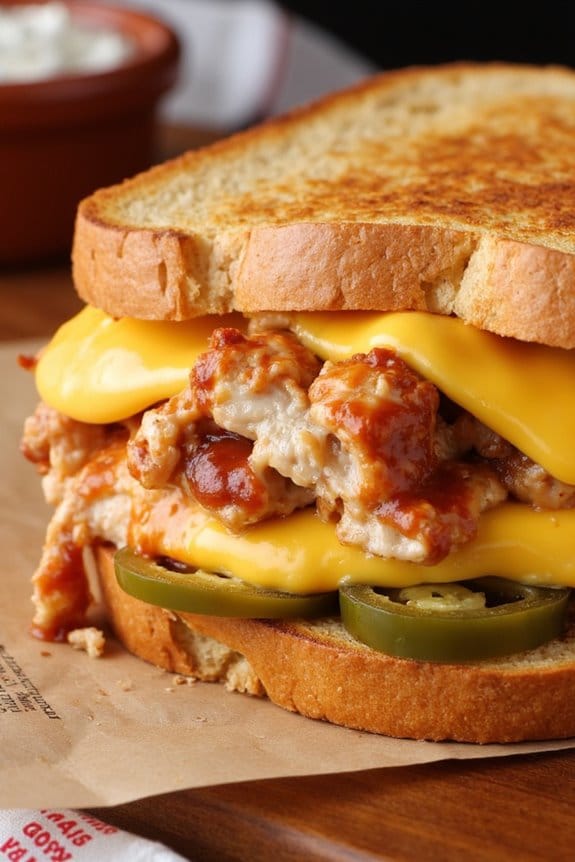
Indulge in the ultimate comfort food with a twist by preparing the Zesty Combo: BBQ Chicken and Cheddar Melt. This savory delight combines tender BBQ chicken with the rich, creamy taste of melted cheddar cheese, all nestled between slices of perfectly toasted bread. It’s the ideal sandwich for those who crave a burst of flavor in every bite.
Whether you’re planning a casual family dinner or a cozy lunch, this dish is sure to please everyone at the table. The Zesty Combo doesn’t just satisfy your taste buds; it’s also quick and easy to prepare, making it a go-to recipe for busy weeknights.
The combination of tangy BBQ sauce and sharp cheddar cheese creates a harmonious blend of flavors that will leave you reaching for seconds. Pair this grilled cheese with a side of coleslaw or pickles to enhance the BBQ experience further. Now, let’s plunge into the recipe and bring this flavorful creation to life.
Ingredients (serving size: 4-6 people):
- 2 cups cooked chicken, shredded
- 1 cup BBQ sauce
- 8 slices of sourdough or your preferred bread
- 2 cups sharp cheddar cheese, shredded
- 4 tablespoons butter, softened
- Optional: sliced jalapeños for extra heat
Cooking Instructions:
- Prepare the Chicken Mixture: In a medium-sized bowl, combine the shredded chicken with the BBQ sauce, making sure that the chicken is evenly coated. If you like a spicier kick, mix in some sliced jalapeños at this stage.
- Assemble the Sandwiches: Lay out the slices of bread on a clean surface. Spread a thin layer of butter on one side of each slice. Flip the bread over and distribute the BBQ chicken mixture evenly over half of the slices. Sprinkle a generous amount of shredded cheddar cheese on top of the chicken.
- Close the Sandwiches: Place the remaining slices of bread on top of the cheese, buttered side facing up, to form a sandwich.
- Grill the Sandwiches: Preheat a large skillet or griddle over medium heat. Once hot, carefully place the sandwiches in the skillet. Cook for about 3-4 minutes on each side, or until the bread is golden brown and the cheese has melted thoroughly.
- Serve and Enjoy: Remove the sandwiches from the skillet and let them cool for a minute or two before slicing them in half. Serve immediately with your choice of sides.
Extra Tips:
For the best results, opt for a sturdy bread like sourdough that can hold up to the weight of the fillings and provide a nice crunch.
Make sure your skillet isn’t too hot, as this can cause the bread to burn before the cheese has a chance to melt. If you’re preparing the chicken from scratch, consider grilling or roasting it for an added layer of flavor.
Finally, feel free to experiment with different cheeses or add-ons like caramelized onions or crispy bacon to customize the sandwich to your liking.
Italian Classic: Mozzarella, Basil, and Tomato
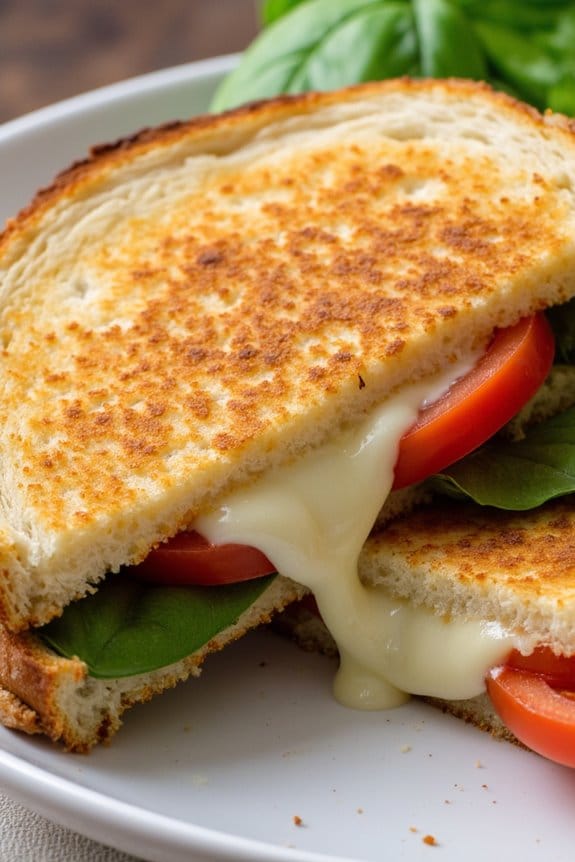
The Italian Classic Grilled Cheese is a delightful twist on the traditional grilled cheese, incorporating the fresh and vibrant flavors of Italy. With creamy mozzarella cheese, fragrant basil leaves, and juicy tomatoes, this sandwich is both satisfying and rejuvenating. Perfect for a quick lunch or a light dinner, it brings the essence of a Caprese salad into a warm, crispy sandwich.
To make this delicious sandwich, you’ll layer slices of mozzarella cheese and fresh tomatoes between two slices of bread, along with a few basil leaves for a hint of herbal sweetness. The sandwich is then grilled to golden perfection, allowing the cheese to melt beautifully, making it savory and gooey. This recipe serves 4-6 people, making it ideal for a family meal or a small gathering with friends.
Ingredients (Serves 4-6):
- 8-12 slices of good-quality bread (sourdough or Italian)
- 2-3 large fresh mozzarella balls, sliced
- 2-3 ripe tomatoes, sliced
- A handful of fresh basil leaves
- Olive oil or softened unsalted butter, for grilling
- Salt and pepper, to taste
Cooking Instructions:
- Prepare the Ingredients: Begin by slicing the mozzarella balls and tomatoes into even slices. Wash and pat dry the basil leaves. Lay everything out for an easy assembly.
- Assemble the Sandwiches: Take a slice of bread and layer 2-3 slices of mozzarella on top. Add a few slices of tomato, followed by 3-4 basil leaves. Season with salt and pepper. Top with another slice of bread to complete the sandwich. Repeat until all sandwiches are assembled.
- Preheat the Pan: Heat a non-stick skillet or griddle over medium heat. Add a small amount of olive oil or spread a thin layer of butter on the outside of each sandwich.
- Grill the Sandwiches: Place the sandwiches in the pan. Cook for about 3-4 minutes on one side until golden brown and crispy. Carefully flip the sandwiches and cook the other side for another 3-4 minutes, ensuring the cheese is fully melted.
- Serve: Once done, remove the sandwiches from the pan. Allow them to rest for a minute, then slice them diagonally for easy serving. Serve immediately while hot and cheesy.
Extra Tips: For the best flavor, use ripe tomatoes and fresh mozzarella. If you prefer, you can use a panini press for an even cook and perfect grill marks.
Be sure not to overload the sandwiches with too many ingredients, as this can make them difficult to handle and prevent the bread from grilling properly. Adjust the seasoning to your taste, and if desired, add a drizzle of balsamic glaze before serving for an extra touch of Italian flair.