

I’m always on the hunt for meals that are both satisfying and energizing, and grilled fish dishes never disappoint. Think about the aroma of zesty lemon herb salmon sizzling on the grill or the vibrant colors of mahi-mahi paired with pineapple salsa. Each dish is packed with protein and flavor, promising a culinary adventure. Ready to explore these delicious options that will elevate your dinner game and boost your energy levels? Let’s get started.
Freshen up With Zesty Lemon Herb Grilled Salmon
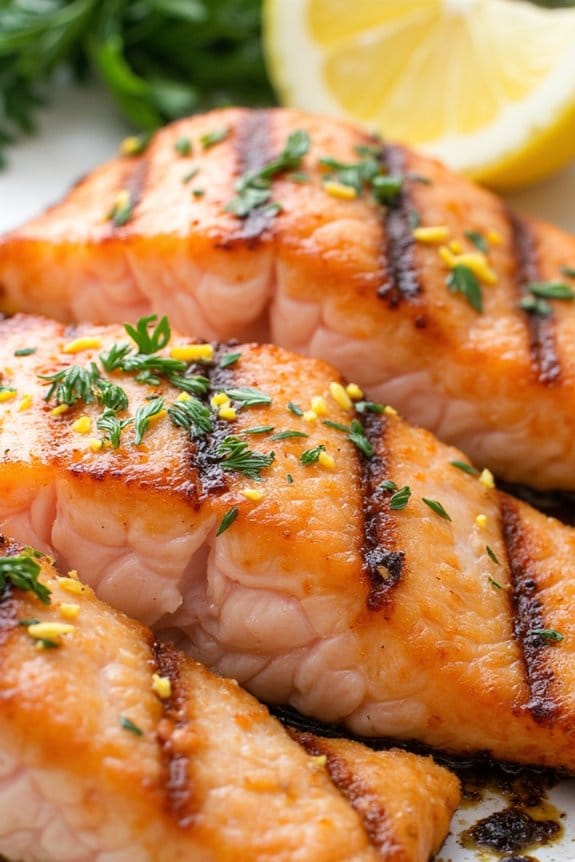
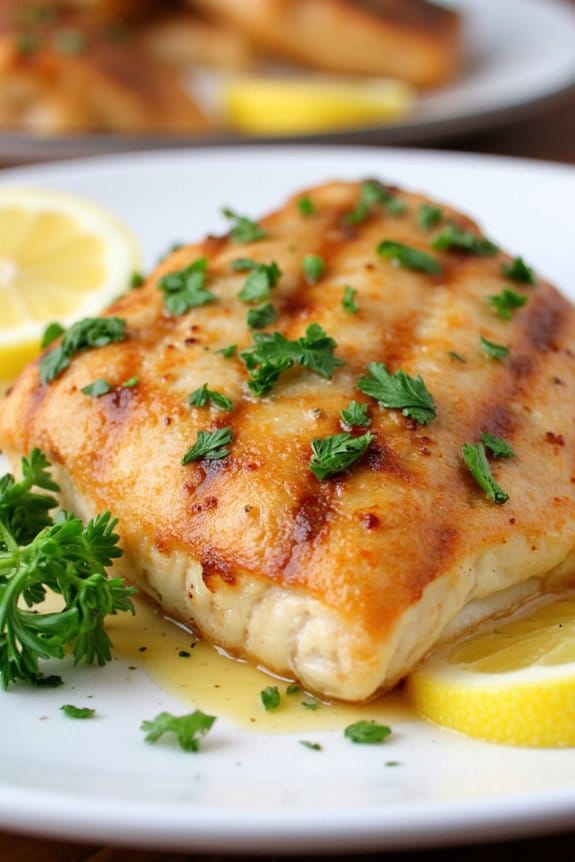
Indulge in a delicious and nutritious meal with this Zesty Lemon Herb Grilled Salmon recipe. Not only is this dish packed with protein, but it’s also bursting with fresh and vibrant flavors that are sure to please your taste buds. The marriage of zesty lemon and aromatic herbs enhances the rich taste of the salmon, elevating it to a gourmet level.
Grilled to perfection, this dish is perfect for a family dinner or a gathering with friends, offering a delightful blend of savory and citrusy notes that are both invigorating and satisfying. This recipe serves 4-6 people and is ideal for those looking to enjoy a healthy, yet flavorful meal.
With easy-to-find ingredients and simple preparation steps, you’ll have a restaurant-quality dish right from your own kitchen. Whether you’re a seasoned cook or a beginner, this recipe is straightforward and rewarding. The result is a beautifully grilled salmon that’s tender, flaky, and infused with the perfect balance of lemony goodness and herbal fragrance.
Ingredients:
- 4-6 salmon fillets (about 6 oz each)
- 2 tablespoons olive oil
- 3 cloves garlic, minced
- 1 tablespoon fresh dill, chopped
- 1 tablespoon fresh parsley, chopped
- Zest and juice of 2 lemons
- Salt and pepper to taste
- Lemon slices for garnish
Cooking Instructions:
- Prepare the Marinade: In a small mixing bowl, combine the olive oil, minced garlic, dill, parsley, lemon zest, and lemon juice. Whisk until the ingredients are well incorporated. Season with salt and pepper to taste.
- Marinate the Salmon: Place the salmon fillets in a shallow dish or a resealable plastic bag. Pour the marinade over the salmon, making sure that each fillet is evenly coated. Cover and refrigerate for at least 30 minutes to allow the flavors to penetrate the fish.
- Preheat the Grill: While the salmon is marinating, preheat your grill to medium-high heat. If using a charcoal grill, make sure the coals are evenly distributed for consistent cooking.
- Grill the Salmon: Lightly oil the grill grates to prevent sticking. Remove the salmon from the marinade and place the fillets skin-side down on the grill. Cook for about 4-6 minutes on each side, or until the salmon is opaque and flakes easily with a fork.
- Serve and Garnish: Once the salmon is cooked, transfer it to a serving platter. Garnish with fresh lemon slices and additional herbs if desired. Serve immediately for the best taste.
Extra Tips:
For ideal grilling results, make sure your grill is properly preheated to prevent the salmon from sticking. If you don’t have access to a grill, you can also cook the salmon in a non-stick grill pan on the stove.
Adjust the cooking time based on the thickness of the salmon fillets to ensure they’re cooked through without drying out. Additionally, feel free to experiment with adding other herbs or spices to the marinade to suit your personal taste preferences. Enjoy this dish with a side of grilled vegetables or a fresh salad for a complete and balanced meal.
Add Spice With Grilled Tuna Steaks
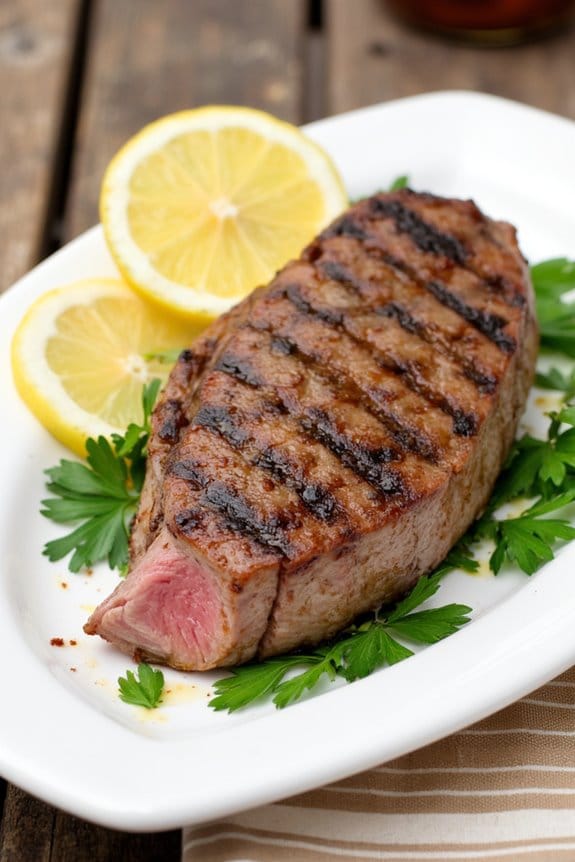
Grilled Tuna Steaks are a fantastic way to enjoy a high-protein meal that’s both delicious and healthy. Tuna steaks have a firm texture that holds up well on the grill, making them perfect for outdoor cooking. By adding a mix of spices and herbs, you can enhance the natural flavors of the tuna, creating a dish that’s both savory and aromatic.
Whether you’re hosting a summer barbecue or simply looking for a nutritious dinner option, grilled tuna steaks are certain to impress.
For this recipe, the tuna steaks are marinated in a zesty blend of spices before being grilled to perfection. The marinade not only infuses the fish with bold flavors but also helps to keep it moist during the cooking process. Paired with a fresh salad or some grilled vegetables, these tuna steaks can be the star of a healthy, balanced meal. This recipe serves 4-6 people, making it ideal for family dinners or small gatherings.
Ingredients (for 4-6 people):
- 4-6 tuna steaks (about 6-8 ounces each)
- 1/4 cup olive oil
- 1 tablespoon lemon juice
- 2 teaspoons soy sauce
- 2 garlic cloves, minced
- 1 teaspoon ground black pepper
- 1 teaspoon paprika
- 1/2 teaspoon cayenne pepper
- 1 teaspoon dried oregano
- Salt to taste
- Lemon wedges, for serving
- Fresh parsley, chopped, for garnish
Instructions:
- Prepare the Marinade: In a medium mixing bowl, combine the olive oil, lemon juice, soy sauce, minced garlic, black pepper, paprika, cayenne pepper, oregano, and a pinch of salt. Whisk the ingredients together until well blended.
- Marinate the Tuna Steaks: Place the tuna steaks in a shallow dish or a resealable plastic bag. Pour the marinade over the steaks, making sure they’re evenly coated. Cover the dish or seal the bag, and let it marinate in the refrigerator for at least 30 minutes to 1 hour.
- Preheat the Grill: Preheat your grill to medium-high heat. If using a charcoal grill, the coals should be hot and glowing. If using a gas grill, allow it to heat up for about 10 minutes before cooking.
- Grill the Tuna Steaks: Remove the tuna steaks from the marinade, letting the excess drip off. Place them on the preheated grill. Cook the steaks for about 3-4 minutes on each side, depending on the thickness, until they’re slightly charred on the outside but still pink in the center.
- Rest and Serve: Once cooked, remove the tuna steaks from the grill and let them rest for a few minutes. This allows the juices to redistribute throughout the fish. Serve with lemon wedges and a sprinkle of chopped parsley for garnish.
Extra Tips:
When grilling tuna steaks, it’s essential not to overcook them. Tuna is best enjoyed when it’s slightly rare in the center, as this keeps the fish tender and juicy. If you prefer your tuna well-done, you can adjust the cooking time accordingly, but be cautious as overcooking can lead to a dry texture.
Additionally, verify your grill is clean and well-oiled to prevent the fish from sticking. If you’re using a charcoal grill, consider using wood chips to add a smoky flavor to the tuna.
Savor Mediterranean Grilled Swordfish
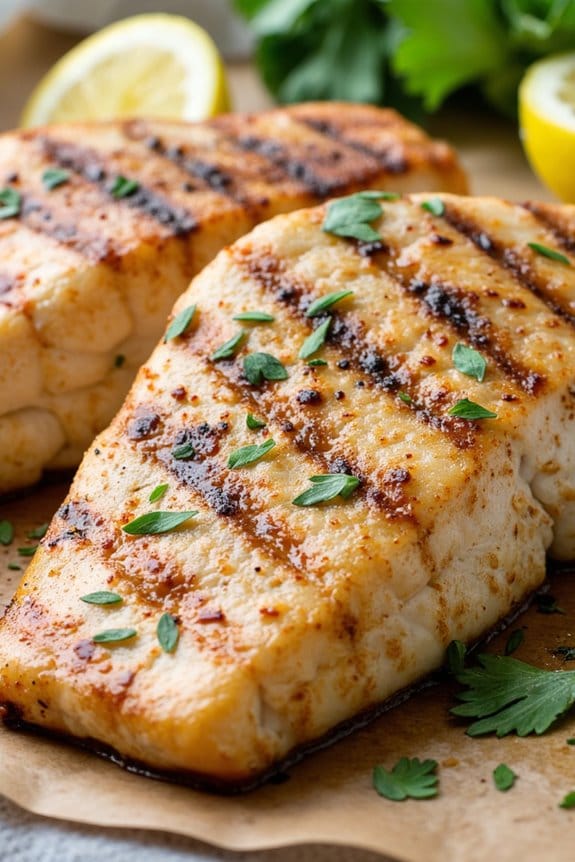
Grilled swordfish is a delightful and nutritious way to enjoy a high-protein meal with a Mediterranean flair. This dish is perfect for those who appreciate a combination of simple, fresh ingredients that come together to create a flavorful and satisfying meal. The key to this recipe lies in the marinade, which infuses the fish with a mixture of herbs, lemon, and olive oil, enhancing its natural taste while keeping it moist and tender.
Swordfish is a meaty fish that holds up well on the grill, making it an excellent choice for an outdoor barbecue or an indoor grill session. Preparing a Mediterranean Grilled Swordfish meal not only satisfies your taste buds but also provides a healthy dose of omega-3 fatty acids and essential nutrients. The delicious blend of Mediterranean herbs and spices complements the rich texture of the swordfish, creating a dish that’s both hearty and elegant.
Whether you’re hosting a dinner party or simply looking to enjoy a wholesome meal with your family, this recipe serves 4-6 people and is sure to be a crowd-pleaser.
Ingredients for Mediterranean Grilled Swordfish (Serves 4-6):
- 4 swordfish steaks (about 6-8 oz each)
- 1/4 cup olive oil
- 2 tablespoons fresh lemon juice
- 2 tablespoons fresh oregano, chopped
- 2 tablespoons fresh basil, chopped
- 2 cloves garlic, minced
- 1 teaspoon salt
- 1/2 teaspoon black pepper
- Lemon wedges, for serving
- Fresh parsley, chopped, for garnish
Cooking Instructions:
- Prepare the Marinade: In a small bowl, whisk together the olive oil, lemon juice, chopped oregano, chopped basil, minced garlic, salt, and black pepper. This will be your aromatic marinade that infuses the swordfish with flavor.
- Marinate the Swordfish: Place the swordfish steaks in a shallow dish or a resealable plastic bag. Pour the marinade over the fish, ensuring that each steak is well-coated. Cover the dish or seal the bag and refrigerate for at least 30 minutes, allowing the flavors to permeate the fish.
- Preheat the Grill: Heat your grill to medium-high. If using an outdoor grill, oil the grates to prevent sticking. For indoor grilling, a grill pan can be used, lightly oiled to achieve similar results.
- Grill the Swordfish: Remove the swordfish from the marinade, allowing any excess to drip off. Place the steaks on the grill and cook for about 4-5 minutes on each side, or until the fish is opaque and flakes easily with a fork. Be mindful not to overcook, as swordfish can become dry.
- Serve: Transfer the grilled swordfish to a serving platter. Garnish with fresh parsley and serve with lemon wedges on the side for an extra burst of citrus flavor.
Extra Tips:
Swordfish is best when fresh, so try to purchase it from a reliable source. If fresh swordfish isn’t available, frozen can be a good alternative, but make sure to thaw it properly before marinating.
To add a bit more zest, consider adding a pinch of red pepper flakes to the marinade for a slight kick. Additionally, pairing this dish with a side of roasted vegetables or a fresh salad complements the flavors beautifully, creating a well-rounded meal.
Finally, always monitor the grilling process closely, as overcooked swordfish can lose its delightful texture.
Indulge in Grilled Mahi-Mahi With Pineapple Salsa

Preparing this dish is straightforward, making it an excellent choice for both novice and experienced cooks. The mahi-mahi fillets are seasoned with a simple spice blend and grilled to perfection, while the pineapple salsa adds a vibrant contrast of flavors and colors.
Whether you’re hosting a backyard barbecue or looking for a healthy weeknight dinner, this Grilled Mahi-Mahi with Pineapple Salsa will surely impress your family and friends.
Ingredients (Serves 4-6)
- 4-6 mahi-mahi fillets (about 6 ounces each)
- 2 tablespoons olive oil
- 1 teaspoon salt
- 1/2 teaspoon black pepper
- 1 teaspoon paprika
- 1 teaspoon garlic powder
- 1 teaspoon onion powder
- 2 cups fresh pineapple, diced
- 1/2 red onion, finely chopped
- 1 red bell pepper, diced
- 1 jalapeño, seeded and minced
- 1/4 cup fresh cilantro, chopped
- Juice of 2 limes
- Salt and pepper to taste
Cooking Instructions
1. Prep the Mahi-Mahi: Rinse the mahi-mahi fillets under cold water and pat dry with paper towels. In a small bowl, mix together the olive oil, salt, black pepper, paprika, garlic powder, and onion powder.
Rub this mixture evenly over both sides of the fillets. Let them marinate for about 15 minutes to allow the flavors to penetrate the fish.
2. Prepare the Grill: Preheat your grill to medium-high heat. If using a charcoal grill, arrange the coals for direct grilling. Lightly oil the grill grates to prevent the fish from sticking.
3. Make the Pineapple Salsa: In a medium bowl, combine the diced pineapple, red onion, red bell pepper, jalapeño, and cilantro. Squeeze the lime juice over the mixture and season with salt and pepper to taste.
Toss everything together until well mixed. Set aside to allow the flavors to meld.
4. Grill the Mahi-Mahi: Place the marinated mahi-mahi fillets on the preheated grill. Cook for about 4-5 minutes per side or until the fish is opaque and flakes easily with a fork.
Be careful not to overcook the fish to retain its moisture and tenderness.
5. Serve: Transfer the grilled mahi-mahi to a serving platter. Spoon the pineapple salsa over the top of the fillets, or serve it on the side.
Garnish with additional cilantro if desired. Enjoy your meal while it’s hot.
Extra Tips
When grilling mahi-mahi, it’s important to keep a close eye on the cooking time, as fish can quickly become dry if overcooked. If you’re unsure if the fish is done, use a fork to check if it flakes easily.
For added flavor, you can also grill pineapple slices alongside the fish and chop them into the salsa for a smoky touch. If you prefer a spicier salsa, leave some of the jalapeño seeds in, or substitute with a hotter chili pepper.
This dish pairs well with a light side salad or grilled vegetables.
Bring Heat With Cajun Spiced Grilled Catfish
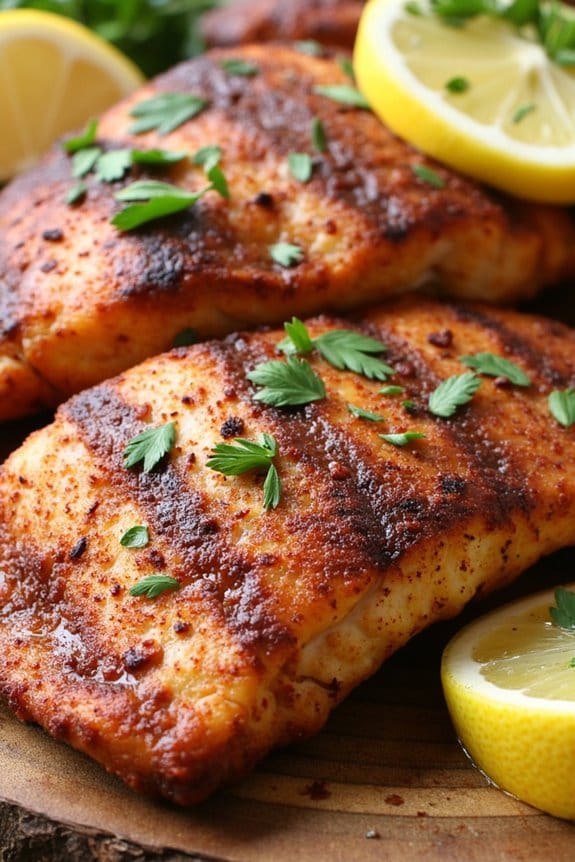
Cajun Spiced Grilled Catfish is a flavorful, protein-rich dish that brings a taste of the South to your table. This dish is perfect for those who enjoy a smoky, spicy kick in their meals. Catfish, known for its mild flavor and flaky texture, is the perfect canvas for the bold and zesty Cajun spices. Grilling the catfish not only enhances its natural flavors but also adds a delightful char that complements the spice mix.
Whether you’re hosting a summer BBQ or just want a quick and healthy dinner, this recipe is bound to please. The beauty of this dish lies in its simplicity and the capacity to highlight the natural taste of the fish. The Cajun spice mix, with its blend of paprika, cayenne, garlic, and herbs, penetrates the fish, creating layers of flavor in every bite.
Pair this with a fresh vegetable salad or some grilled corn to complete your meal. This recipe is designed to serve 4-6 people, making it ideal for family dinners or small gatherings.
Ingredients:
- 4-6 catfish fillets
- 3 tablespoons olive oil
- 2 tablespoons Cajun spice mix
- Juice of 1 lemon
- Salt to taste
- Freshly ground black pepper to taste
- Lemon wedges for serving
- Chopped fresh parsley for garnish
Cooking Instructions:
- Prepare the Marinade: In a small bowl, combine olive oil, Cajun spice mix, lemon juice, salt, and black pepper. Mix well until all ingredients are thoroughly combined to form a marinade.
- Marinate the Catfish: Place the catfish fillets in a shallow dish or a large resealable plastic bag. Pour the marinade over the fillets, guaranteeing they’re well coated. Seal the bag or cover the dish and refrigerate for at least 30 minutes to allow the flavors to infuse into the fish.
- Preheat the Grill: Preheat your grill to medium-high heat. If using a charcoal grill, guarantee the coals have a light layer of ash for an even heat distribution.
- Grill the Catfish: Remove the catfish from the marinade and place them on the preheated grill. Cook for about 4-5 minutes on each side, or until the fish flakes easily with a fork and has a nice char on the outside. Avoid moving the fillets too much to prevent them from breaking apart.
- Serve: Once cooked, remove the catfish from the grill and let them rest for a few minutes. Garnish with chopped fresh parsley and serve with lemon wedges on the side for an extra burst of freshness.
Extra Tips:
To prevent the catfish from sticking to the grill, make sure the grill grates are clean and well-oiled before placing the fish on them. If you prefer a less spicy version, you can reduce the amount of cayenne in the Cajun spice mix.
Additionally, while grilling, keep a close eye on the catfish to avoid overcooking, as it can dry out quickly. For added flavor, consider adding a sprinkle of smoked paprika to the marinade or a dash of hot sauce for extra heat.
Explore Asian Flavors in Grilled Halibut

Indulge in the exotic flavors of Asia with this delectable grilled halibut recipe. Combining the delicate taste of fresh halibut with a savory marinade rich in traditional Asian ingredients, this dish offers a healthy and flavorful meal.
Whether you’re hosting a summer barbecue or simply seeking a nutritious weeknight dinner, this Asian-style grilled halibut will captivate your taste buds and leave your guests craving more.
For a serving size of 4-6 people, this recipe harnesses the umami of soy sauce, the sweetness of honey, and the aromatic notes of ginger and garlic. The fish is gently marinated to absorb these exquisite flavors and then grilled to perfection, resulting in a succulent, protein-rich meal.
Served with a side of steamed jasmine rice or a revitalizing Asian slaw, this dish is sure to become a staple in your culinary repertoire.
Ingredients:
- 4-6 halibut fillets (about 6 ounces each)
- 1/2 cup soy sauce
- 1/4 cup honey
- 2 tablespoons rice vinegar
- 2 tablespoons sesame oil
- 2 cloves garlic, minced
- 1 tablespoon fresh ginger, grated
- 1 tablespoon lime juice
- 1 teaspoon chili flakes
- 1/4 cup chopped fresh cilantro
- Salt and pepper to taste
- Lime wedges, for serving
Instructions:
- Prepare the Marinade: In a mixing bowl, combine soy sauce, honey, rice vinegar, sesame oil, minced garlic, grated ginger, lime juice, and chili flakes. Whisk together until the honey is fully dissolved and the marinade is well mixed.
- Marinate the Halibut: Place the halibut fillets in a shallow dish or a resealable plastic bag. Pour the marinade over the fish, allowing each fillet to be well coated. Cover the dish or seal the bag and refrigerate for at least 30 minutes, allowing the flavors to infuse into the fish.
- Preheat the Grill: Preheat your grill to medium-high heat. Brush the grill grates with oil to prevent sticking.
- Grill the Halibut: Remove the halibut from the marinade, letting any excess drip off. Place the fillets on the grill and cook for about 4-5 minutes per side, or until the fish is opaque and flakes easily with a fork. Be careful not to overcook.
- Serve: Transfer the grilled halibut to a serving platter. Garnish with chopped cilantro and lime wedges. Serve immediately with your choice of sides, such as steamed jasmine rice or an Asian slaw.
Extra Tips:
When preparing this dish, it’s important to watch the grill closely, as fish can overcook quickly.
If using a charcoal grill, ensure the coals are evenly distributed for consistent heat. For added flavor, consider using a cedar plank on the grill. Soak the plank in water for at least an hour before grilling, then place the halibut on top for a subtle smoky taste.
Finally, always use fresh fish for the best results, and adjust the marinade according to your spice preference, adding more chili flakes for extra heat if desired.
Relish Grilled Barramundi With Garlic Butter
Relish Grilled Barramundi With Garlic Butter is a mouth-watering dish that combines the rich flavor of barramundi with the savory taste of garlic butter. This delightful meal isn’t only high in protein, but it’s also incredibly easy to prepare, making it perfect for a quick and delicious dinner.
The barramundi is grilled to perfection, allowing its natural flavors to shine while being enhanced by the aromatic garlic butter. This dish is a great option for those looking to enjoy a healthy meal that doesn’t compromise on taste.
Ideal for serving 4-6 people, this recipe is perfect for family gatherings or dinner parties. The combination of fresh ingredients and simple cooking techniques guarantees that every bite is packed with flavor.
Whether you’re a seafood enthusiast or someone looking to try something new, this Grilled Barramundi With Garlic Butter is sure to impress your taste buds and leave you craving more.
Ingredients for 4-6 People:
- 4 barramundi fillets (approximately 6-8 ounces each)
- 3 tablespoons olive oil
- 6 cloves garlic, minced
- 1/4 cup unsalted butter, melted
- Salt and freshly ground black pepper, to taste
- 1 lemon, juiced
- 2 tablespoons fresh parsley, chopped
- Lemon wedges, for serving
Cooking Instructions:
- Prepare the Marinade: In a small bowl, combine olive oil, minced garlic, melted butter, lemon juice, salt, and pepper. Mix well to create a flavorful marinade for the barramundi.
- Marinate the Fish: Place the barramundi fillets in a large dish or resealable plastic bag. Pour the marinade over the fillets, making sure they’re well-coated. Let the fish marinate in the refrigerator for at least 30 minutes, allowing the flavors to infuse.
- Preheat the Grill: Preheat your grill to medium-high heat. Lightly oil the grill grates to prevent the fish from sticking during cooking.
- Grill the Fish: Remove the barramundi fillets from the marinade and place them on the preheated grill. Cook for about 4-5 minutes on each side, or until the fish is opaque and flakes easily with a fork.
- Prepare the Garlic Butter: While the fish is grilling, melt the remaining butter in a small saucepan over low heat. Add any leftover minced garlic and cook until fragrant, about 1-2 minutes.
- Serve: Once the barramundi is cooked, transfer it to a serving platter. Drizzle the garlic butter over the fish and sprinkle with chopped parsley. Serve with lemon wedges on the side for an extra burst of citrus flavor.
Extra Tips:
When preparing Relish Grilled Barramundi With Garlic Butter, it’s essential to keep a close eye on the grill as fish can cook quickly.
Make sure your grill is at the right temperature before adding the fillets to guarantee even cooking. If you don’t have access to a grill, you can also cook the barramundi on a grill pan or under a broiler for similar results.
Feel free to adjust the amount of garlic and lemon according to your personal taste preferences, and don’t forget to garnish with fresh parsley for added freshness and color.
Enjoy Grilled Snapper With Citrus Glaze
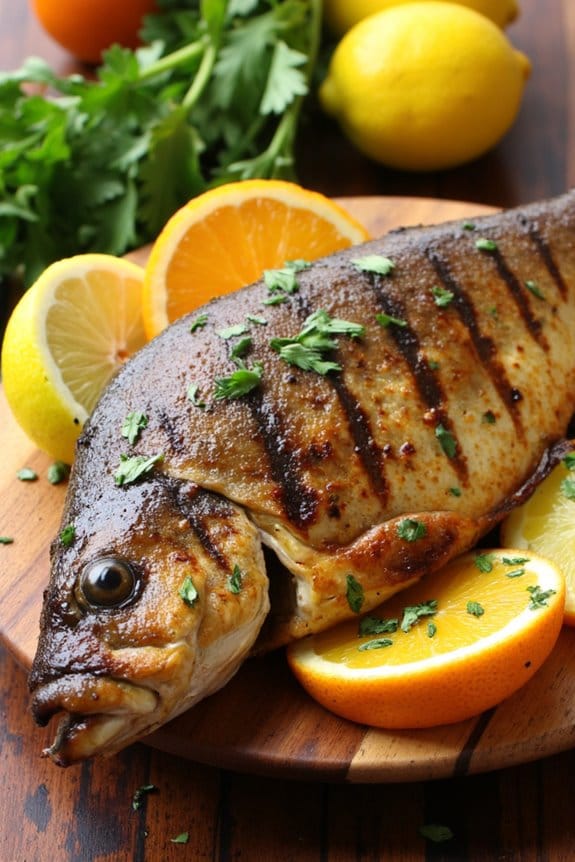
Grilled Snapper With Citrus Glaze is a delightful dish that perfectly balances the richness of the fish with the bright, tangy notes of citrus. This high-protein meal isn’t only nutritious but also incredibly flavorful, making it a perfect choice for a healthy lunch or dinner. The snapper, known for its mild, slightly sweet flavor, is enhanced by the citrus glaze, which caramelizes beautifully on the grill, giving the fish a luscious, glossy finish.
This dish isn’t only visually appealing but also a treat for the taste buds, providing a revitalizing twist to your typical grilled fish recipe.
Preparing Grilled Snapper With Citrus Glaze is a straightforward process that requires a few fresh ingredients and a bit of patience for marination. The citrus glaze, made from a combination of orange and lime juices, offers a zesty contrast to the tender, flaky snapper. This recipe serves 4-6 people, making it an excellent choice for family gatherings or small dinner parties.
With simple preparation and cooking techniques, even novice cooks can master this dish and impress their guests with a gourmet-style meal right from their own kitchen.
Ingredients for 4-6 servings:
- 2 whole red snapper (about 1.5 to 2 pounds each), cleaned and scaled
- 1/4 cup fresh orange juice
- 1/4 cup fresh lime juice
- 2 tablespoons olive oil
- 2 tablespoons honey
- 2 cloves garlic, minced
- 1 teaspoon salt
- 1 teaspoon black pepper
- 1 tablespoon fresh parsley, chopped
- 1 tablespoon fresh cilantro, chopped
- 1 lime, sliced for garnish
- 1 orange, sliced for garnish
Cooking Instructions:
- Prepare the Snapper: Rinse the snapper under cold water and pat dry with paper towels. Make three diagonal cuts on each side of the fish to allow the marinade to penetrate.
- Make the Citrus Glaze: In a medium-sized bowl, whisk together the orange juice, lime juice, olive oil, honey, minced garlic, salt, and black pepper until well combined.
- Marinate the Fish: Place the snapper in a shallow dish and pour the citrus glaze over it, making sure the fish is well coated. Cover the dish with plastic wrap and allow the fish to marinate in the refrigerator for at least 30 minutes, or up to 2 hours for deeper flavor.
- Preheat the Grill: Preheat your grill to medium-high heat. Brush the grill grates with oil to prevent sticking.
- Grill the Snapper: Remove the snapper from the marinade and place it on the preheated grill. Cook for about 6-8 minutes on each side, or until the fish is cooked through and flakes easily with a fork. Baste with the remaining marinade occasionally for extra flavor.
- Serve the Dish: Carefully remove the snapper from the grill and transfer to a serving platter. Garnish with chopped parsley, cilantro, lime slices, and orange slices before serving.
Extra Tips:
When grilling whole fish, it’s important to verify the grill is well-oiled to prevent the skin from sticking. Also, avoid moving the fish too much while it cooks; this will help achieve those beautiful grill marks and prevent the fish from breaking apart.
If you’re unsure whether the fish is done, check for a temperature of 145°F at the thickest part or see if the flesh is opaque and flakes easily. If you prefer, you can substitute red snapper with other firm white fish like grouper or sea bass, which also pair well with the citrus glaze.
Experience Herb Crusted Grilled Sea Bass
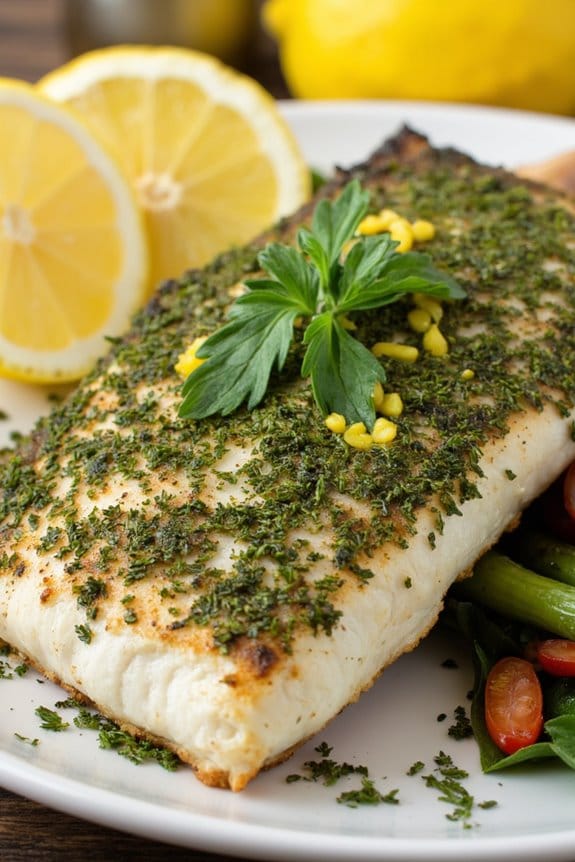
Herb Crusted Grilled Sea Bass is a delicious and nutritious option for those looking to enjoy a high-protein meal without compromising on flavor. The sea bass is a versatile fish, known for its mild flavor and firm texture, making it perfect for grilling. By adding a herb crust, this dish is elevated with a fresh, aromatic profile that enhances the natural taste of the fish.
The combination of herbs, lemon, and garlic creates a symphony of flavors that complements the delicate nature of the sea bass, providing a satisfying and healthy dining experience. Grilling the sea bass not only imparts a smoky flavor but also guarantees that the fish remains moist and tender.
This cooking method brings out the best in the sea bass, giving it a beautifully charred exterior that contrasts wonderfully with the soft, flaky interior. This recipe is designed to serve 4-6 people, making it ideal for a family meal or a small gathering. Pair with a simple salad or grilled vegetables to create a well-rounded meal that’s both nourishing and delicious.
Ingredients (Serves 4-6):
- 4-6 sea bass fillets
- 1 cup of fresh parsley, chopped
- 1/2 cup of fresh basil, chopped
- 1/4 cup of fresh dill, chopped
- 4 cloves of garlic, minced
- Zest of 1 lemon
- Juice of 1 lemon
- 1/2 cup of breadcrumbs
- 1/4 cup of olive oil
- Salt and pepper to taste
- Lemon wedges for serving
Cooking Instructions:
- Prepare the Herb Crust: In a bowl, combine the chopped parsley, basil, dill, minced garlic, lemon zest, breadcrumbs, salt, and pepper. Mix well until all ingredients are thoroughly combined.
- Prepare the Sea Bass: Pat the sea bass fillets dry with paper towels to remove excess moisture. Season each fillet with salt and pepper on both sides.
- Apply the Herb Crust: Drizzle olive oil over the fillets, then press the herb mixture onto the top side of each fillet, providing a generous and even coating.
- Preheat the Grill: Preheat your grill to medium-high heat, approximately 400°F (200°C). Brush the grill grates with oil to prevent sticking.
- Grill the Sea Bass: Place the fillets on the grill, herb side up. Close the lid and grill for about 4-5 minutes per side, or until the fish is opaque and flakes easily with a fork.
- Finish with Lemon Juice: Just before removing the fillets from the grill, squeeze fresh lemon juice over each piece to enhance the flavor.
- Serve: Transfer the grilled sea bass to a serving platter and garnish with lemon wedges. Serve immediately for best taste and texture.
Extra Tips:
When grilling sea bass, make sure your grill is properly preheated to avoid the fish sticking to the grates. Using a grill basket can also help in flipping the fish without breaking it.
If fresh herbs are unavailable, dried herbs can be used, but reduce the quantity by half as dried herbs have a more concentrated flavor. Finally, keep an eye on the fillets as they cook quickly, and overcooking can lead to a dry texture.
Enjoy your Herb Crusted Grilled Sea Bass with a side of grilled vegetables or a fresh salad for a complete meal.
Delight in Grilled Trout With Almond Pesto
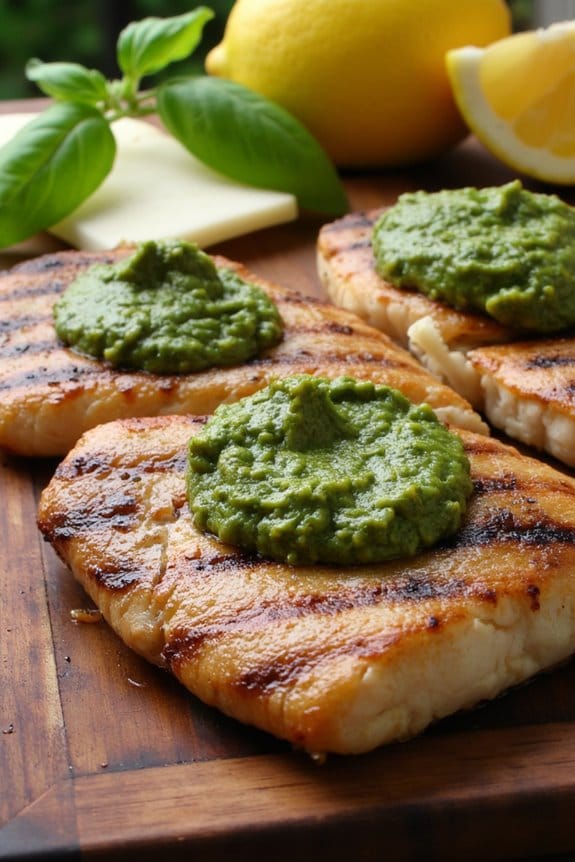
Grilled trout with almond pesto is a delightful dish that combines the rich flavors of fresh fish with the nutty and aromatic taste of homemade pesto. This recipe is perfect for a healthy and satisfying meal, offering a high protein content with the added benefits of omega-3 fatty acids found in trout. The almond pesto brings a unique twist to the traditional basil-based sauce, adding a crunchy texture and a subtle sweetness. Serve this dish with a side of roasted vegetables or a fresh green salad to complete your meal.
This recipe is designed to serve 4-6 people, making it ideal for a family dinner or a small gathering. The preparation process is relatively simple, allowing even novice cooks to create a gourmet-quality dish. The key to success lies in using fresh ingredients and grilling the trout to perfection, guaranteeing it remains moist and flavorful.
Follow the steps below to create a memorable dining experience that will leave your guests asking for seconds.
Ingredients:
- 4-6 trout fillets, cleaned and deboned
- Salt and pepper to taste
- 2 tablespoons olive oil
- 1 lemon, sliced
For the Almond Pesto
- 1 cup fresh basil leaves
- 1/2 cup toasted almonds
- 1/2 cup grated Parmesan cheese
- 2 cloves garlic, minced
- 1/2 cup olive oil
- Salt and pepper to taste
Cooking Instructions:
- Prepare the Grill: Preheat your grill to medium-high heat. Confirm the grates are clean to prevent the fish from sticking.
- Season the Trout: Pat the trout fillets dry with paper towels. Drizzle olive oil over the fillets and season both sides with salt and pepper. Place a slice of lemon on each fillet for added flavor.
- Make the Almond Pesto: Combine the basil leaves, toasted almonds, grated Parmesan cheese, and minced garlic in a food processor. Pulse until the mixture is well combined. With the processor running, slowly add the olive oil until the pesto reaches your desired consistency. Season with salt and pepper to taste.
- Grill the Trout: Place the seasoned trout fillets, skin-side down, on the preheated grill. Cook for 4-5 minutes per side, or until the fish flakes easily with a fork and has grill marks. Be careful not to overcook the trout, as it can become dry.
- Serve the Dish: Transfer the grilled trout to a serving platter. Spoon the almond pesto generously over each fillet. Garnish with additional lemon slices if desired.
Extra Tips:
Toasting the almonds enhances their flavor, so don’t skip this step. You can toast them in a dry skillet over medium heat for 3-4 minutes or until golden brown.
If you’re short on time, this pesto can be prepared in advance and stored in the refrigerator for up to a week. When grilling, use a fish spatula for easier handling of the delicate trout fillets.
For a little extra zing, try adding a pinch of red pepper flakes to the pesto for a spicy kick.
Try Smoky Grilled Sardines With Lemon
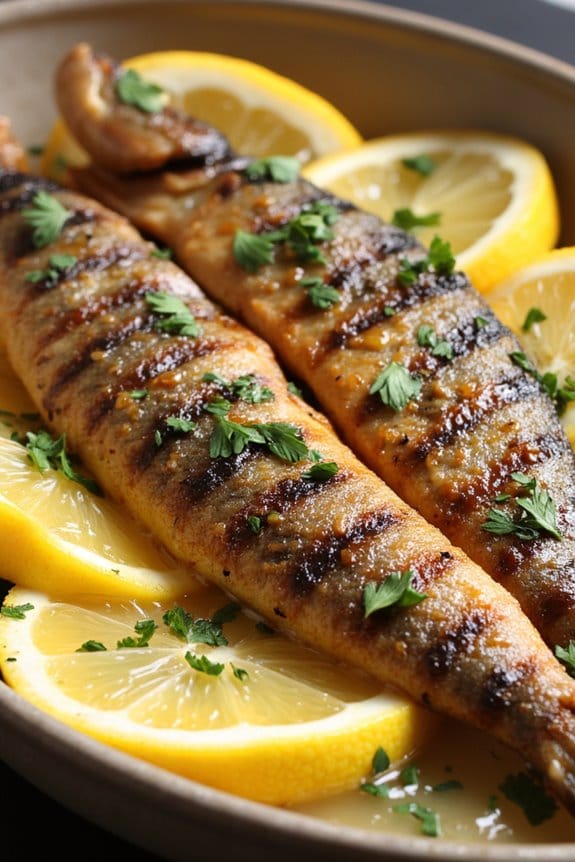
Grilled sardines are a delightful way to enjoy a high-protein meal that’s both flavorful and easy to prepare. These small, oily fish are packed with nutrients and have a rich, bold taste that pairs wonderfully with the smoky flavor imparted by grilling. Sardines are also an excellent source of omega-3 fatty acids, essential vitamins, and minerals that contribute to a healthy diet. When paired with fresh lemon and aromatic herbs, this dish becomes a revitalizing and satisfying option for any meal.
The key to achieving perfectly grilled sardines is to verify that they’re fresh and well-seasoned before cooking. The smoky aroma from the grill enhances the natural flavors of the fish while the lemon adds a zesty brightness. This recipe is perfect for a casual outdoor gathering or a simple family dinner, and it can be easily scaled up or down depending on the number of guests. Whether you’re an experienced grill master or a novice cook, this recipe for “Smoky Grilled Sardines With Lemon” is sure to impress.
Ingredients (Serves 4-6):
- 12 fresh sardines, cleaned and gutted
- 2 lemons, sliced
- 1/4 cup olive oil
- 2 teaspoons sea salt
- 1 teaspoon black pepper
- 2 cloves garlic, minced
- 1 tablespoon fresh parsley, chopped
- 1 teaspoon smoked paprika
- Lemon wedges, for serving
Cooking Instructions:
- Prepare the Sardines: Rinse the cleaned sardines under cold water and pat them dry with a paper towel. This helps in removing any scales and verifies the sardines are dry, which is important for a good sear on the grill.
- Make the Marinade: In a small bowl, combine olive oil, sea salt, black pepper, minced garlic, smoked paprika, and chopped parsley. Mix well to create a fragrant marinade.
- Marinate the Sardines: Place the sardines in a shallow dish and pour the marinade over them, verifying that each fish is well-coated. Layer lemon slices over the sardines. Cover the dish with plastic wrap and refrigerate for at least 30 minutes to let the flavors meld.
- Preheat the Grill: Preheat your grill to medium-high heat. If using charcoal, make sure the coals are white-hot before placing the sardines on the grill.
- Grill the Sardines: Lightly oil the grill grates to prevent sticking. Place the marinated sardines on the grill, verifying they’re evenly spaced. Grill for about 3-4 minutes on each side, or until the skin is crispy and the fish is cooked through.
- Serve: Remove the sardines from the grill and place them on a serving platter. Garnish with fresh lemon wedges for an extra burst of citrus flavor.
Extra Tips:
When grilling sardines, make sure to keep a close eye on them as they cook quickly and can easily burn due to their high oil content. If your grill grates are widely spaced, consider using a fish basket to hold the sardines together and make flipping easier.
Additionally, if you prefer less smoky flavor, you can grill the sardines on a cedar plank for a milder taste. Serve immediately to enjoy the sardines at their best, with a side of crusty bread or a fresh salad for a complete meal.
Feast on Grilled Cod With Tomato Basil Relish
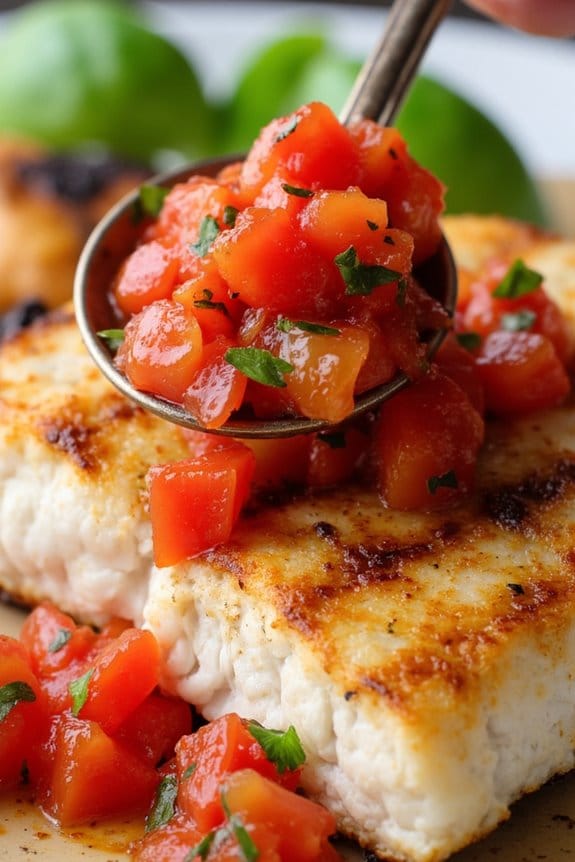
Indulge in a delightful high-protein meal with Grilled Cod With Tomato Basil Relish. This dish is perfect for a healthy yet flavorful dinner that will satisfy any seafood lover. The succulent, flaky cod is perfectly complemented by the fresh and vibrant tomato basil relish, offering a harmonious blend of textures and tastes. The relish, made from ripe tomatoes, fragrant basil, and a hint of lemon, adds a fresh twist to the smoky, tender fish.
Not only is this meal delicious, but it’s also nutritious and quick to prepare, making it ideal for a weeknight dinner. The simplicity of grilling the cod guarantees that the fish’s natural flavors are highlighted, while the relish brings a burst of freshness that elevates the dish to a new level. Whether you’re cooking for your family or entertaining guests, this grilled cod recipe is sure to impress and nourish everyone at the table.
Ingredients (Serves 4-6 people):
- 4-6 cod fillets (about 6 ounces each)
- 2 tablespoons olive oil
- Salt and pepper to taste
- 1 lemon, juiced
- 4 ripe tomatoes, diced
- 1/4 cup fresh basil, finely chopped
- 2 cloves garlic, minced
- 1 tablespoon red wine vinegar
- 1 tablespoon olive oil (for the relish)
Cooking Instructions:
- Prepare the Cod: Rinse the cod fillets under cold water and pat them dry with paper towels. Brush each fillet with olive oil, and season both sides generously with salt and pepper. Squeeze half of the lemon juice over the fillets and let them marinate for about 10 minutes while you prepare the relish.
- Make the Tomato Basil Relish: In a medium bowl, combine the diced tomatoes, chopped basil, minced garlic, red wine vinegar, and the remaining olive oil. Add the juice from the other half of the lemon, and mix well. Season the relish with salt and pepper to taste. Set aside to allow the flavors to meld together.
- Preheat the Grill: Heat your grill to medium-high heat. Brush the grill grates with a little oil to prevent the fish from sticking.
- Grill the Cod: Place the cod fillets on the preheated grill. Cook for about 4-5 minutes on each side, depending on the thickness of the fillets. The fish should be opaque and flake easily with a fork when done. Avoid overcooking to maintain the fish’s moisture and tenderness.
- Serve the Dish: Transfer the grilled cod to a serving platter. Spoon the tomato basil relish generously over the top of each fillet. Serve immediately with lemon wedges on the side for extra zing.
Extra Tips:
For peak flavor, choose the freshest cod available. If fresh basil is unavailable, substitute with fresh parsley or cilantro for a different flavor profile.
Be sure to preheat the grill properly to achieve those beautiful grill marks and prevent the fish from sticking. If you prefer a spicier kick, add a pinch of red pepper flakes to the tomato basil relish.
This dish pairs beautifully with a side of grilled vegetables or a light arugula salad.